Auth Connect
Auth Connect App manages user authentication through Captive Portal from the OOS Controller.
The Auth Connect App manages user authentication through a Captive Portal from the OOS Controller.
When clients at edge OOS devices attempt to connect, they are redirected to a Captive Portal page where they must enter their Auth Connect credentials (username and password).
Upon successful authentication, users are granted network access and redirected to a designated homepage.
This feature provides a secure and centralized method of connection management, ensuring only authorized users can access the network. It eliminates the need for pre-shared passwords and is particularly useful in scenarios requiring controlled access and user verification.
How to Use Auth Connect
Configuring Auth Connect requires setting up edge-side OOS Wi-Fi and adding an AAA server.
The steps are as follows:
Configure Portal Mode on Edge OOS
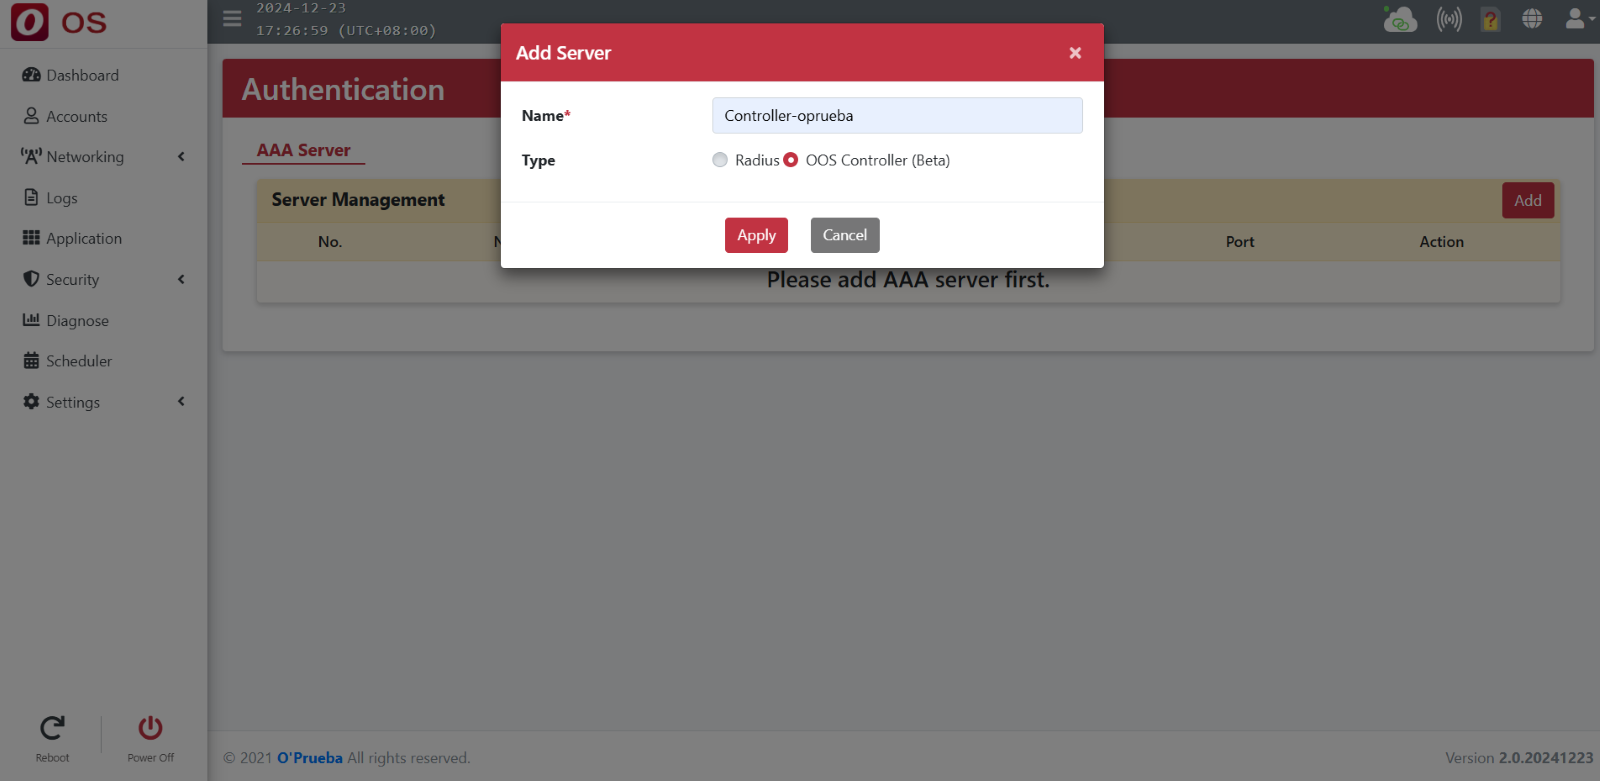
- Step 1: Go to edge OOS Security > Authentication > AAA Server page.
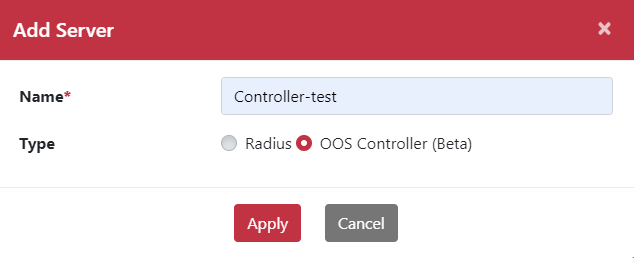
- Step 2: Click the Add button to pop up the Add server page.
- Step 3: Type the Name and select server type as
OOS Controller.
- Step 4: Go to edge OOS Networking > Wi-Fi page.
- Step 5: Click the Setting button to pop up the Setting dialog box.
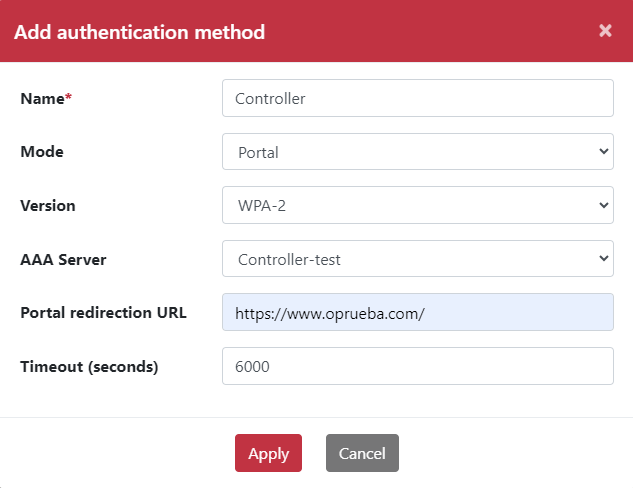
- Step 6: Select the Authentication tab and click the Add button.
- Step 7: Type the name.
- Step 8: Select Portal mode and WPA-2 version.
- Step 9: Select the AAA server configured for the Controller.
- Step 10: Type the Portal redirection URL.
- Step 11: Set the timeout duration.
Note: After the timeout, the Internet connection is disabled and requires re-authentication to regain access.
- Step 12: Click the Apply button.
Configure Auth Connect Accounts on OOS Controller
- Step 13: Log in to the OOS Controller.
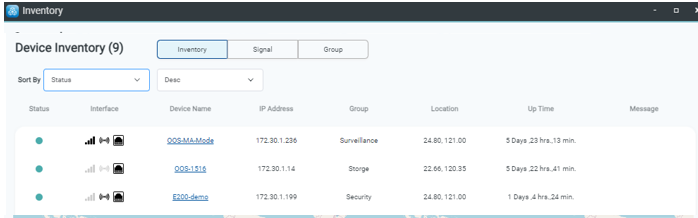
- Step 14: Ensure the target OOS device is provisioned and appears in the Inventory list.
- Step 15: Click the OOS Controller Auth Connect APP.
- Step 16: Click the Add button.
- Step 17: Type Account Name and Password.
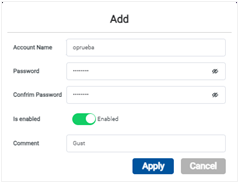
- Step 18: Click the Apply button.
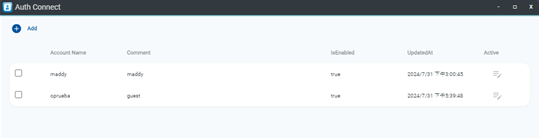
- Step 19: Go to the SSID settings page.
- Step 20: Select authentication type as
portal-Controller.
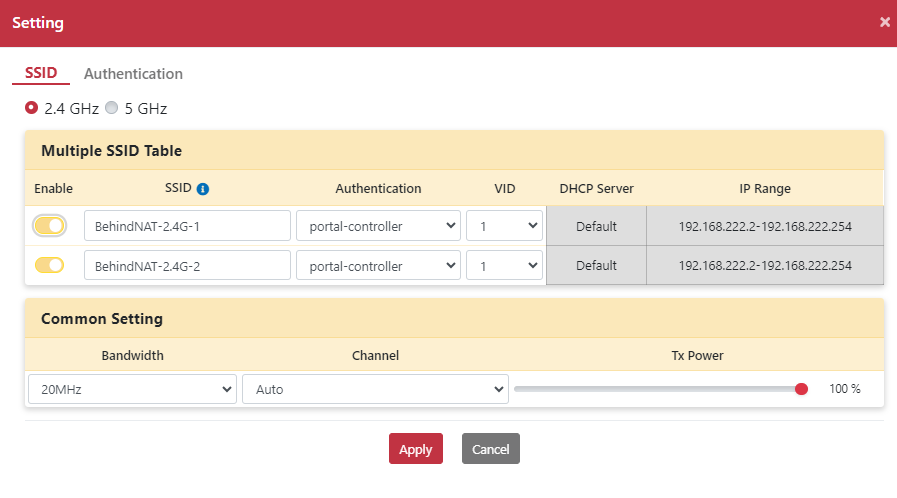
- Step 21: Click the Apply button.
- Step 22: When clients connect to the
BehindNAT-2.4G-2SSID, the OOS Wi-Fi Captive Portal page appears.
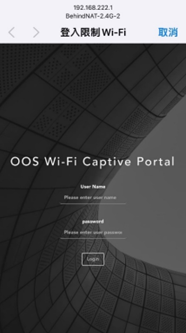
- Step 23: Type the account name and password created in Auth Connect.
- Step 24: Upon successful authentication, clients are automatically redirected to the specified redirection URL.