Mission
Mission provides Profile Wizard to guide users in deploying configurations and policies at scale across OOS devices.
Mission provides the "Profile Wizard" to guide users through deploying configuration profiles at scale across OOS devices provisioned to the OOS Controller and present in the Inventory.
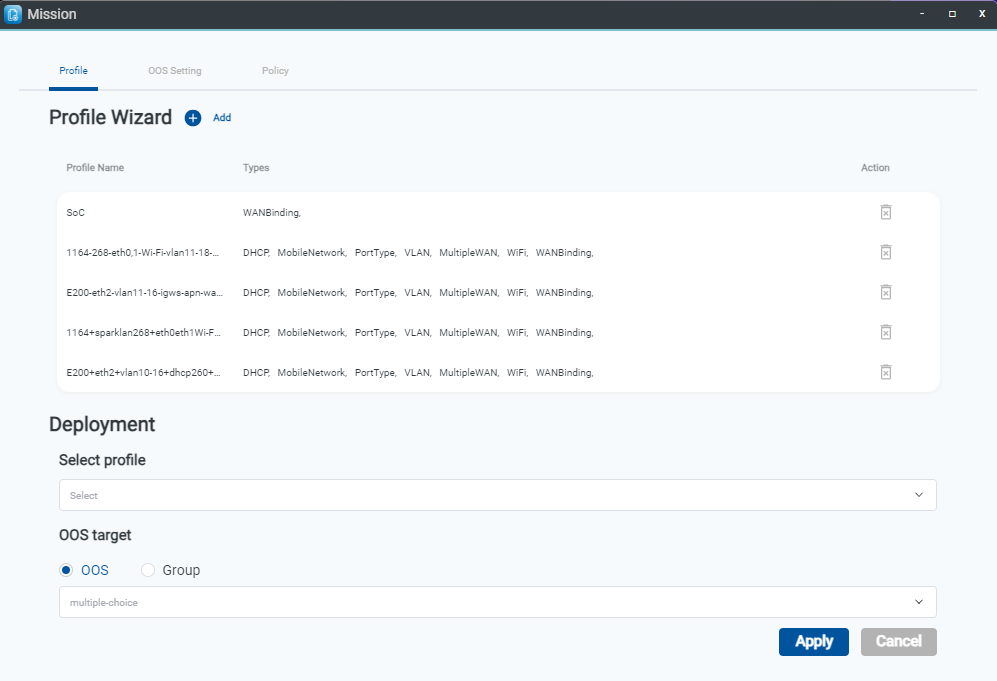
The "Profile Wizard" consolidates key configuration settings into a single wizard, encompassing Port Type, VLAN, DHCP Server, APN, Wi-Fi, Multiple WAN, and WAN Binding.
Setup Profile Wizard
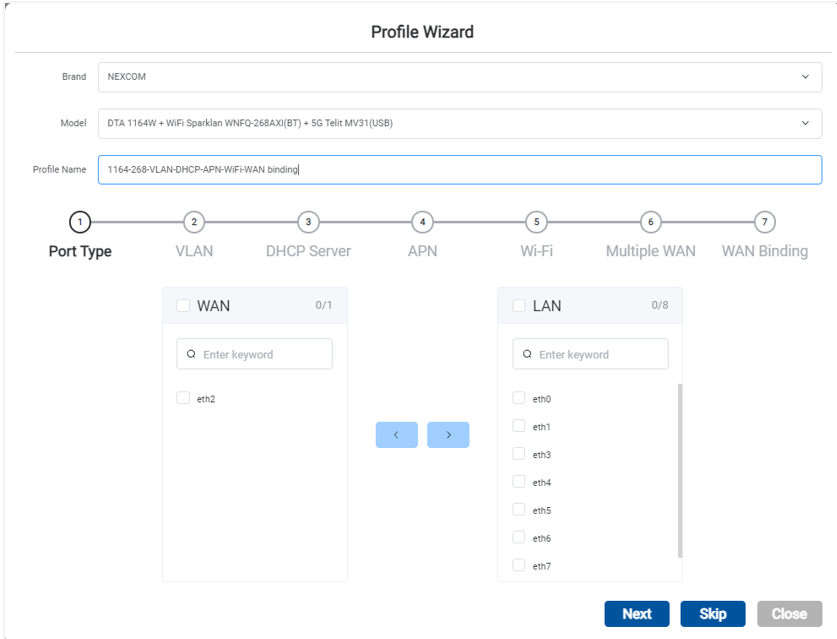
In the Profile Wizard settings, clicking NEXT confirms configuration changes, while selecting Skip leaves original settings unchanged.
- Step 1: Go to the Mission > Profile page.
- Step 2: Click the Add button on the Profile Wizard.
- Step 3: Select the Brand.
- Step 4: Select the Model.
- Step 5: Type the Profile Name.
- Step 6: Modify Port Type settings and click the Next button.
- Step 7: Type VLAN ID
20and click the Add button. - Step 8: Select the Interface and click the Edit button.
- Step 9: Select VLAN ID
20and click the Apply button.
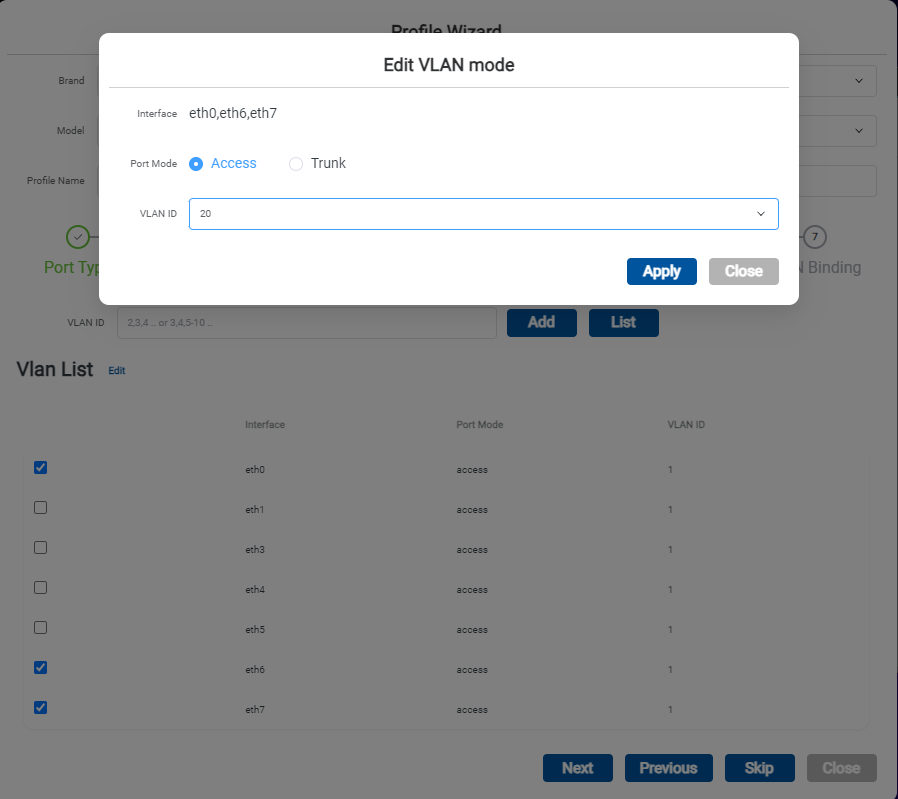
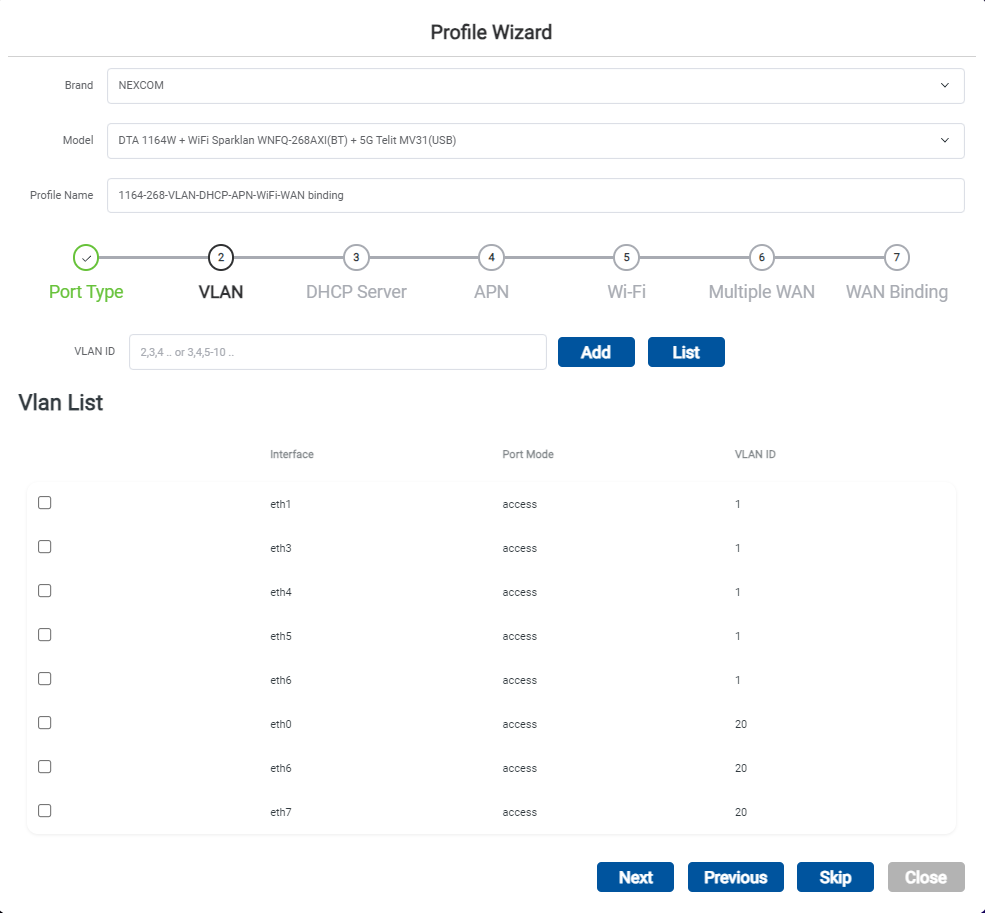
- Step 10: Click the Next button.
- Step 11: Click Add to add a DHCP server.
- Step 12: Enter DHCP server settings and click the Apply button.
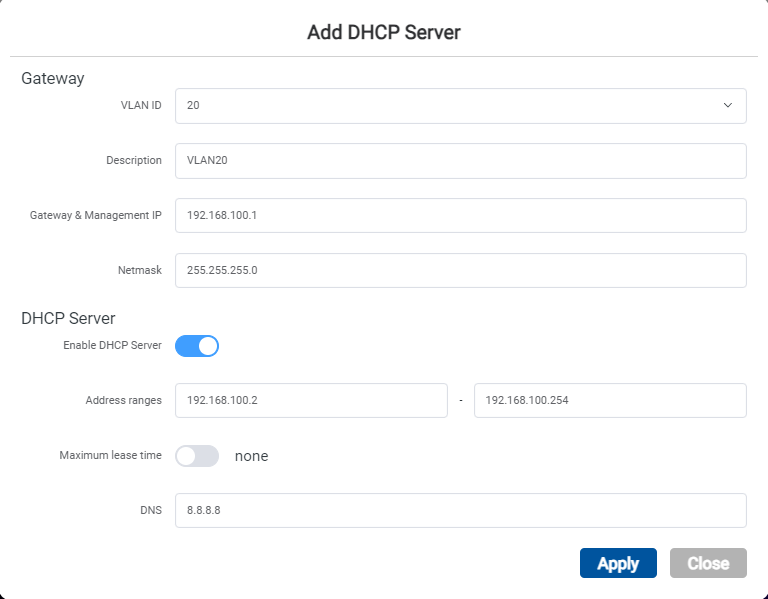
- Step 13: Click the Next button.
- Step 14: Enter the Profile field name and click the Add APN icon.
- Step 15: Type the APN name and click the Next button.
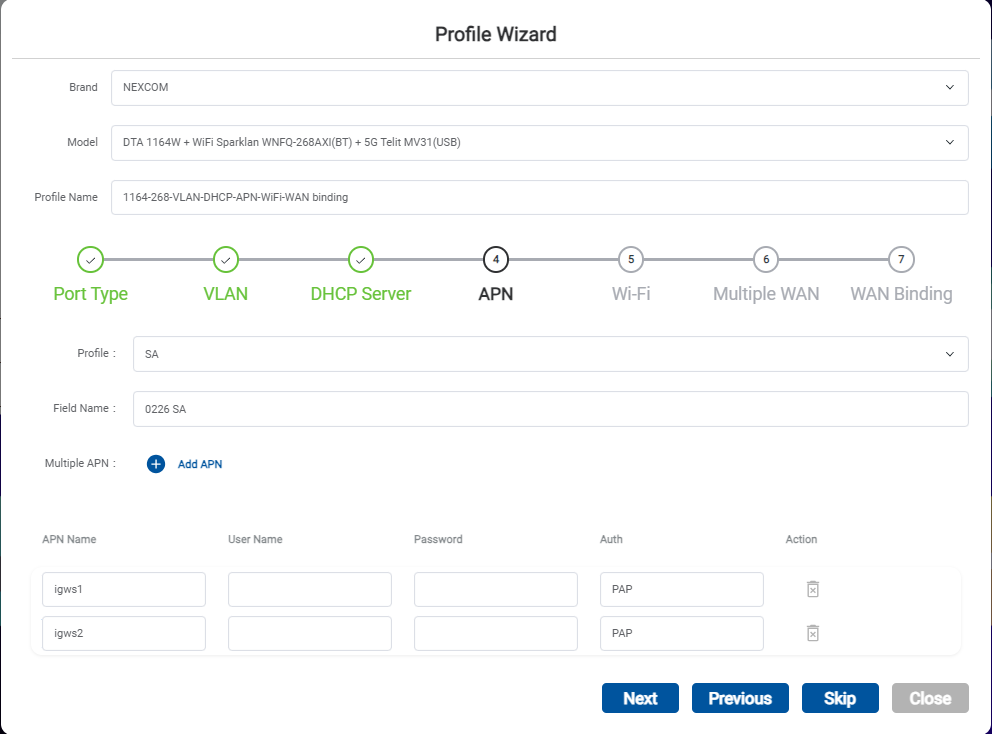
- Step 16: Modify Wi-Fi settings and click the Next button.
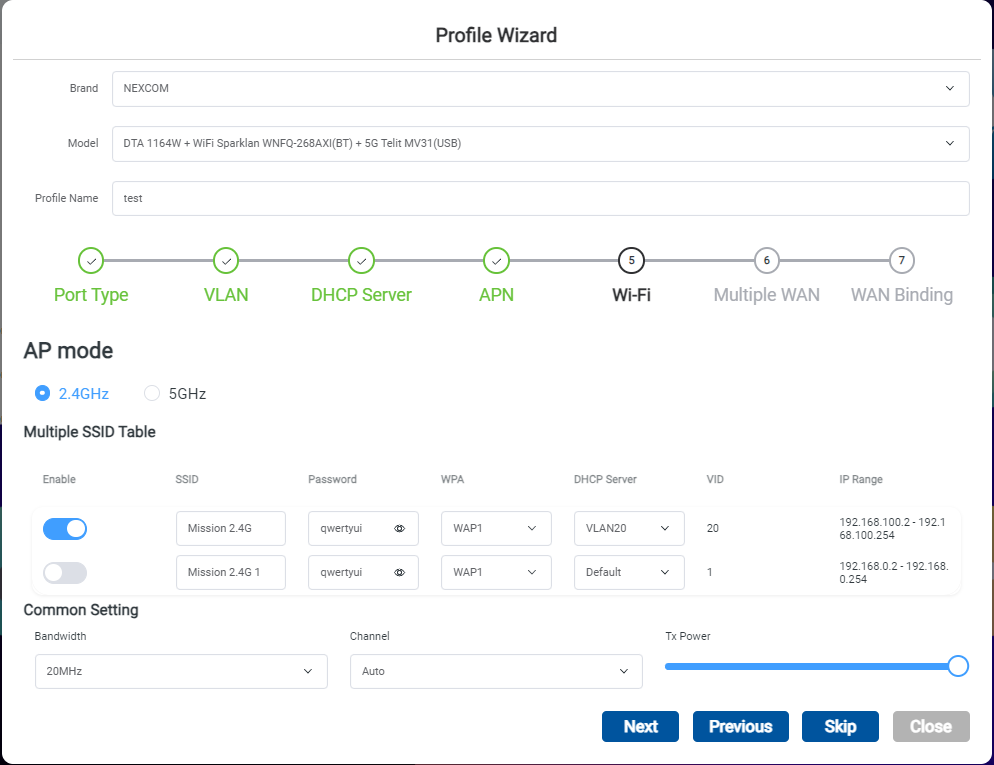
- Step 17: Click the Skip button.
- Step 18: Bind
eth2in WAN Binding and click the Apply button.
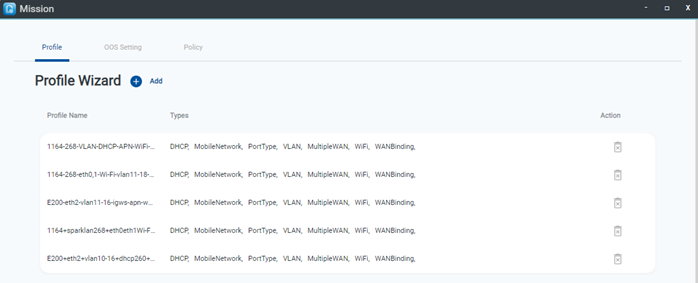
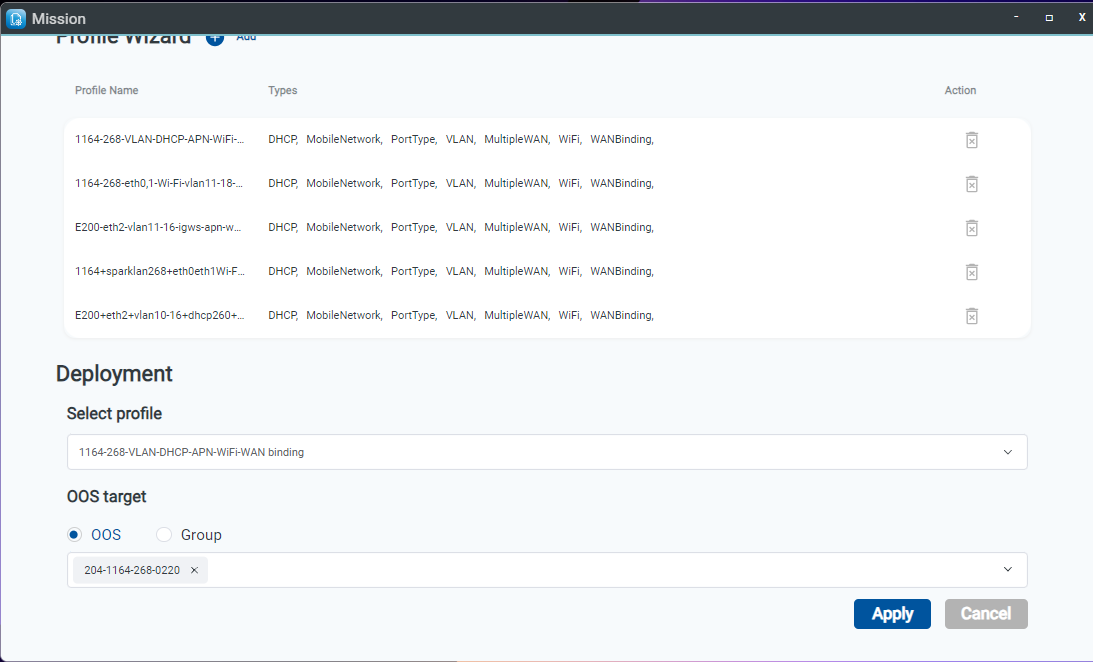
- Step 19: Select the configured Profile in the Deployment field.
- Step 20: Select the target OOS devices and click the Apply button.
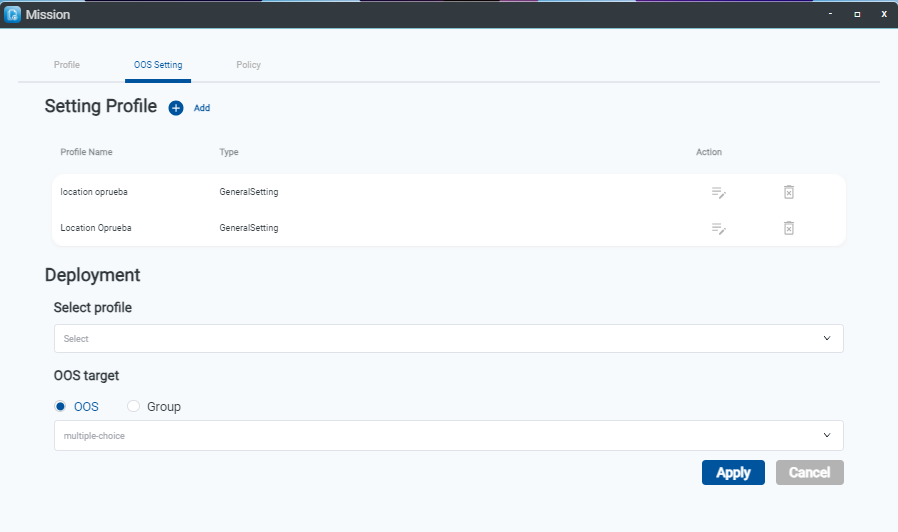
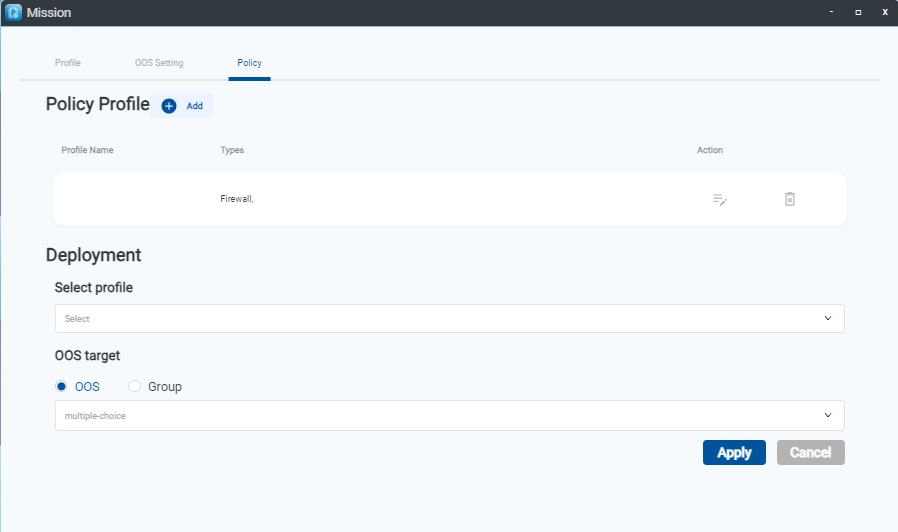
Users can simultaneously modify "OOS Setting" parameters across multiple devices, covering "General settings", "Mobile Network", and "Account" (to change initial passwords assigned during provisioning). Users can also use "Policy" to add Firewall or Blacklist rules for OOS devices.