oosVersion 2.1
Portal Mode with RADIUS
Portal mode with Radius
Captive Portal Mode with RADIUS Server
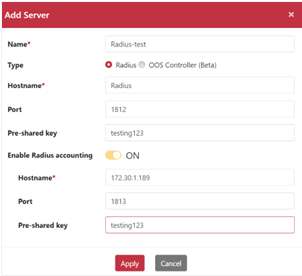
- Navigate to Security > Authentication > AAA Server.
- Click Add to open the Add Server dialog.
- Enter a Name, select Radius as the type, and configure RADIUS server parameters (Hostname, Port, and Pre-Shared Key). Click Apply.
!NOTE You must set up and configure your own RADIUS server beforehand and enter matching server details.
- Navigate to Networking > Wi-Fi.
- Click Setting to open the Setting dialog box.
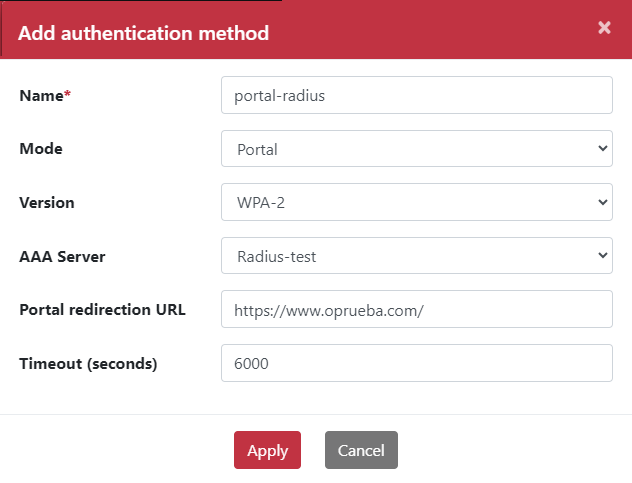
- Go to the Authentication tab and click Add.
- Enter a Name.
- Select Portal mode and WPA-2 version.
- Select the RADIUS AAA server created earlier.
- Enter the Portal Redirection URL.
- Enter the Timeout value.
!NOTE Upon timeout, internet connection will be suspended until the user re-authenticates.
- Click Apply.
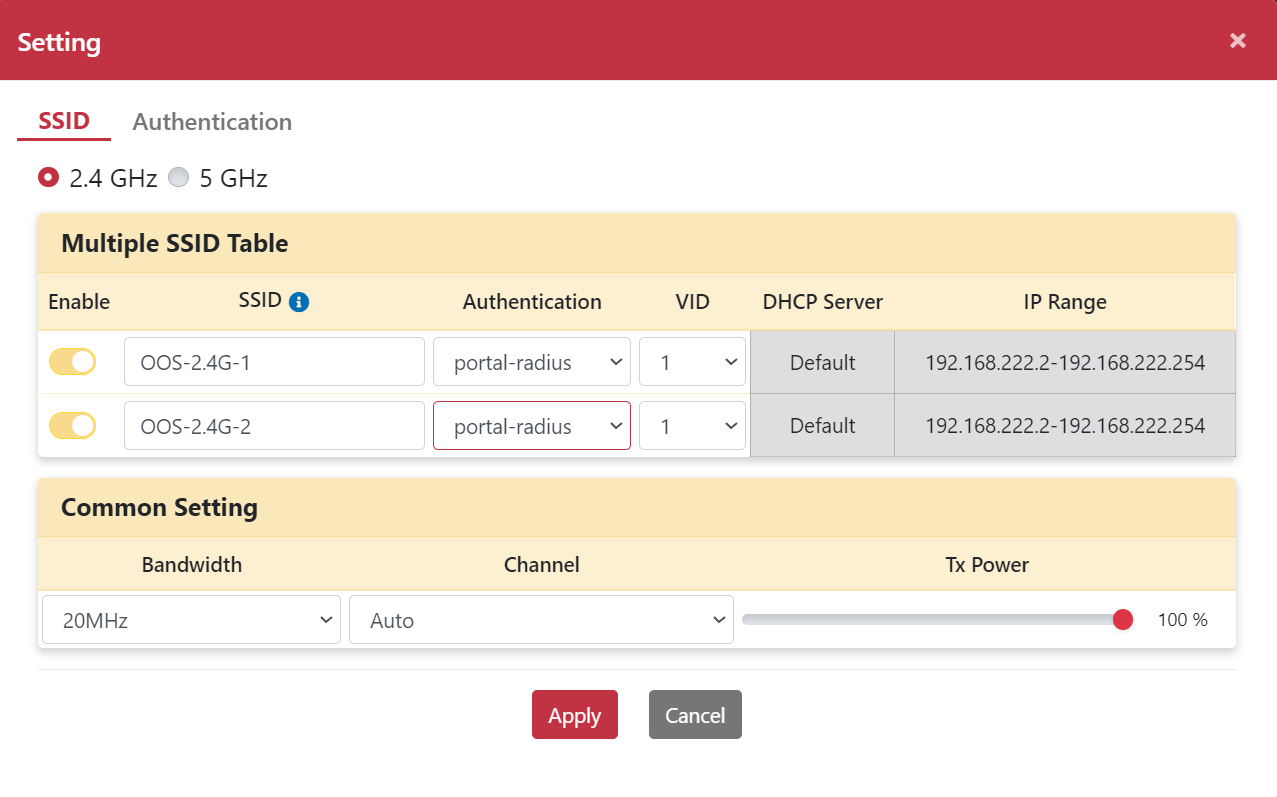
- Switch to the SSID tab.
- Select the portal-radius authentication profile for the target SSID.
- Click Apply.
- When clients connect to the
OOS-2.4G-1SSID, the OOS Wi-Fi Captive Portal login page will automatically appear.
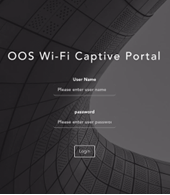
- Enter the username and password.
- Upon successful authentication, the system will automatically redirect to the configured URL.

Captive Portal Mode with OOS Controller
- Navigate to Security > Authentication > AAA Server.
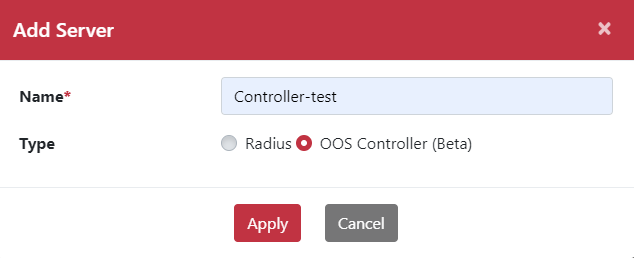
- Click Add to open the Add Server dialog.
- Enter a Name and select OOS Controller as the type.
- Navigate to Networking > Wi-Fi.
- Click Setting to open the Setting dialog box.
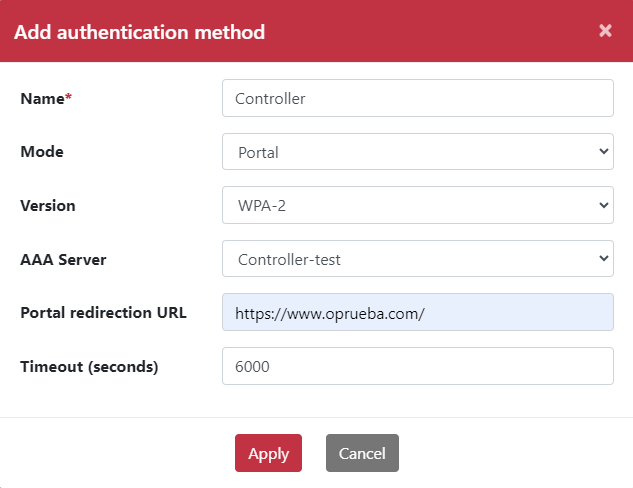
- Go to the Authentication tab and click Add.
- Enter a Name.
- Select Portal mode and WPA-2 version.
- Select the Controller AAA server.
- Enter the Portal Redirection URL.
- Enter the Timeout value.
!NOTE After timeout, internet access will be disabled until re-authentication.
- Click Apply.
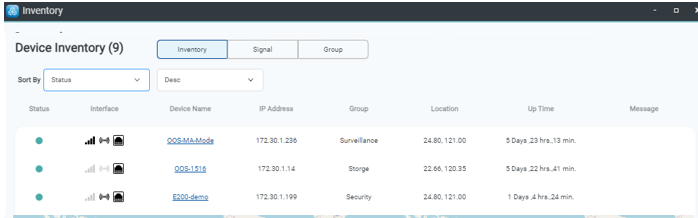
- Log in to the OOS Controller management interface.

- Verify that the OOS device is provisioned and listed in the Inventory.
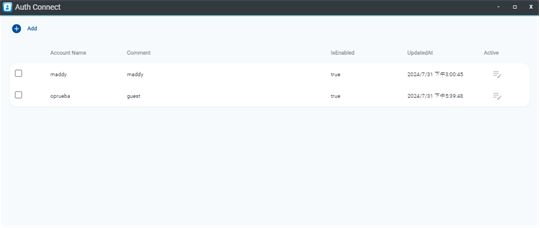
- Open the Auth Connect app.
- Click Add.
- Enter the Account Name and Password.
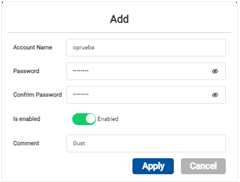
- Click Apply.
- Switch back to the SSID tab in OOS.
- Select the portal-Controller authentication profile.
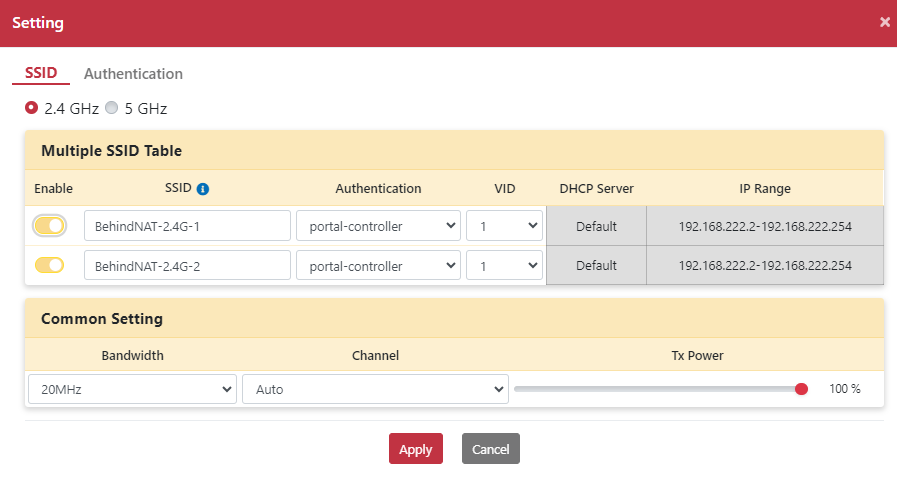
- Click Apply.
- When clients connect to the
BehindNAT-2.4G-2SSID, the OOS Wi-Fi Captive Portal login page will appear.
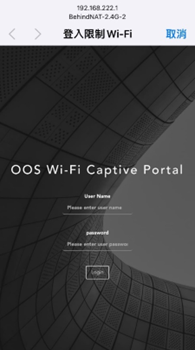
- Enter the account credentials created in Auth Connect.
- Upon successful authentication, the user will be redirected automatically to the designated URL.