Wi-Fi
Wi-Fi
Wi-Fi supports multiple SSIDs and several authentication modes: Pre-Shared Key (PSK), Enterprise, and Captive Portal.
- PSK (Pre-Shared Key) Mode: All users share the same password. Individual or centralized management is not supported. If the password is changed on the router or access point, it must be updated manually on every client device. The password is stored on the client device, allowing anyone with device access to connect to the network and view the password.
- Enterprise Mode: Provides enhanced security for business environments, enabling individual and centralized management of network access. Users must enter their unique credentials to connect. This mode supports RADIUS authentication and is ideal for setups with a RADIUS server. Clients do not handle the actual network password; instead, they use their user credentials to establish a secure connection, preventing unauthorized access to the network password.
- Captive Portal Mode: Requires users to interact with a web authentication page before gaining network access. It can be configured with a RADIUS server or OOS Controller. This mode is commonly used in public Wi-Fi environments such as cafes or hotels. Users must enter credentials or accept terms on the portal page prior to access, enabling user authentication without sharing a network password.

Wi-Fi can be enabled using the toggle switch. OOS provides reliable Wi-Fi service for mobile devices.
The Wi-Fi status page displays relevant network statistics, including transmitted traffic, received traffic, SSID, MAC Address, Bandwidth, Channel, and connected client information.
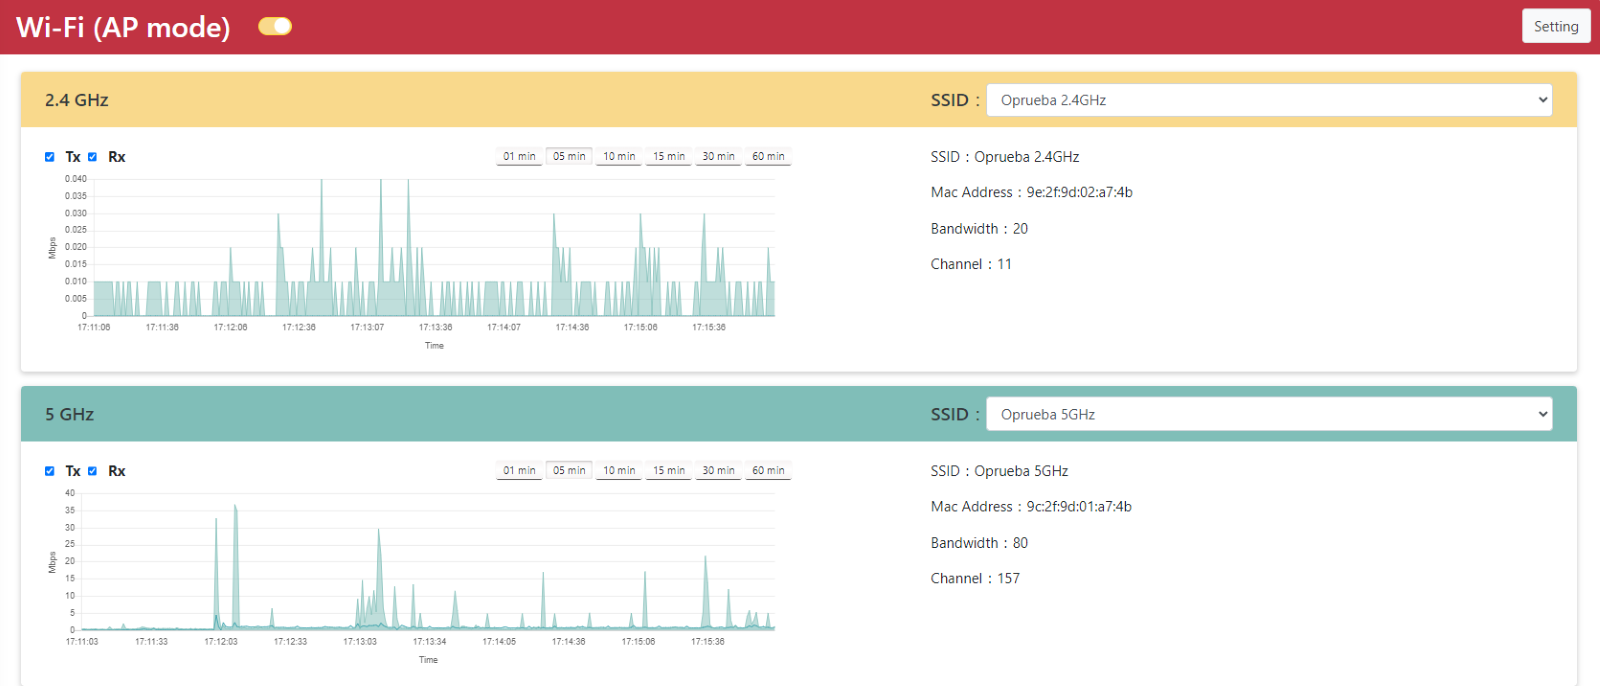
Wi-Fi client devices connect to SSIDs. Active clients are listed in the Client table.
!NOTE For certain devices, such as Apple iPhones, the device name may be displayed as "Unknown" due to privacy and security protections.
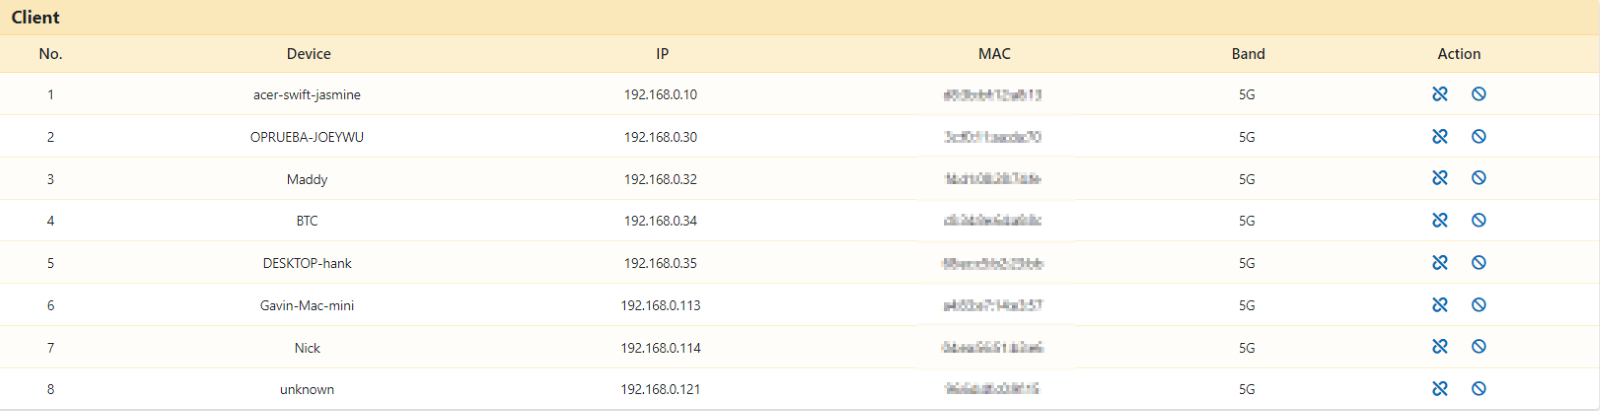
In the Action column:

Click the Unlink button to disconnect the selected device.
Click the:

Click the Block button to add the selected device to the Blacklist.
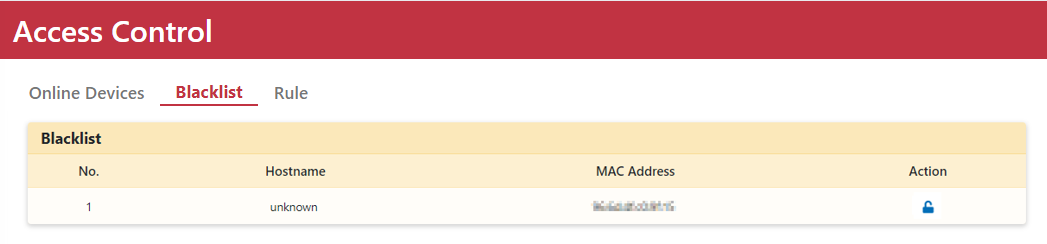
Navigate to Security > Access Control > Blacklist. Blocked devices are listed in the Blacklist table. Click the "unlock" icon to remove a device from the blacklist.

Wi-Fi can be disabled using the toggle switch.
Wi-Fi Settings Reference
| Parameter | Description |
|---|---|
| SSID | Service Set Identifier. Default 2.4 GHz SSID is OOS_2.4GHz; default 5 GHz SSID is OOS_5GHz. |
| Authentication | Supports PSK, Enterprise, and Portal modes. Configure under Wi-Fi > Settings > Authentication by adding an entry with the desired mode and password or selecting an AAA server. Default is PSK mode with password qwertyui. |
| Bandwidth | Specifies the channel bandwidth and maximum data throughput capability. |
| Channel | Select Auto to allow the system to dynamically choose the optimal channel with minimal interference. |
| Tx Power | Transmit power percentage to adjust signal range and strength. |
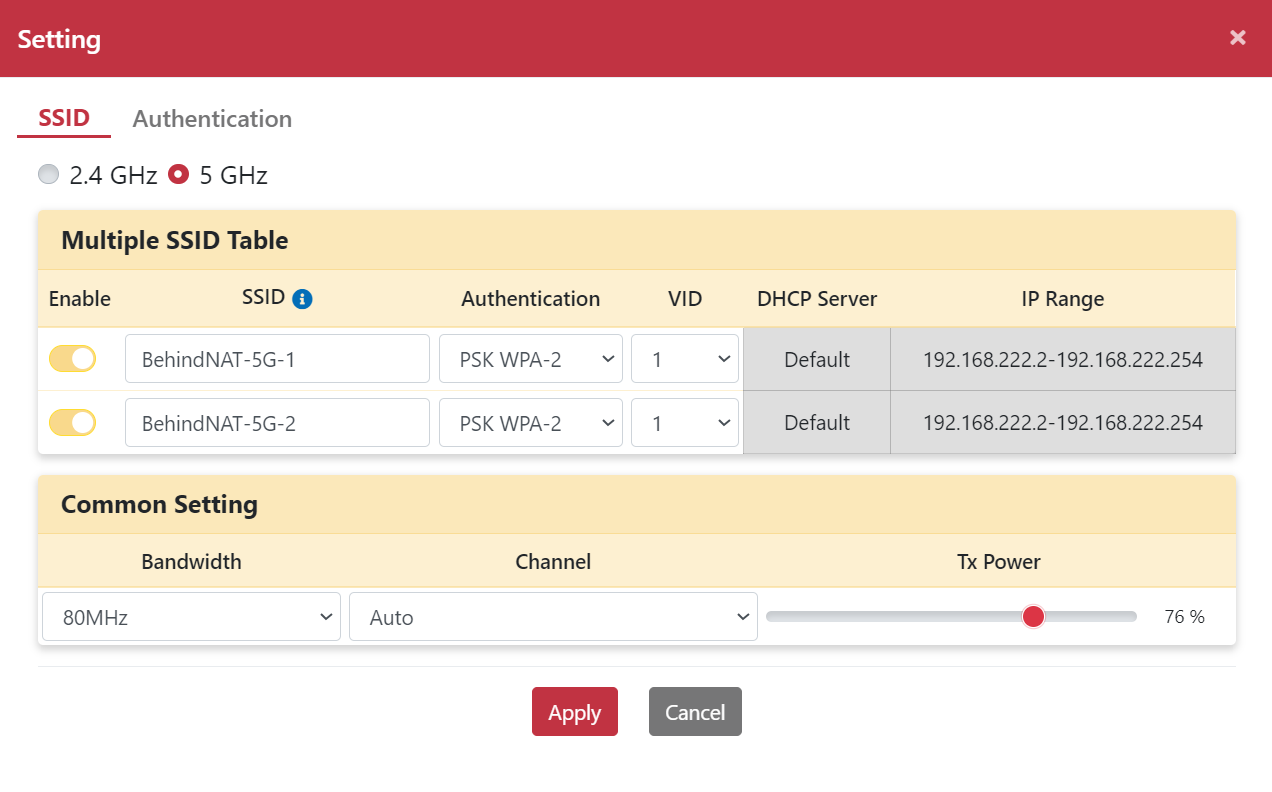
Configuring 5 GHz Multiple SSIDs
- Navigate to Networking > Wi-Fi.
- Click the Setting button to open the Setting dialog box.
- Select the 5GHz radio option.
- Go to the Authentication tab and click the Add button.
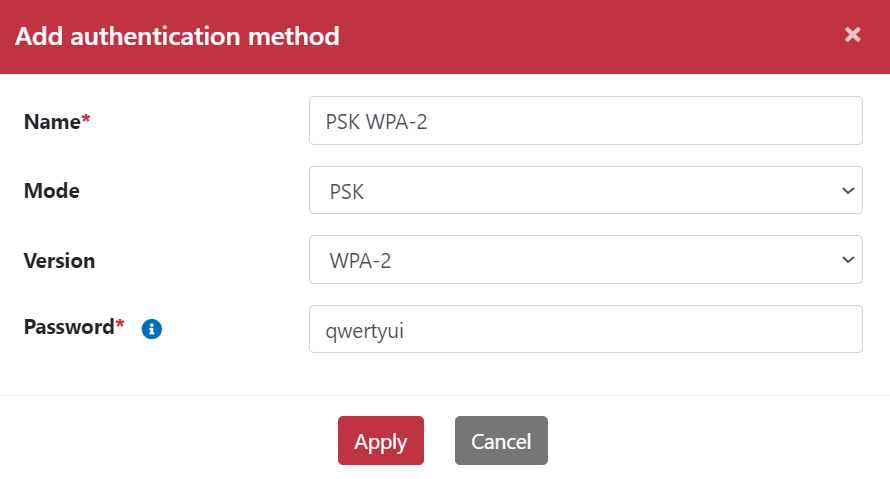
- Enter a Name, select the Mode and Version, and specify the PSK password.
- Switch to the SSID tab.
- Enter the SSID name and select the corresponding Authentication profile.
- Select the VID from the drop-down menu.
- Set Bandwidth to 80MHz.
- Set Channel to Channel 149.
- Set Tx Power to 76%.
- Click Apply.
- Mobile devices can now connect to the newly created SSID.
!NOTE Supported frequencies vary according to the hardware specifications of the Wi-Fi module.
Captive Portal Mode with RADIUS Server
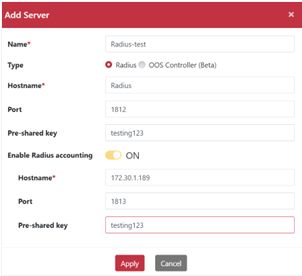
- Navigate to Security > Authentication > AAA Server.
- Click Add to open the Add Server dialog.
- Enter a Name, select Radius as the type, and configure RADIUS server settings (Hostname, Port, and Pre-Shared Key). Click Apply.
!NOTE You must configure your own RADIUS server beforehand and enter the matching parameters.
- Navigate to Networking > Wi-Fi.
- Click Setting to open the Setting dialog.
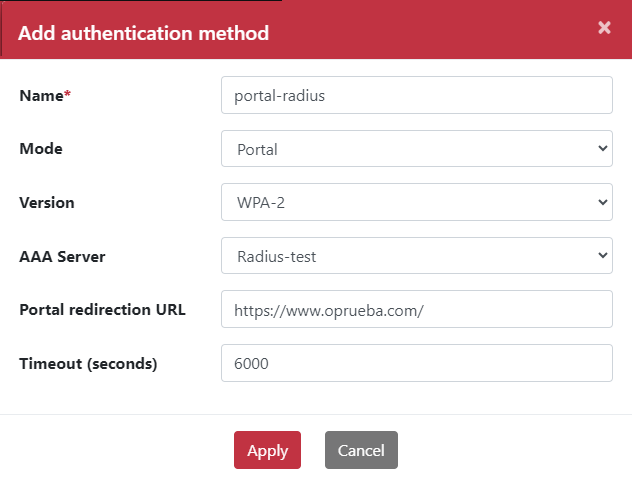
- Go to the Authentication tab and click Add.
- Enter a Name.
- Select Portal mode and WPA-2 version.
- Select the RADIUS AAA server created earlier.
- Enter the Portal Redirection URL.
- Enter the Timeout value.
!NOTE After the timeout expires, internet access will be disabled until the user re-authenticates.
- Click Apply.
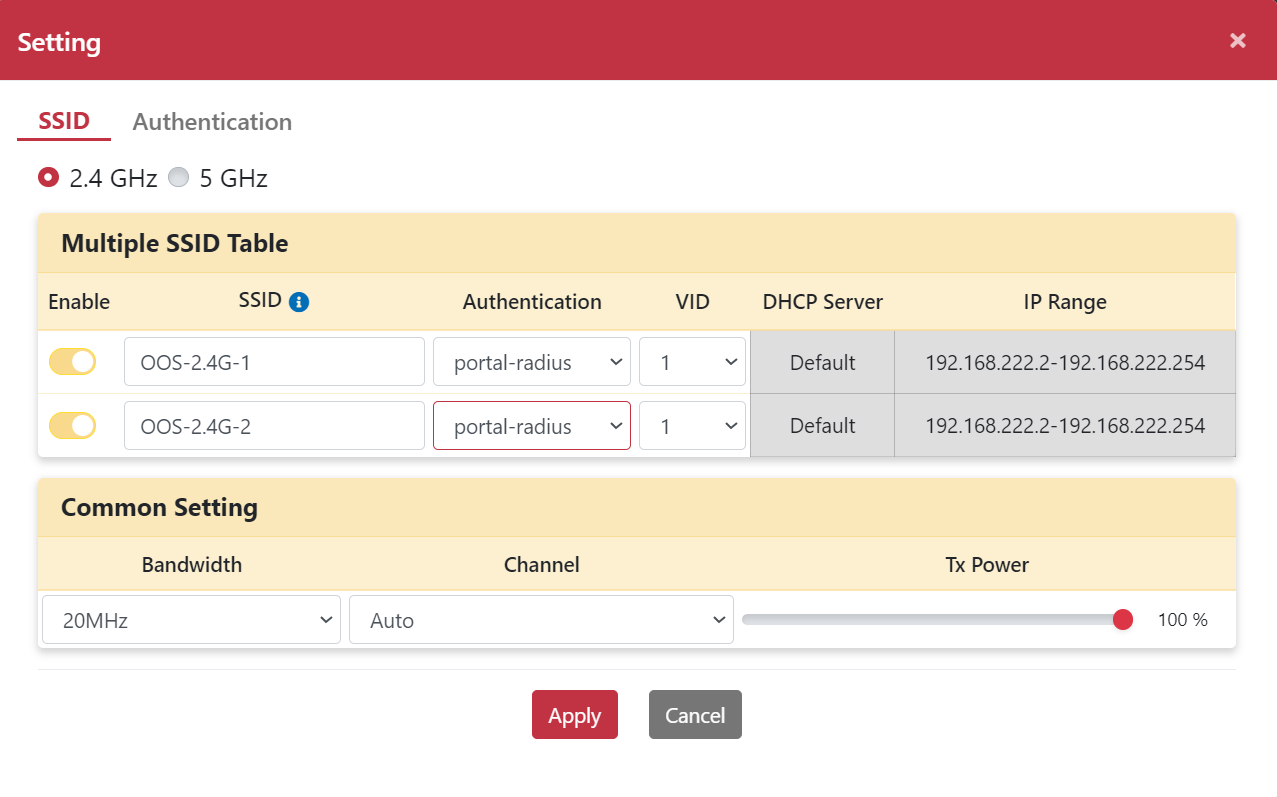
- Switch to the SSID tab.
- Select the portal-radius authentication profile for the target SSID.
- Click Apply.
- When clients connect to the
OOS-2.4G-1SSID, the OOS Wi-Fi Captive Portal login page will appear automatically.
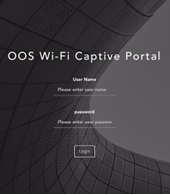
- Enter the username and password.
- Upon successful authentication, the browser will automatically redirect to the designated URL.

Captive Portal Mode with OOS Controller
- Navigate to Security > Authentication > AAA Server.
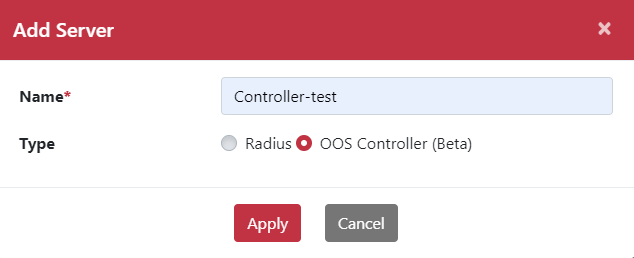
- Click Add to open the Add Server dialog.
- Enter a Name and select OOS Controller as the type.
- Navigate to Networking > Wi-Fi.
- Click Setting to open the Setting dialog.
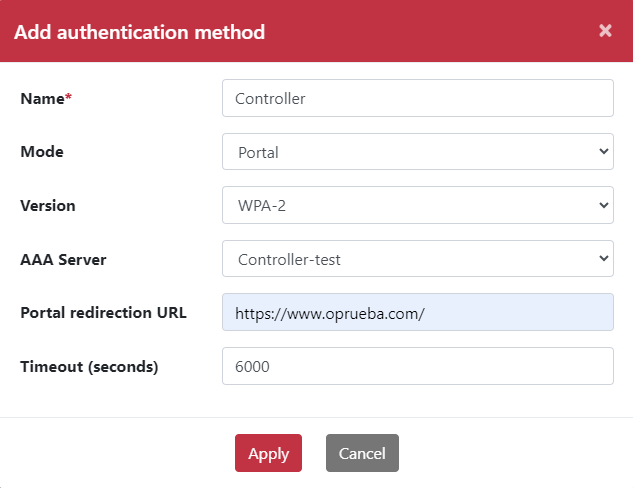
- Go to the Authentication tab and click Add.
- Enter a Name.
- Select Portal mode and WPA-2 version.
- Select the Controller AAA server.
- Enter the Portal Redirection URL.
- Enter the Timeout value.
!NOTE Upon timeout, internet access will be suspended until re-authentication.
- Click Apply.
- Log in to the OOS Controller management interface.
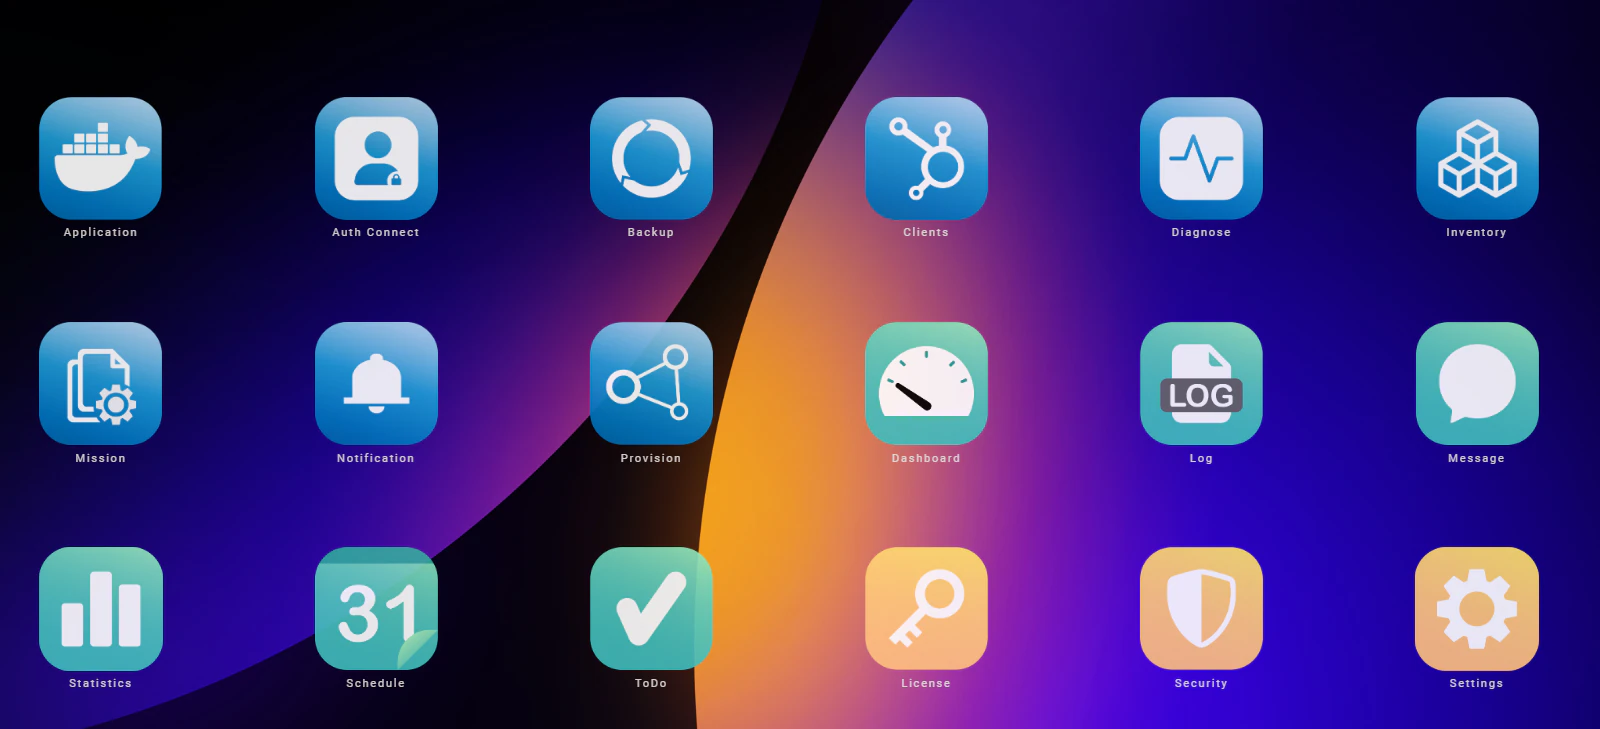
- Verify that the OOS device is provisioned and listed in the Inventory.
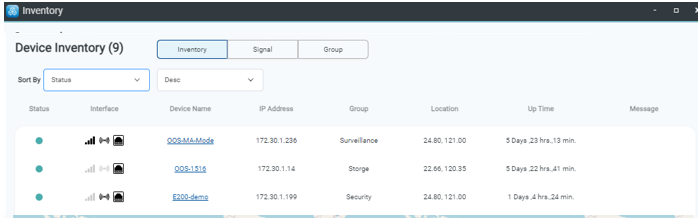
- Open the Auth Connect application.
- Click Add.
- Enter the Account Name and Password.
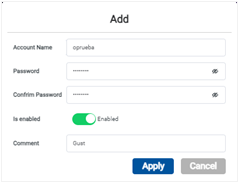
- Click Apply.
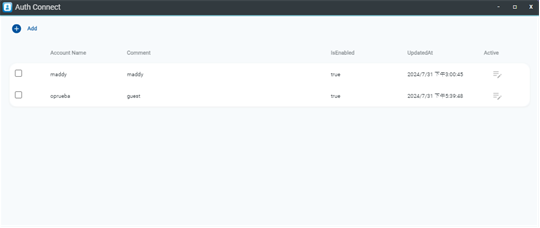
- Switch back to the SSID tab in OOS.
- Select the portal-Controller authentication profile.
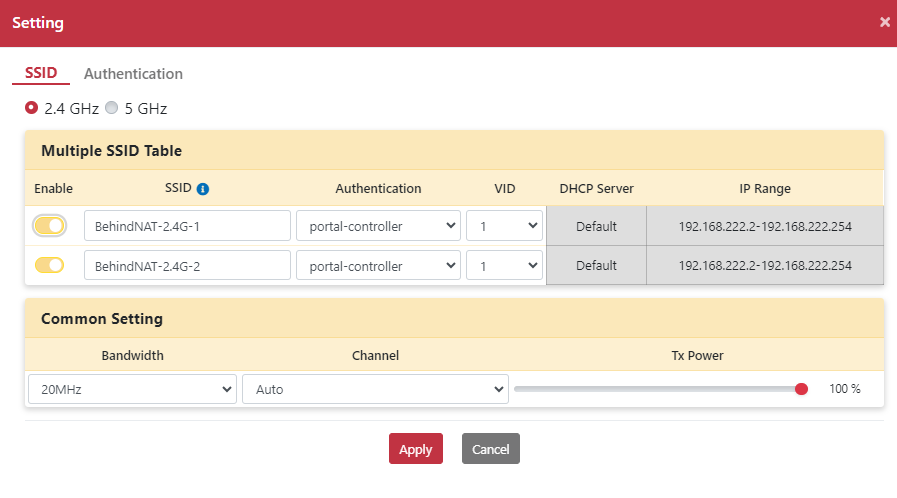
- Click Apply.
- When clients connect to the
BehindNAT-2.4G-2SSID, the OOS Wi-Fi Captive Portal login page will appear.
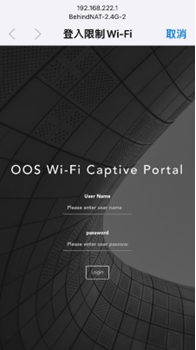
- Enter the credentials created in Auth Connect.
- Upon successful authentication, the user will be redirected automatically to the specified URL.