WAN
WAN
1. Multiple WAN
The Multiple WAN page provides real-time status for all WAN interfaces, displaying WAN Interface name, IP Address, Status, Receiving traffic, Sending traffic, and In-Used Mode (Binding, Failover, or Multiple Active).
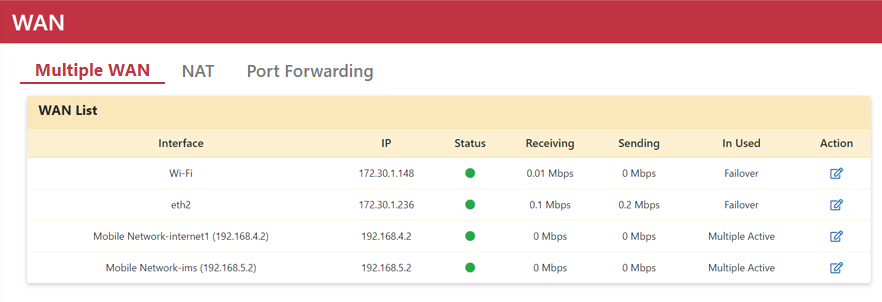
| In-Used Mode | Description |
|---|---|
| Binding | Only a single WAN interface is bound to a specific VLAN. |
| Failover | Two or more WAN interfaces are bound; only one primary WAN connection is active while others serve as redundant backups. |
| Multiple Active | Two or more WAN interfaces are bound to VLAN 1, with all WAN interfaces active simultaneously for traffic load distribution. |
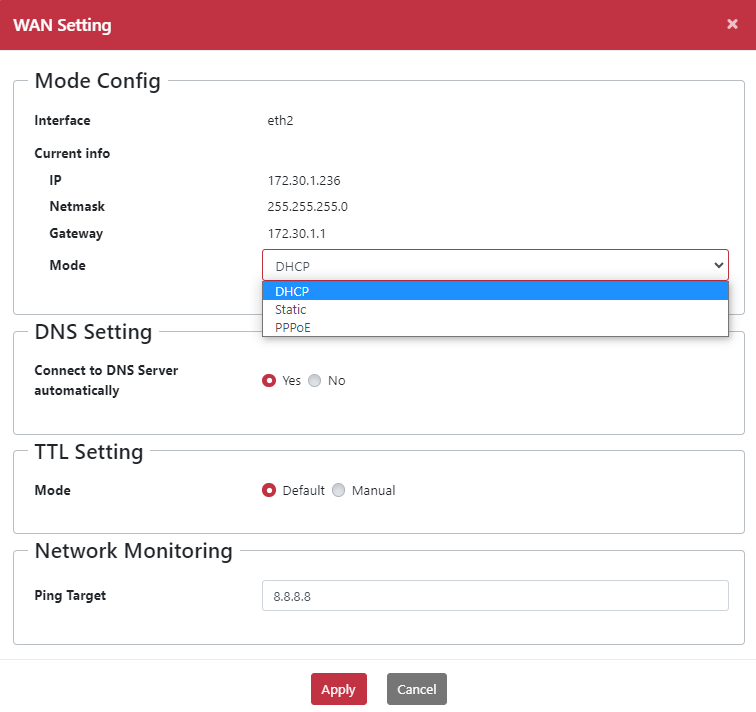
WAN interfaces support IP acquisition via DHCP, Static IP, and PPPoE.
Configuring WAN Interface and Ping Target
The Ping Target feature monitors WAN connectivity. By default, it pings 8.8.8.8. If the device operates within a private network without direct internet connectivity, set the Ping Target to the local gateway IP or a specific local device IP address.
- Navigate to Networking > Forwarding > Port Type.
- Select the interface from the LAN list.
- Click the < icon to reassign it as a WAN port.
- Click Apply.
- Once configured, the WAN interface will acquire an IP address automatically from the DHCP server.
- Navigate to Networking > WAN > Multiple WAN.
- Click the Edit icon to open the WAN setting dialog.
- Select DHCP from the Mode drop-down menu.
- Enter the designated Ping Target Address.
- Click Apply.
2. Network Address Translation (NAT)
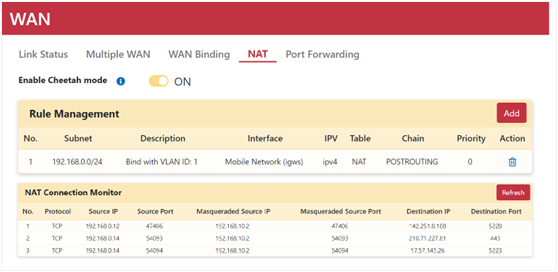
NAT (Network Address Translation) enables communication between public and private networks. When a physical port is configured as WAN, system NAT rules are created automatically to handle internet traffic routing.
If a NAT rule tied to a WAN interface is deleted, the corresponding WAN port type reverts to LAN automatically.
Configuring NAT Rules
- Navigate to Networking > WAN > NAT.
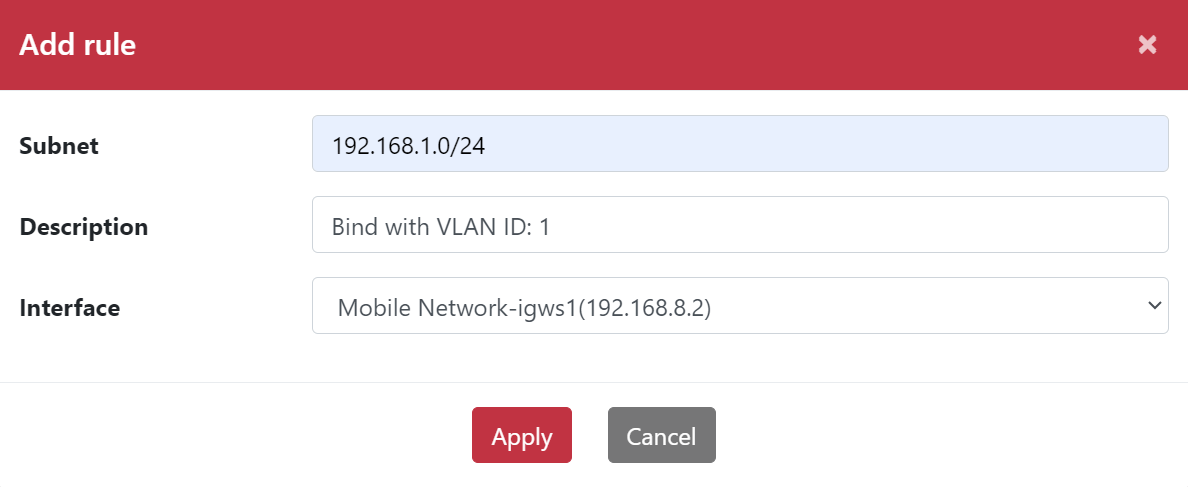
- Click the Add button.
- Enter the Source Subnet (e.g.,
192.168.0.0/24). - Enter a Description.
- Select the target Interface (e.g., Mobile Network).
- Click Apply.
Cheetah Mode
Cheetah mode is enabled by default to boost upload and download throughput. If specific network environments experience unexpected throughput degradation, disable this mode.
3. Port Forwarding
Port Forwarding redirects incoming internet traffic on specific service port ranges to a designated internal LAN IP address. This enables external access to internal computers, services, or servers behind the router.
Configuring Port Forwarding Rules
- Connect the target device or server to an OOS LAN port.
- Ensure the device obtains an IP address via OOS DHCP.
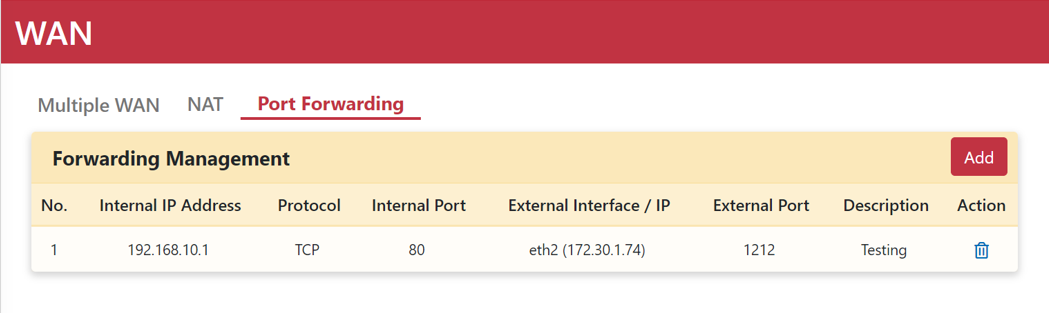
- Navigate to Networking > WAN > Port Forwarding.
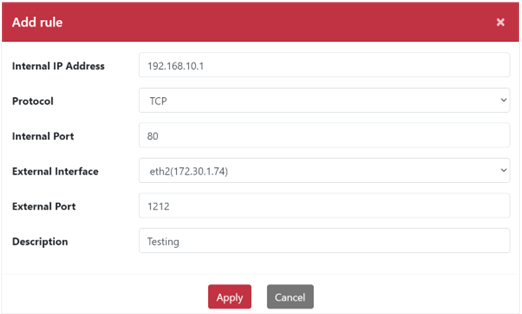
- Click Add to open the "Add rule" dialog box.
- Enter the internal IP address in the Internal IP Address field.
- Select the Protocol (e.g., TCP).
- Set the Internal Port (e.g., 80).
- Select the target WAN interface from the External Interface drop-down menu.
- Set the External Port (e.g., 1212).
- Enter a Description.
- Click Apply.
- External users can access the service by opening
https://<OOS_WAN_IP>:1212in a browser.
Port Forwarding Parameter Reference
| Parameter | Description |
|---|---|
| Internal IP Address | IP address of the target device or server located behind NAT. |
| Protocol | Network protocol: TCP, UDP, or TCP/UDP. |
| Internal Port | Service port on the internal host (Single port or Range 1-65535). |
| External Interface | External WAN interface receiving incoming access requests. |
| External Port | External port exposed to the internet (Single port or Range 1-65535). |
| Description | Rule name or brief descriptive note. |