LAN
OOS Local Area Network (LAN) configuration guide, covering VLAN creation and port modes, DHCP Server setup, and static routing rules.
Local Area Network (LAN) management includes configuring Virtual LANs (VLANs), DHCP Servers, and Static Routes.
1. Virtual LAN (VLAN)
A Virtual LAN (VLAN) is a logical overlay network that groups a subset of devices to share a physical LAN while isolating traffic between groups for enhanced security and efficiency.
Interfaces specified on the Port Type page will be displayed on the VLAN interface page.
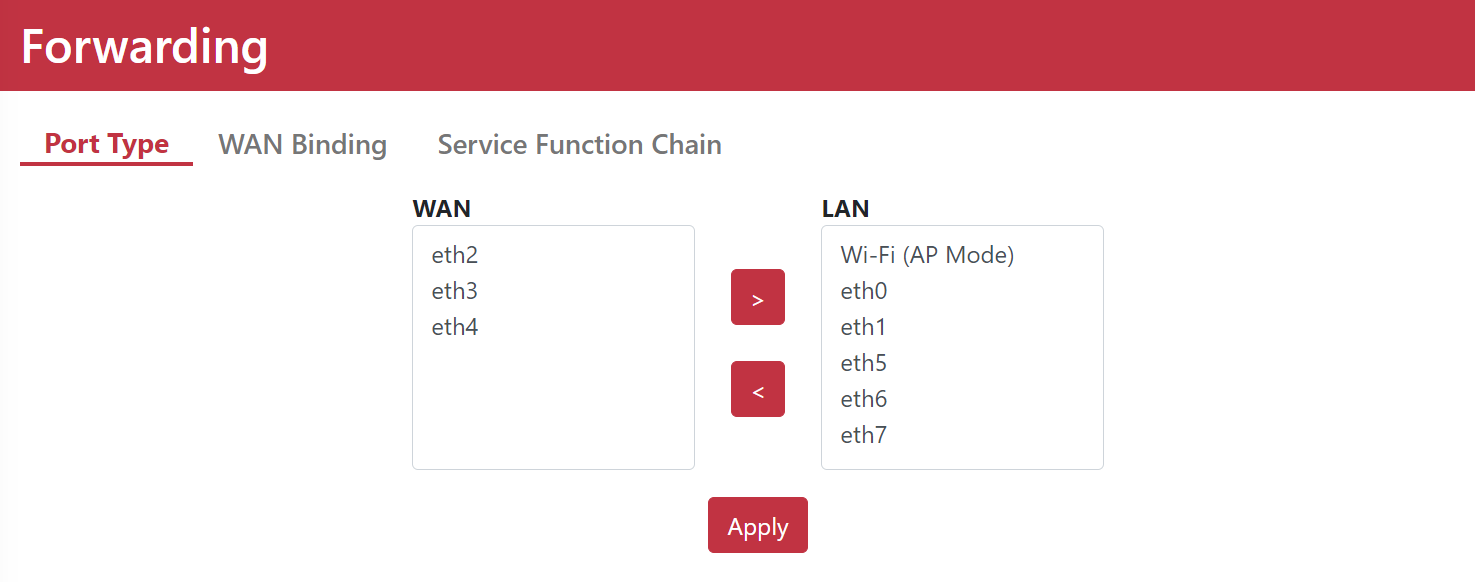
By default, all interfaces belong to VLAN ID 1.
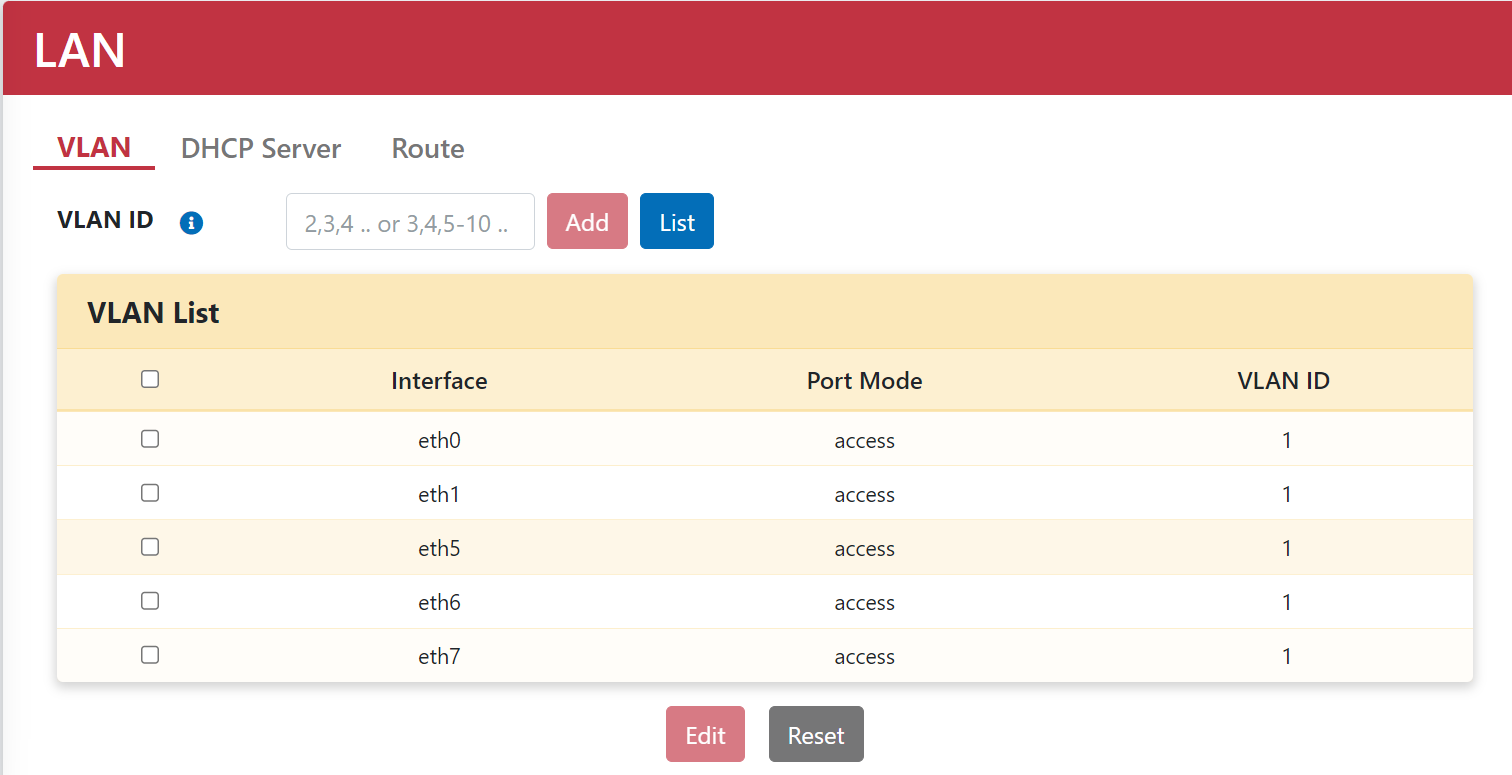
Adding a VLAN ID
- Go to Networking > LAN > VLAN.
- Enter the desired VLAN IDs (e.g.,
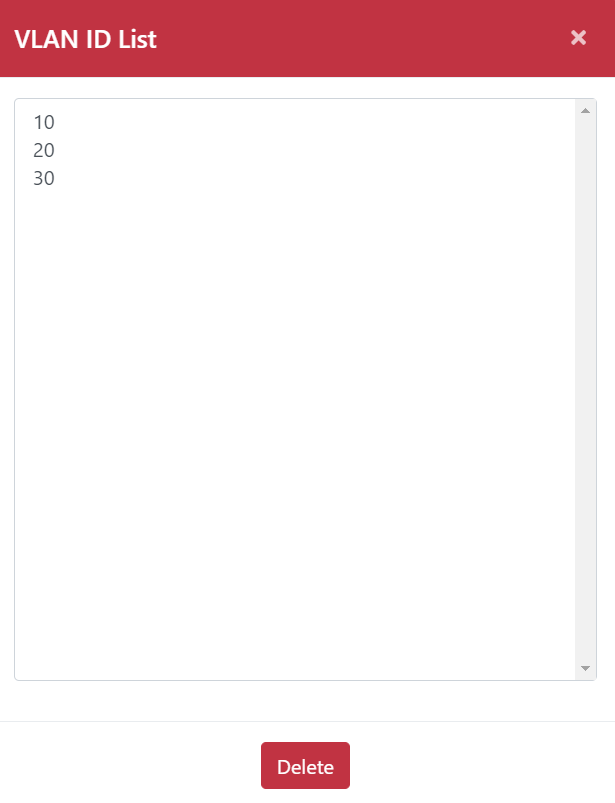
10,20,30) in the VLAN ID field. - Click the Add button.
- Click the List button to view the newly created VLAN IDs.
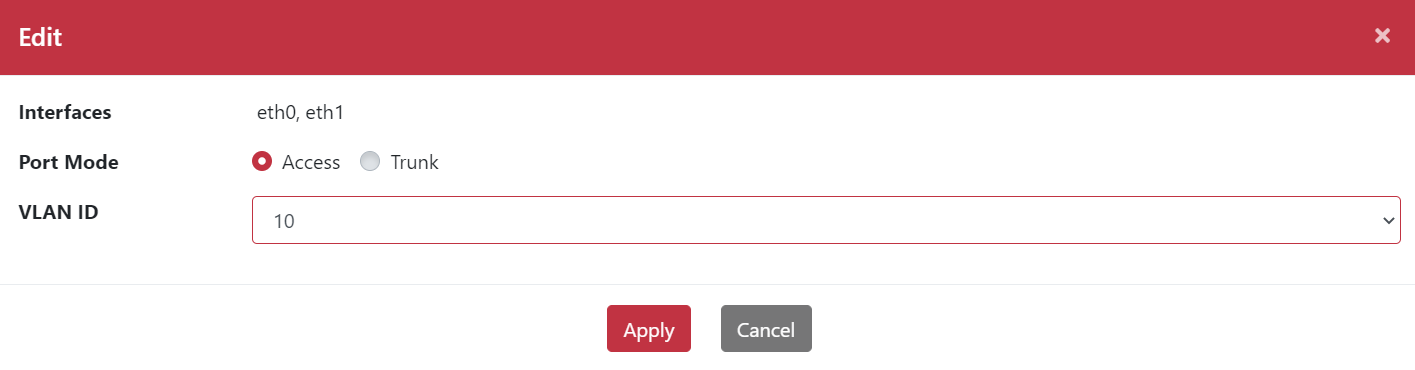
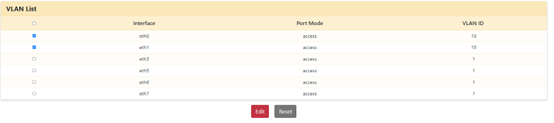
Modifying VLAN ID (Access Mode)
- Go to Networking > LAN > VLAN.
- Select the target interfaces (e.g.,
eth0,eth1) using the checkboxes. - Click the Edit button.
- Set Port Mode to Access.
- Select the target VLAN ID.
- Click the Apply button.
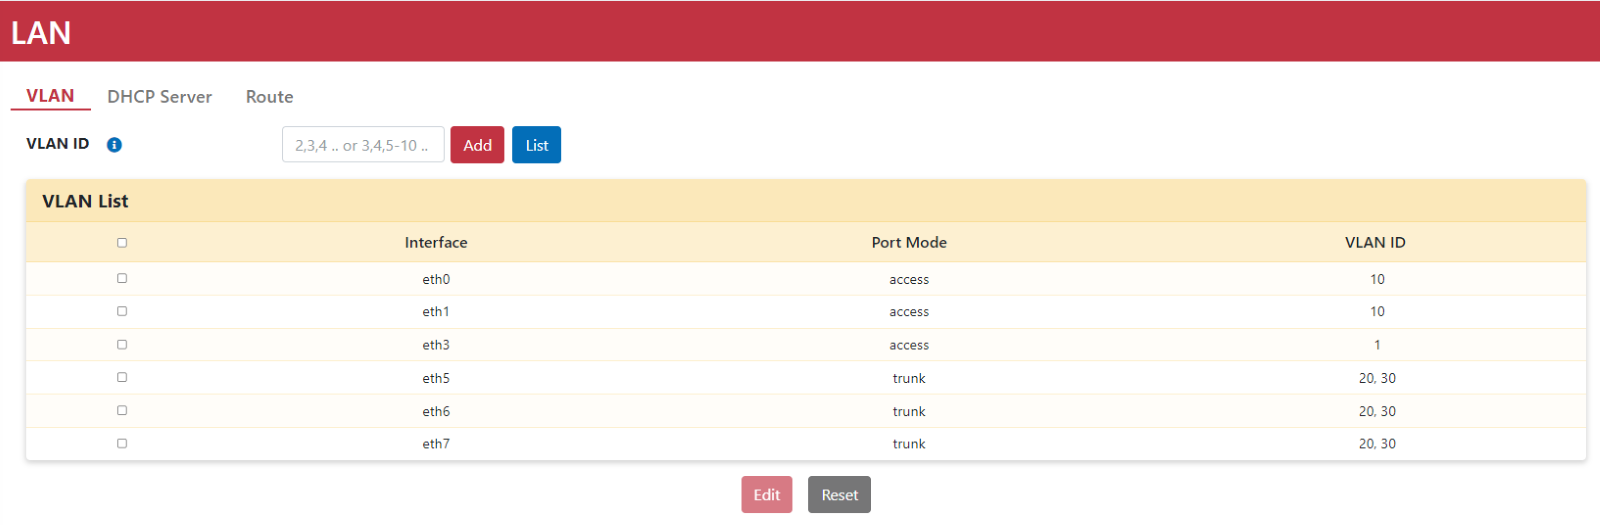
Modifying VLAN ID (Trunk Mode)
- Go to Networking > LAN > VLAN.
- Select the interfaces (e.g.,
eth4,eth5, andeth7) using the checkboxes. - Click the Edit button.
- Select a VLAN ID from the Created VLAN list.
- Click the
>icon to move it into the allowed list.
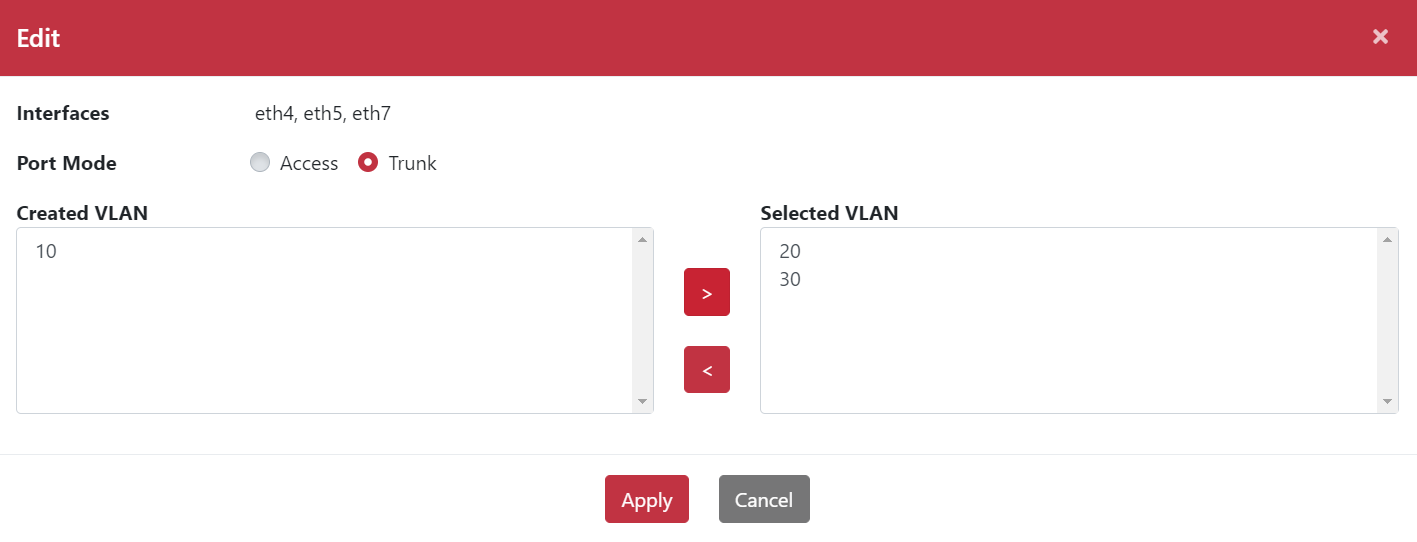
- Click the Apply button.
2. DHCP Server
The DHCP server is enabled by default on VLAN 1. Wired devices connected to LAN ports and mobile devices associated with Wi-Fi SSIDs automatically receive IP addresses via DHCP.
How Devices Receive IP Addresses via DHCP
- Wired Devices:
- Connect the device to an OOS LAN port.
- The device obtains an IP address automatically from the OOS DHCP server.
- Mobile Devices:
- Associate the mobile device with the configured Wi-Fi SSID.
- The mobile device receives an IP address from the OOS DHCP server.
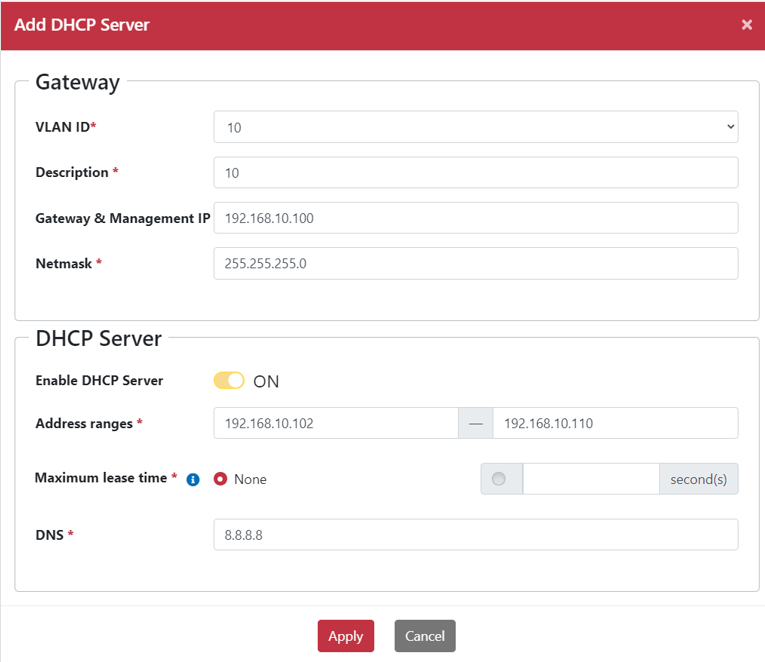
Adding a DHCP Server
- Go to Networking > LAN > DHCP Server.
- Click the Add button to open the "Add DHCP Server" dialog box.
- Select the target VLAN ID from the drop-down menu.
- Enter the Gateway & Management IP (e.g.,
192.168.10.100). - Enter the Netmask (e.g.,
255.255.255.0). - Set Enable DHCP Server to ON.
- Enter the Address range (e.g.,
192.168.10.102 – 192.168.10.110). - Enter the DNS address (e.g.,
8.8.8.8). - Click the Apply button.
3. Static Route
Static routing involves manually configuring entries in the routing table, allowing network administrators to control how data packets are forwarded to specific destinations.
Setting Up a Static Route
- Go to Networking > LAN > VLAN.
- Add VLAN ID
10.

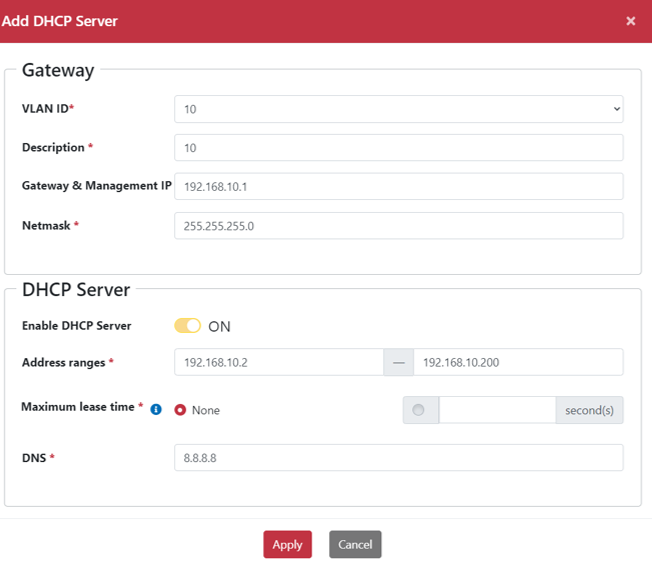
- Go to Networking > LAN > DHCP Server.
- Click the Add button to display the "Add DHCP Server" dialog box.
- Select VLAN
10from the drop-down menu. - Enter the Gateway & Management IP (e.g.,
192.168.10.1). - Enter the Netmask (e.g.,
255.255.255.0). - Set Enable DHCP Server to ON.
- Enter the Address range (e.g.,
192.168.10.2 – 192.168.10.200). - Enter the DNS IP (e.g.,
8.8.8.8). - Click the Apply button.
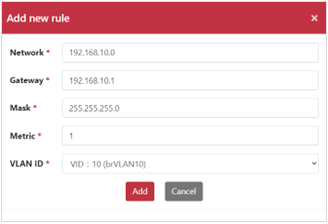
- Go to Networking > LAN > Route.
- Click the Add button to pop up the "Add New Rule" dialog box.
- Enter the Network IP.
- Enter the Gateway IP.
- Enter the Mask IP.
- Enter the Metric.
- Select the corresponding VLAN ID.
- Click the Add button.
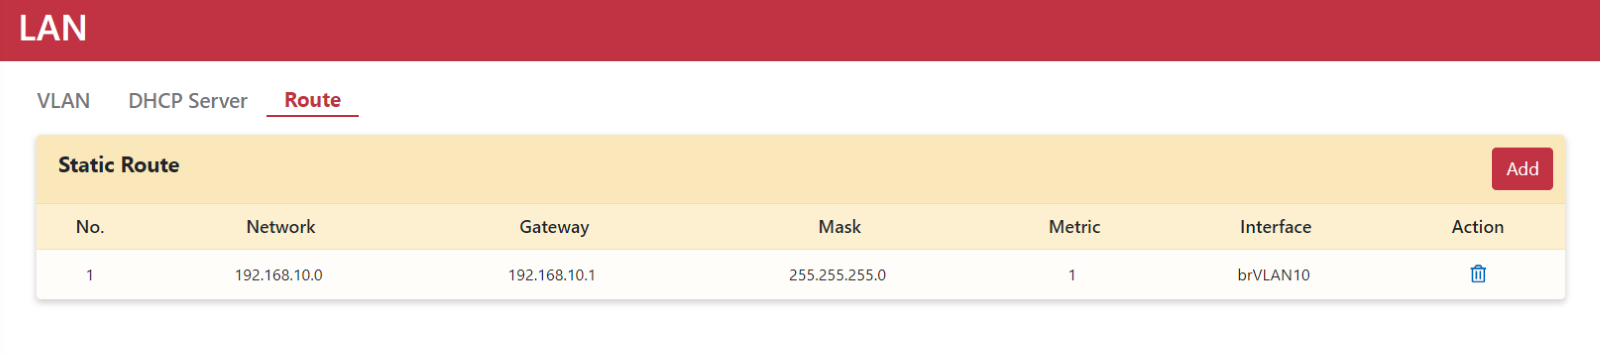
The configured static route rule table is displayed below: