Add Container Template
Comprehensive guide to configuring Container templates, storage mounts, importing templates, Registries, and Network Endpoints.
This page provides instructions for creating and configuring Container templates to publish applications to the App Store.
Adding a Container Template
Step 1. Go to the Application > Template > Container page.
Step 2. Click the Add Template icon.
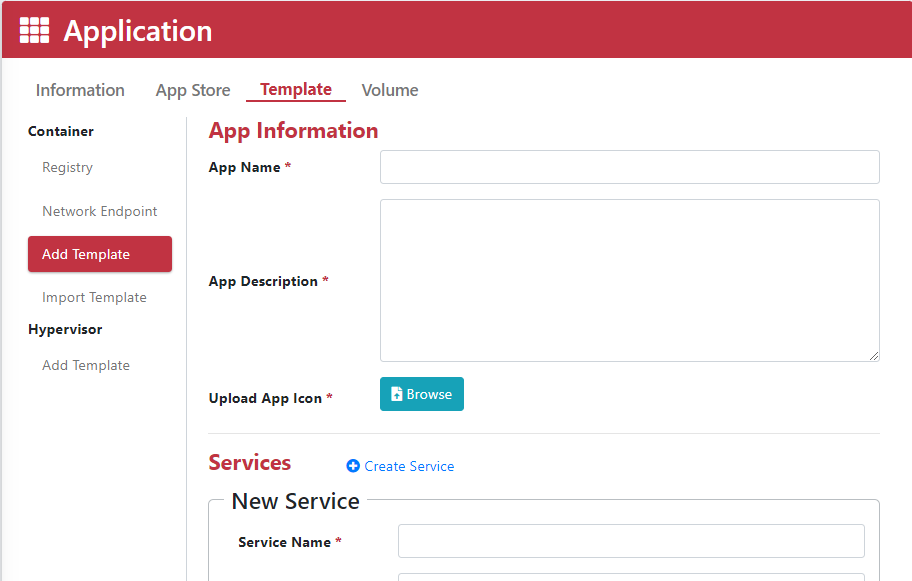
Step 3. Type the App Name.
Step 4. Select the Container Registry.
Step 5. Type the Image Name.
Step 6. Type the Image Tag (defaults to latest).
Step 7. Select the Network Endpoint.
Step 8. Choose the Resource Limitation.
Step 9. Configure Environment Variables if required.
Step 10. Click Upload App Icon to add an icon for the application.
Step 11. Enter an App Description.
Step 12. (Optional) Configure Port Binding: Manually add single ports or port ranges according to Docker requirements.
Step 13. (Optional) Configure Volumes: Add volume paths as required by Docker.
Step 14. (Optional) Configure Labels: Add metadata labels as required by Docker.
Step 15. (Optional) Configure Commands: Specify runtime commands as required by Docker.
Step 16. (Optional) Configure Devices: Map hardware devices as required by Docker.
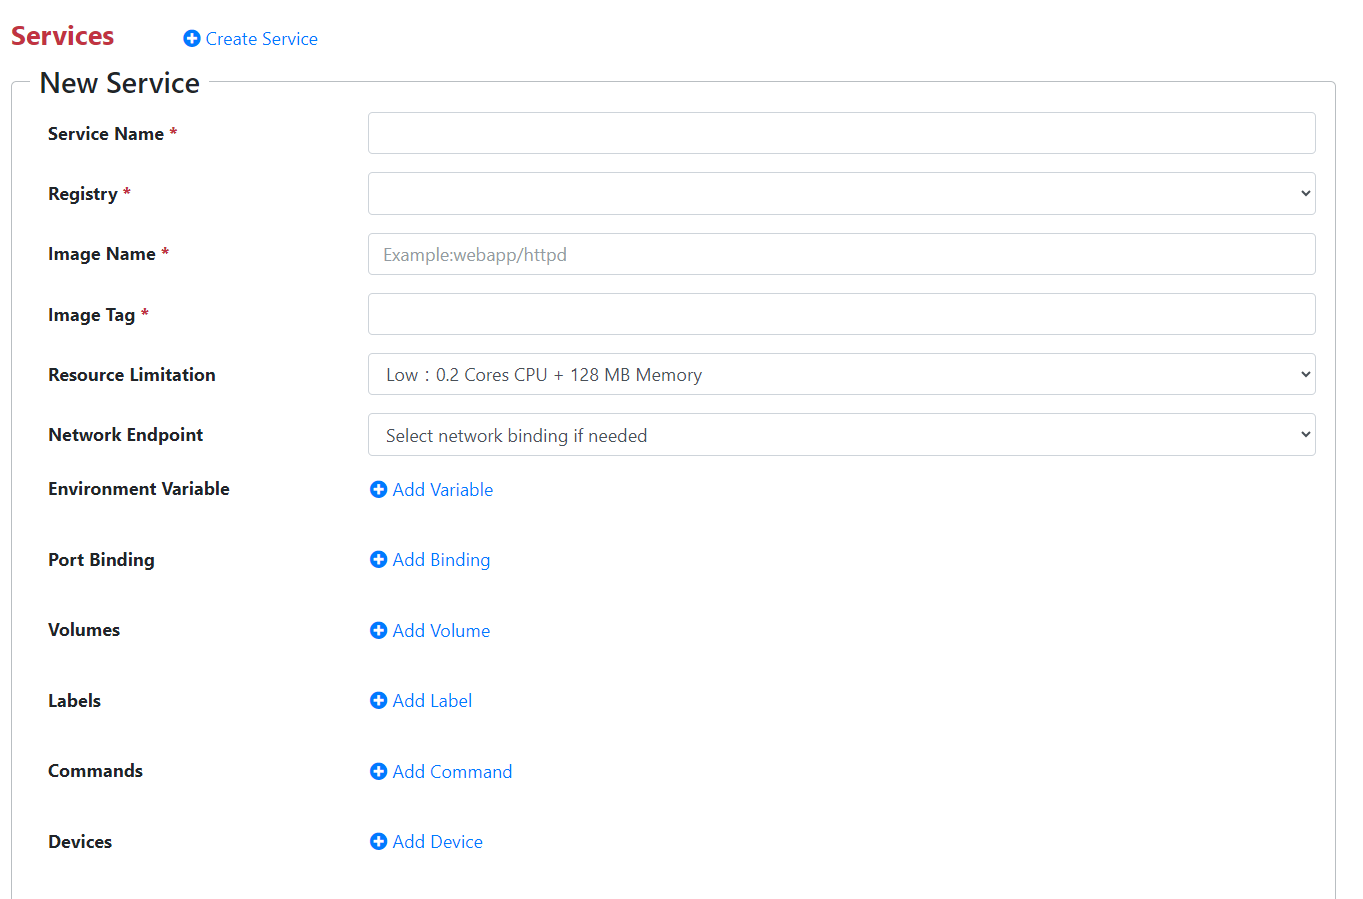
Note: "Device" lists all devices found under the
/devpath, including USB devices and serial ports.
Step 17. If using Docker Compose, add additional services and repeat steps 5 through 16 as needed.
Step 18. Click the Apply button.
Step 19. The new Container application will now appear on the App Store page.
Specifying Path to External USB Drive
If a container requires external storage rather than local device space, specify an external disk path via the container console terminal:
Step 1. Select the external hard disk.
Step 2. Click Apply.

Step 3. Navigate to Application > Information > Container > Action > Console to mount the disk using command-line commands.
Importing a Template
Quickly import pre-configured templates into the App Store:
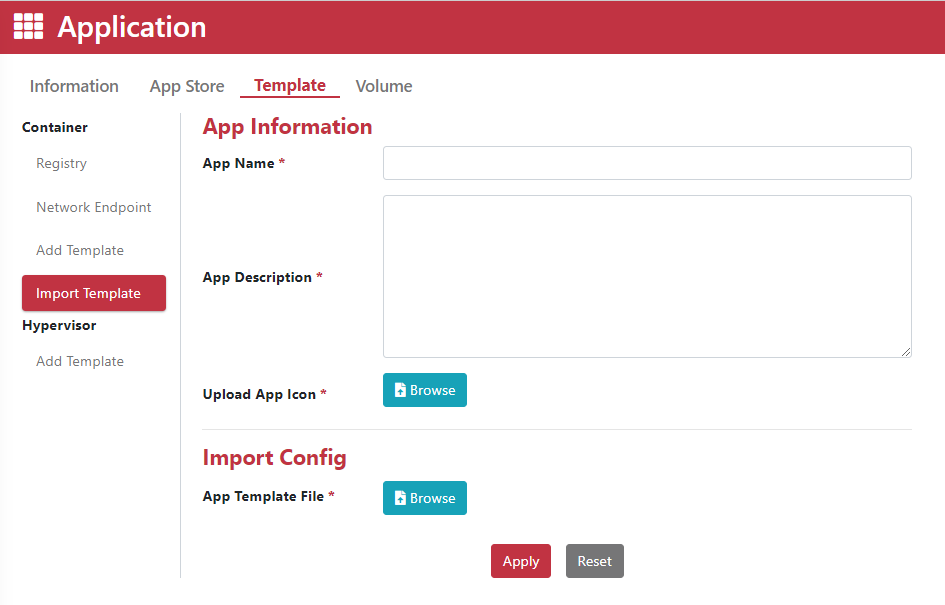
Step 1. Go to Application > Template > Container > Import Template.
Step 2. Type the App Name.
Step 3. Type the App Description.
Step 4. Browse and select the App Template file.
Step 5. Upload the App Icon.
Step 6. Click the Apply button.
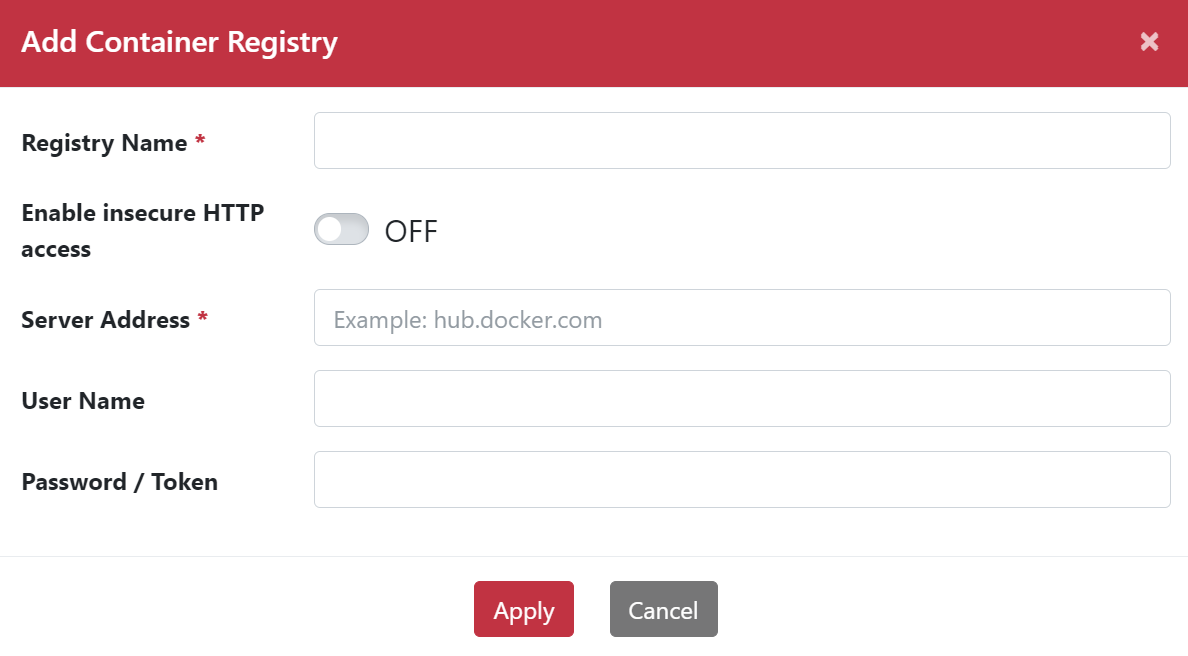
Adding a Container Registry
Step 1. Go to Application > Template > Container > Registry.
Step 2. Click the Add button to add a container registry.
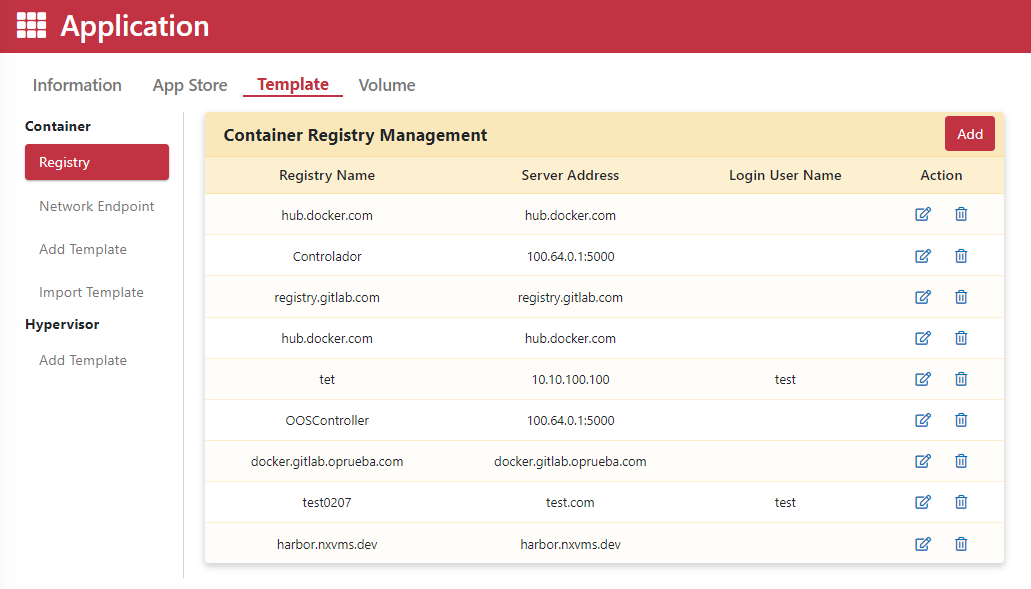
Step 3. Type the Registry Name.
Step 4. (Optional) Enable the HTTP access toggle and enter the Server Address.
Step 5. (Optional) Enter the User Name and Password/Token.
Step 6. Click the Apply button.
Adding a Network Endpoint
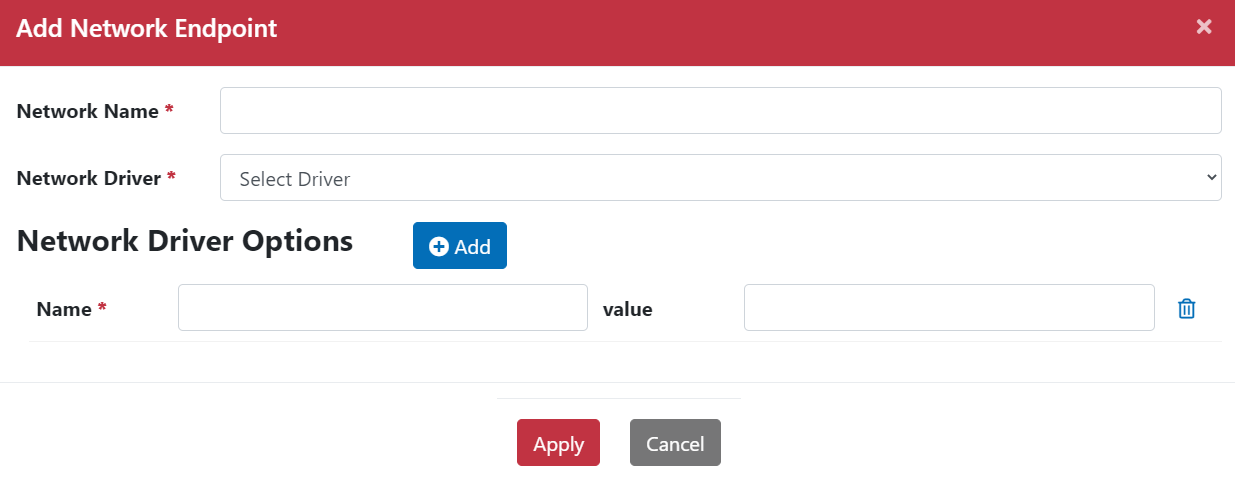
Step 1. Go to Application > Template > Container > Network Endpoint.
Step 2. Click the Add button to create a Network Endpoint.
Step 3. Type the Network Name.
Step 4. Select the Network Driver.
Step 5. Configure Network Driver options.
Step 6. Click the Apply button.
Template Parameter Field Descriptions
| Item | Description |
|---|---|
| App Name | Define a unique name for your application. |
| Container Registry | A repository for container images (e.g., Docker Hub for public repositories, or private registries). |
| Image Name | Read-only Docker image template containing instructions to build a container. |
| Image Tag | Version tags to manage container images. Defaults to latest. |
| Network Endpoint | Host: Reserved for Wireshark or IPsec containers; others default to Bridge mode and cannot switch; Bridge: Default networking mode; Network-restriction(bridge): Secured bridge mode with access control rules; Allow Internet Access (Select Egress WAN): Enables internet connectivity. Container web pages are restricted and managed via port mapping; Allow Controller Access: Grants the controller access to the container; Allow LAN IP/24 Access: Restricts container access to specified local LAN subnets; Allow WAN IP Access: Restricts access to specified WAN IP addresses; None: Applies no network restrictions. |
| Resource Limitation | Resource profiles: Low (0.2 CPU core + 128 MB Memory); Medium (0.5 CPU core + 512 MB Memory); High (2 CPU cores + 2 GB Memory). Note: If container requirements exceed selected resource limits, execution will fail until limits are adjusted. |
| Environment Variable | Key-value pairs used to pass user or application parameters inside containers. |
| Port Binding | Configures TCP/UDP protocol mappings for public and private ports. Setting public port to 0 assigns a random port. |
| Volumes | Filesystem mounts used to persist container data. |
| Labels | Key/value metadata attached to resources (Pods, Services, Nodes) for organization. |
| Commands | Commands executed upon container startup to initialize services or tasks. |
| Upload App Icon | Custom icon image displayed on the App Store page. |
| App Description | Brief summary explaining application features and purpose. |