Active-Active WAN
Active-Active WAN setup guide
OOS supports Multiple-Active WAN in VLAN 1. The following scenario demonstrates the configuration of Multiple-Active WAN using two APNs.
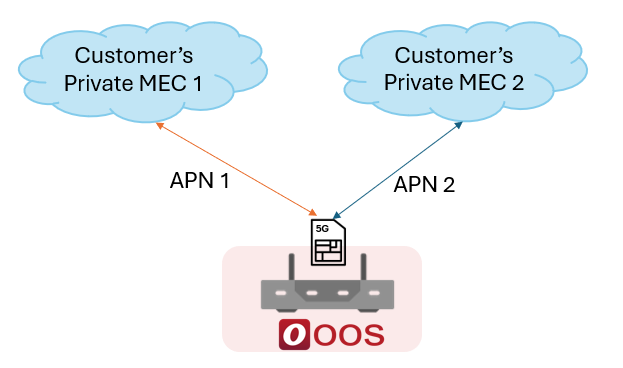
!NOTE Enabling multiple APNs simultaneously requires core network support for multiple APN settings.
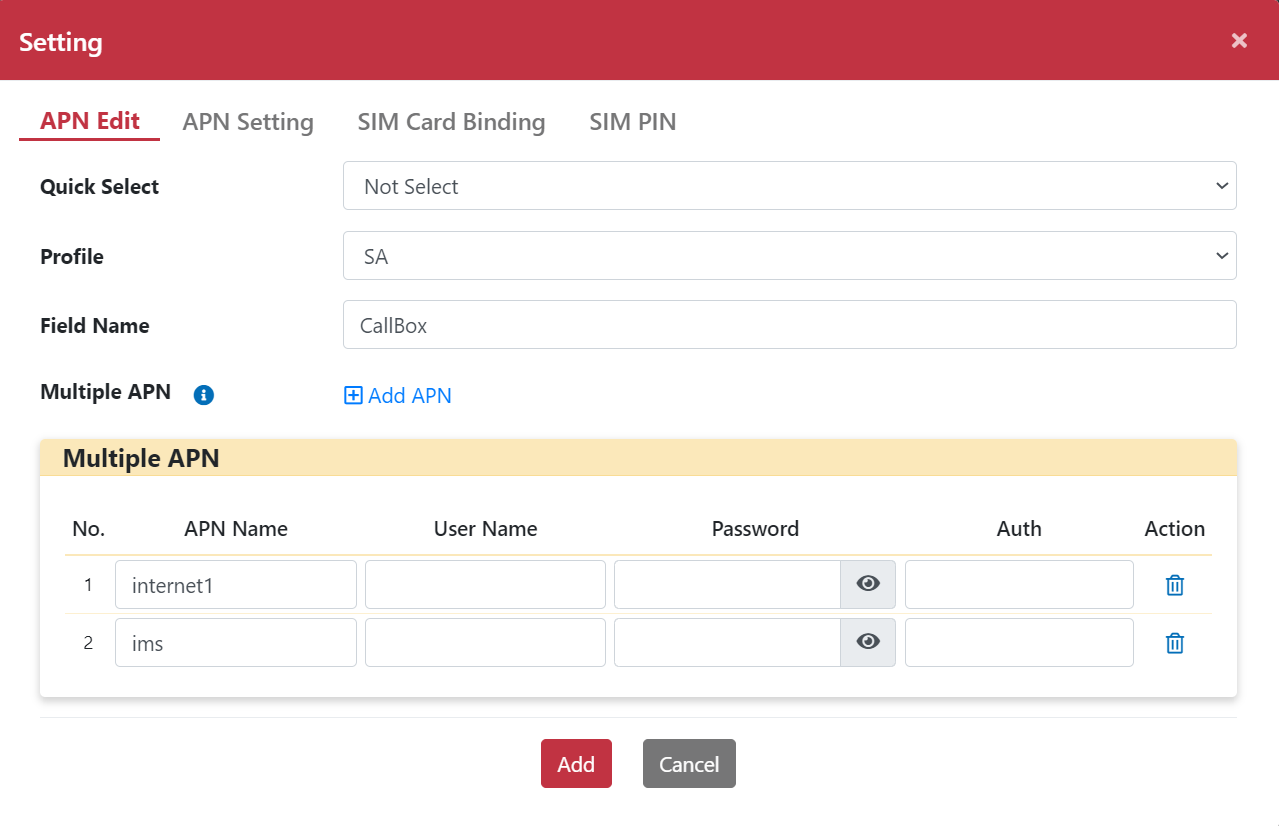
1. APN Edit
- Step 1: Go to Networking > Mobile Network.
- Step 2: Click Setting to open the Setting dialog box.
- Step 3: Go to the APN Edit page.
- Step 4: Select Not Select from the Quick Select drop-down menu.
- Step 5: Select SA from the Profile drop-down menu.
- Step 6: Enter a Field Name.
- Step 7: Click Add to enable multiple APNs.
- Step 8: Enter the APN Name.
- Step 9: Enter the Username (if required).
- Step 10: Enter the Password (if required).
- Step 11: Select the Auth type (if required).
- Step 12: Click Add.
The profile will be saved under the Quick Select drop-down menu.
2. APN Setting
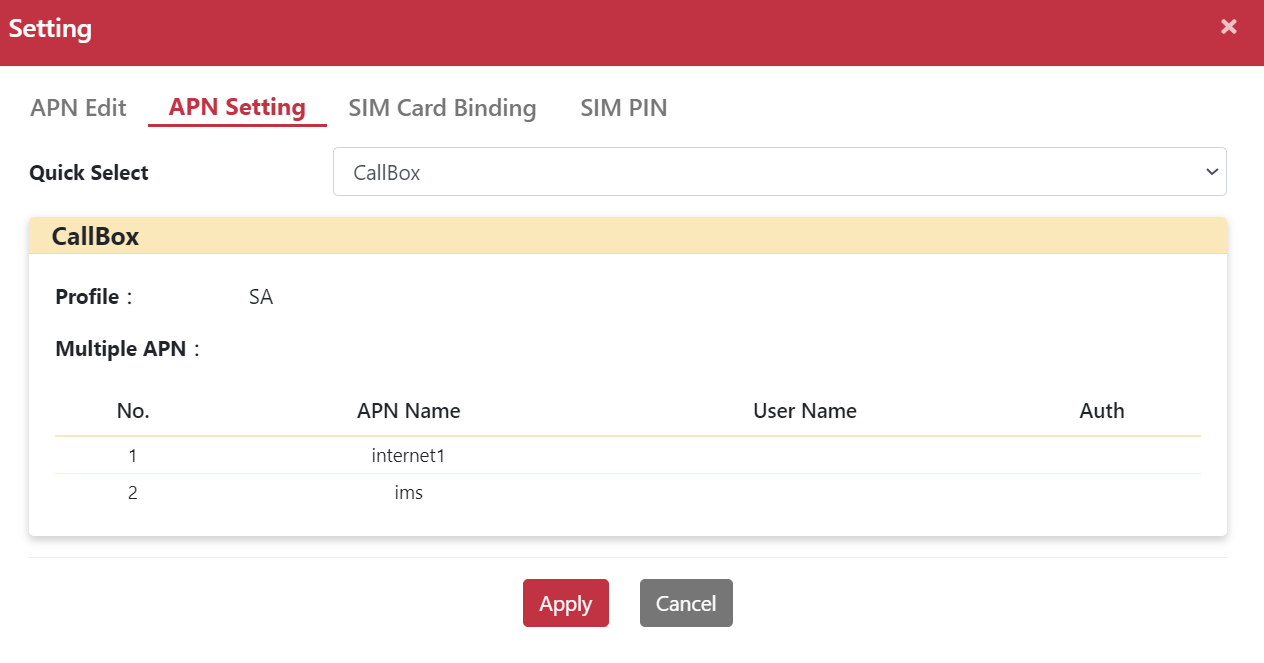
- Step 1: Go to the APN Setting page.
- Step 2: Select CallBox from the Quick Select drop-down menu.
- Step 3: Click Apply.
3. Verify Mobile Network IP Address
- Step 1: Go to Networking > Mobile Network.
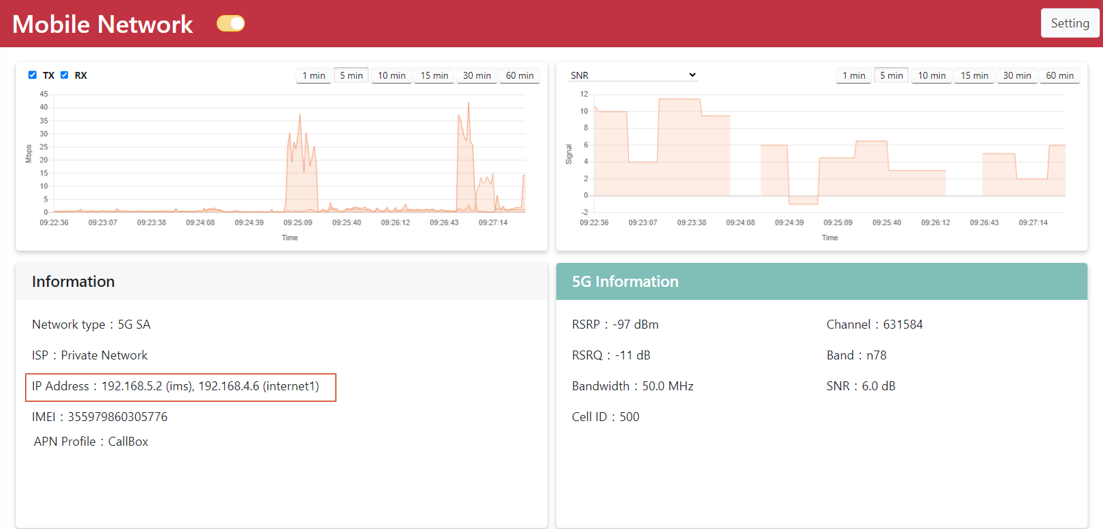
- Step 2: Check the Information panel to verify that the IP address has been successfully obtained.
4. WAN Binding with VLAN Configuration
- Step 1: Go to Networking > Forwarding > WAN Binding.
- Step 2: Click the Bind button for VLAN 10 to open the WAN Binding dialog box.
- Step 3: Move eth2 172.30.1.236 and Wi-Fi 172.30.1.148 from Available WAN to In Used WAN.
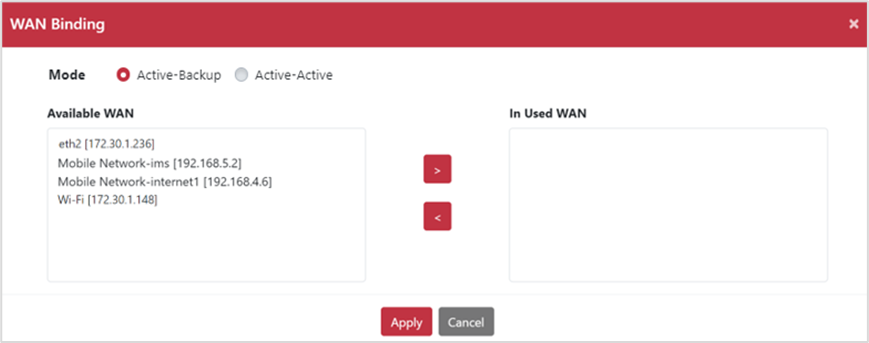
- Step 4: Select Active-Backup mode.
- Step 5: Click Apply.
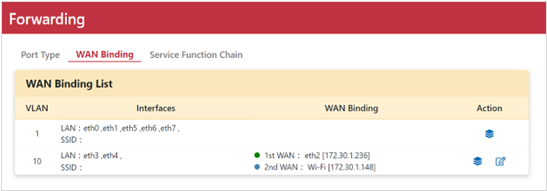
- Step 6: Click the Bind button for VLAN 1 to open the WAN Binding dialog box.
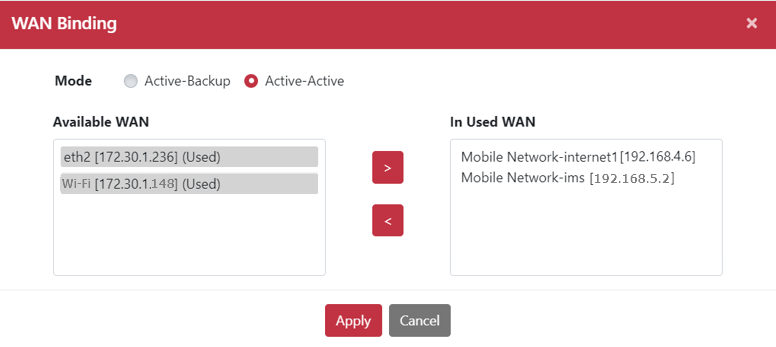
- Step 7: Move Mobile Network-ims 192.168.5.2 and Mobile Network-internet1 192.168.4.6 from Available WAN to In Used WAN.
- Step 8: Select Active-Active mode.
- Step 9: Click Apply.
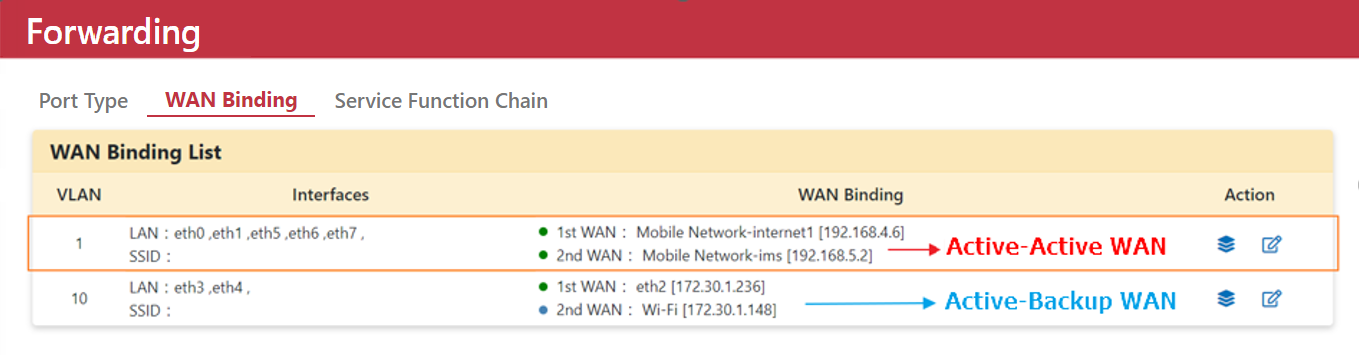
The following diagram shows the status of WAN connections in VLAN 1 and VLAN 10. In VLAN 1, two active WAN connections are indicated by green lights, meaning both are operating simultaneously (Multiple-Active WAN). In VLAN 10, one active WAN connection is indicated by a green light, and another connection is indicated by a blue light, serving as a backup in case the active connection fails.
5. Set Multiple Active Rules
- Step 1: Go to Networking > Forwarding > WAN Binding.
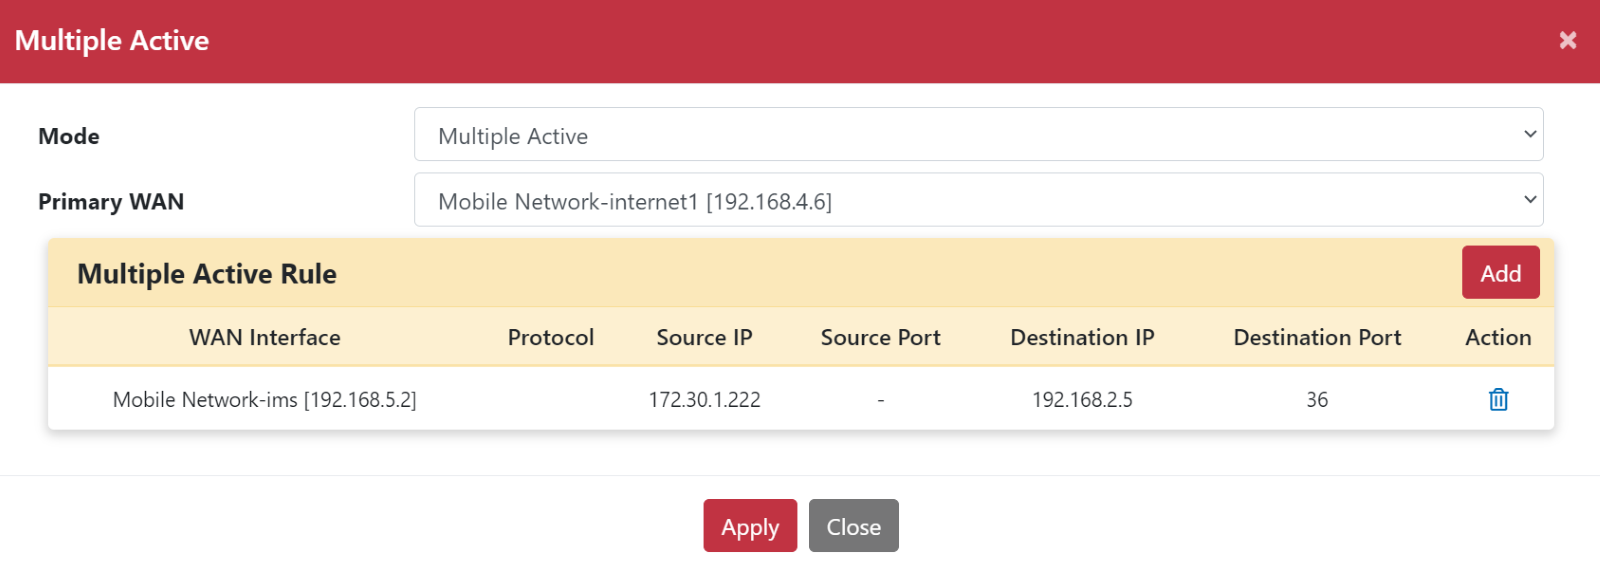
- Step 2: Click Edit to open the Multiple Active dialog box.
- Step 3: Select Mobile Network-ims from the Primary WAN drop-down menu.
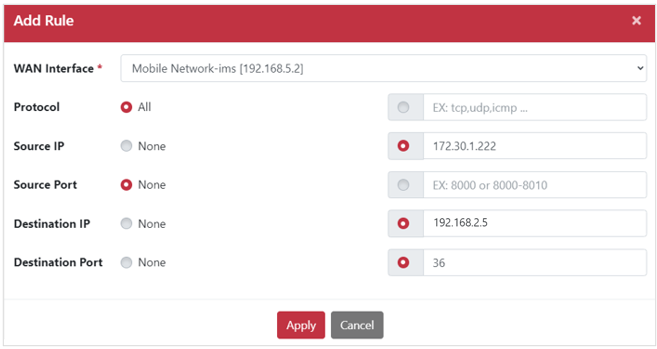
- Step 4: Click Add to open the Add Rule dialog box.
- Step 5: Select Mobile Network-ims from the WAN Interface drop-down menu.
- Step 6: Set Source IP to
172.30.1.222. - Step 7: Set Destination IP to
192.168.2.5. - Step 8: Set Destination Port to
36. - Step 9: Click Apply.
!NOTE All traffic will pass through the Primary WAN, except for traffic matching the "Multiple Active Rule" table. If you change the Primary WAN interface, click the Apply button to make the settings take effect.