orpheagentVersion 1.1.9
Linux (DEB)
OrpheAgent installation and configuration guide on Linux (DEB).
OrpheAgent Binary Daemon: One-Click Installation Guide
This guide explains how to install the OrpheAgent Binary Daemon on a supported Linux system and provision the device through OrpheLink.
Step 1: Sign Up for an OrpheLink Account
- Apply for and register an OrpheLink account.
- Please register a new account by clicking the link below: Create a New Account
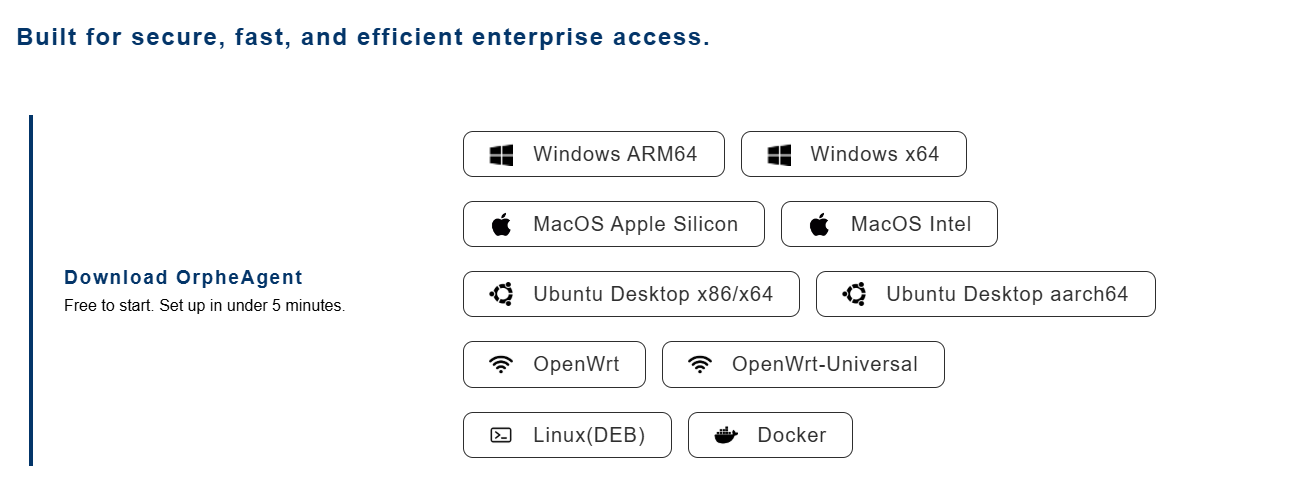
Step 2: Download OrpheAgent
- Download the corresponding OrpheAgent application for your operating system.

Step 3: Extract the Downloaded File
- Extract the downloaded
.tar.gzfile:
tar -zxvf orphe-agent-1.1.1-binary.tar.gz
Step 4: Generate a Provision Key in OrpheLink
- Log in to OrpheLink and navigate to the Provision page.
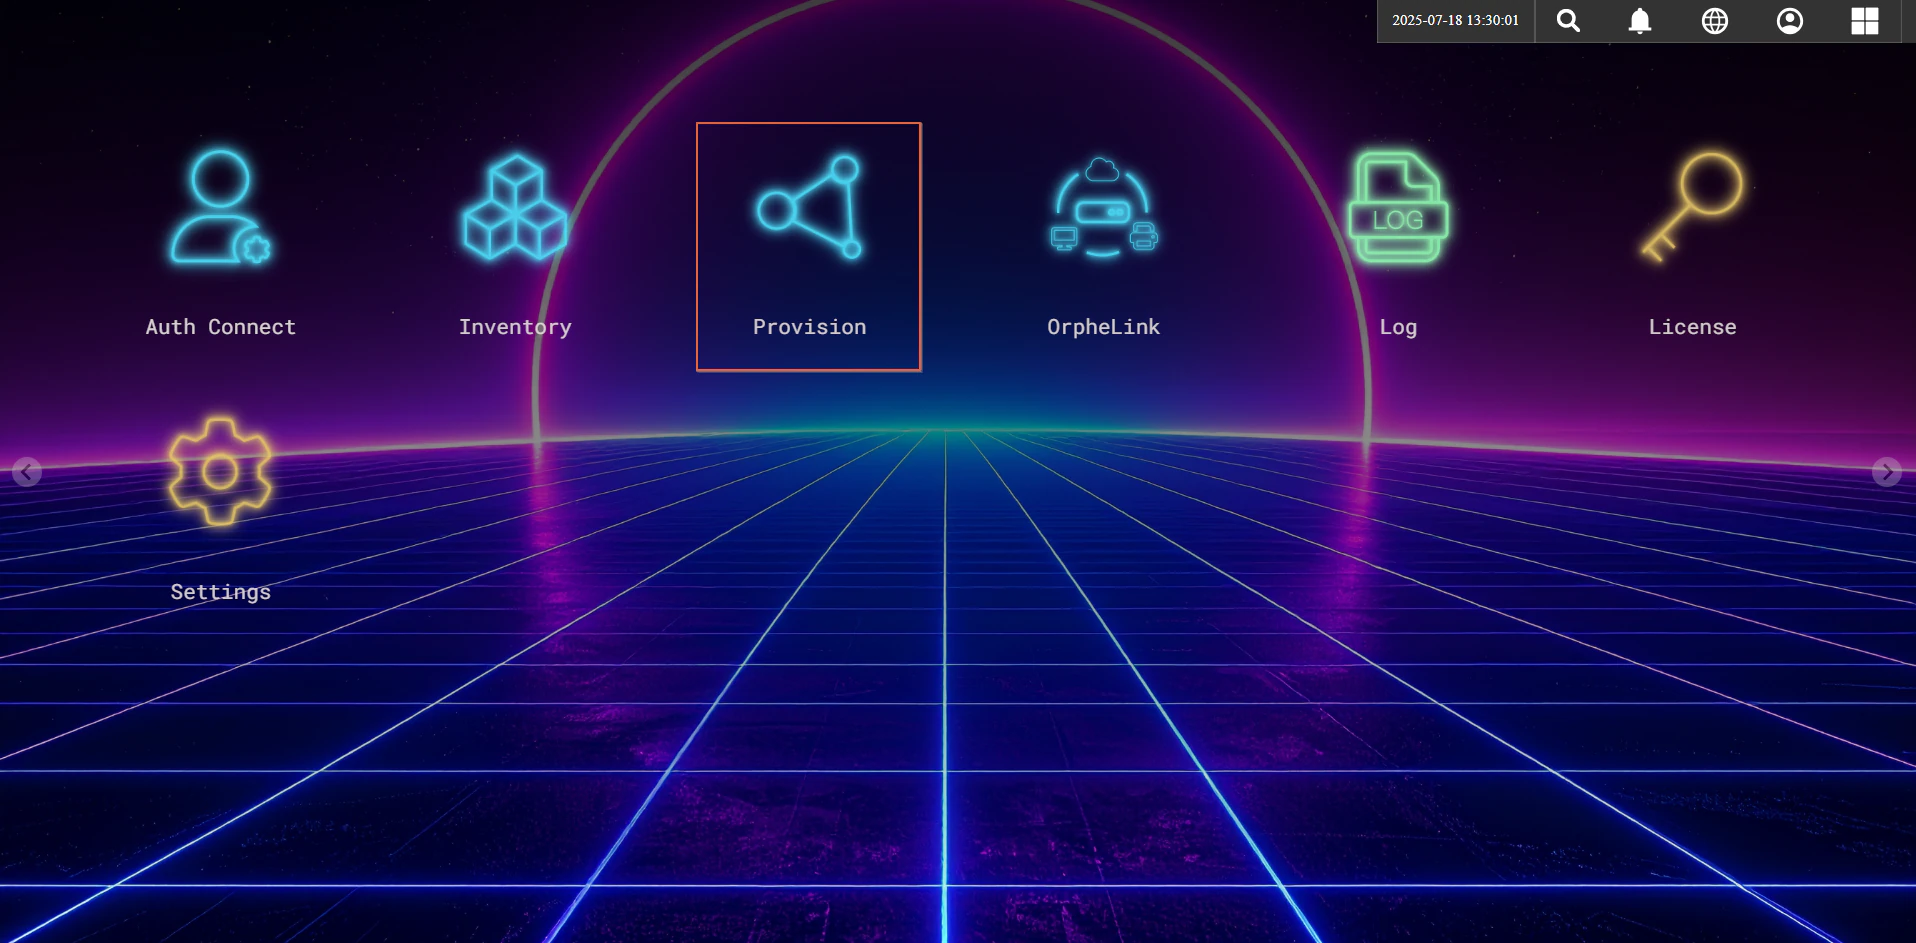
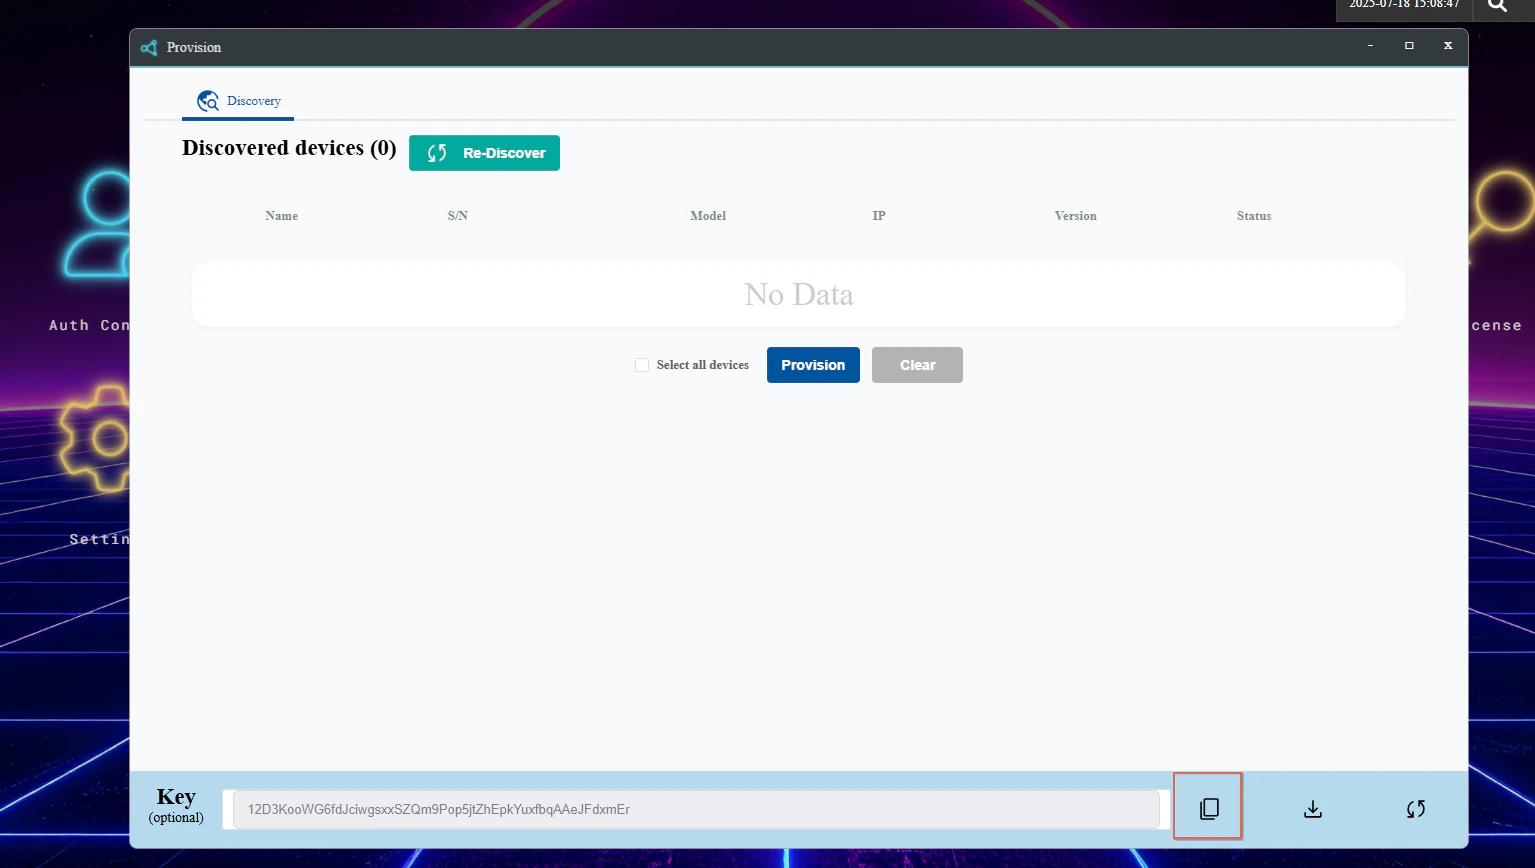
- Generate and copy a new Provision Key for your device.
Step 5: Install with the One-Click Script
- Run the script with the system architecture and an optional Provision Key:
sudo bash install.sh ARCH PROVISION_KEY
ARCH: System architecture (e.g.,amd64,arm64,armhf).PROVISION_KEY: Replace this with the Provision Key generated on the OrpheLink Provision page.
- If you do not provide a Provision Key, you can register it manually after installation.
Step 6: Discover and Provision the New Agent in OrpheLink
- Return to the OrpheLink Provision page and click Re-discover. The new agent will appear in the device list.
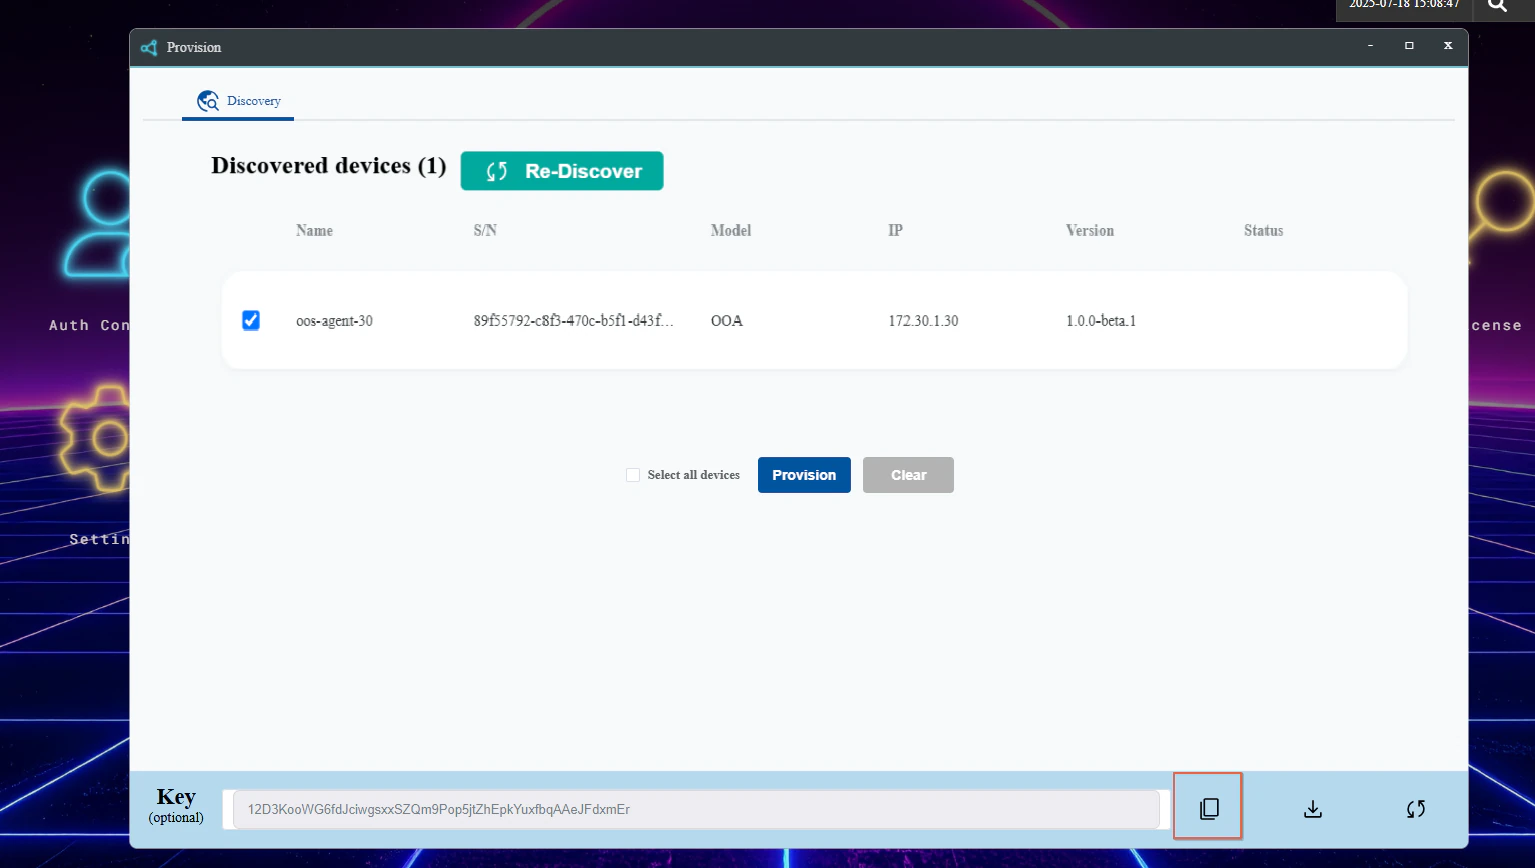
- Select the OrpheAgent device, then click the Provision button at the bottom to let OrpheLink take over management.
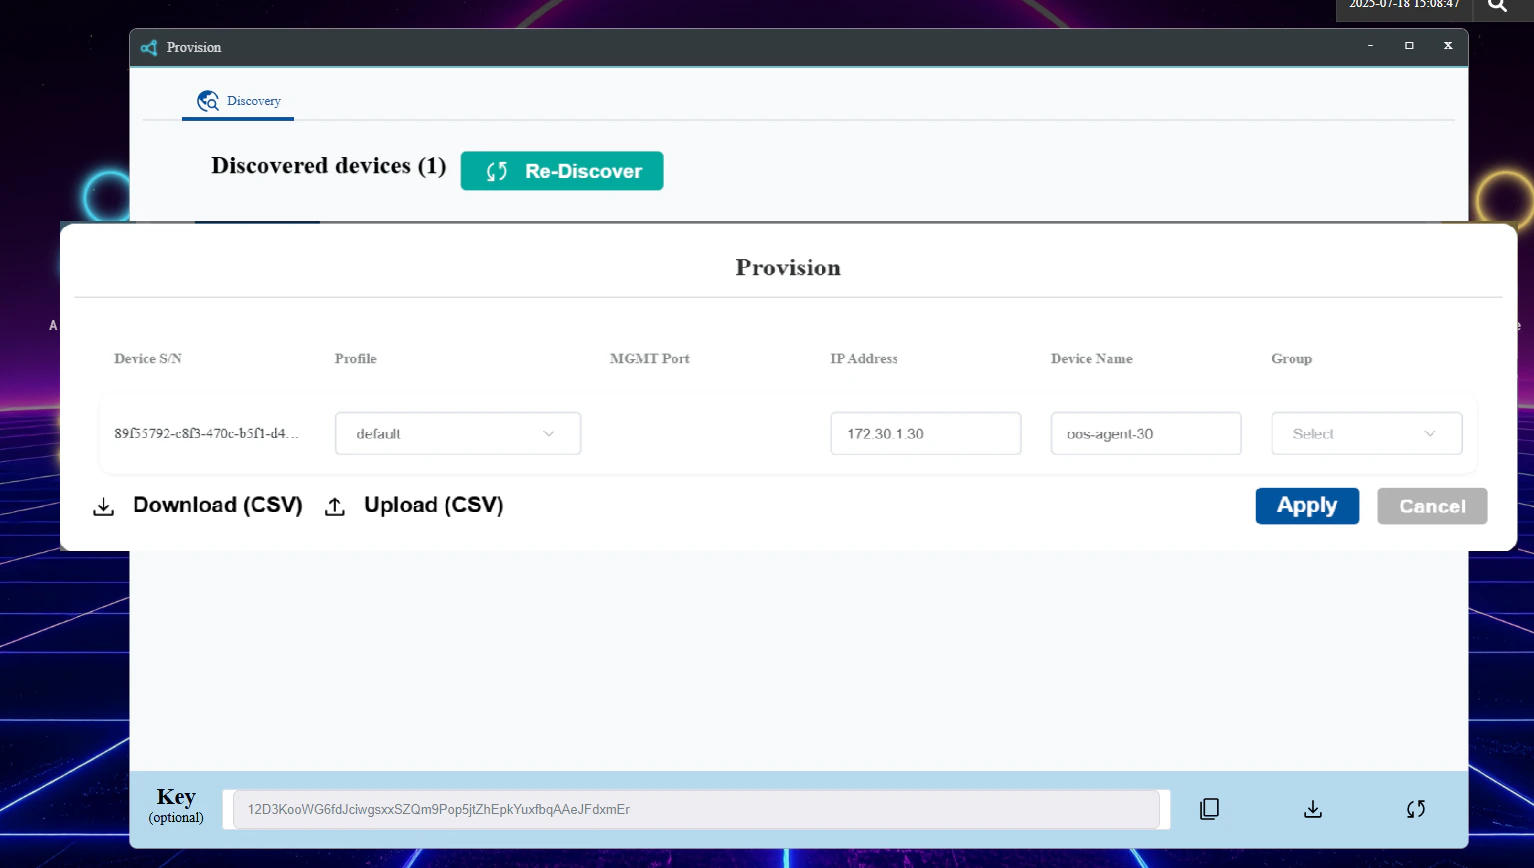
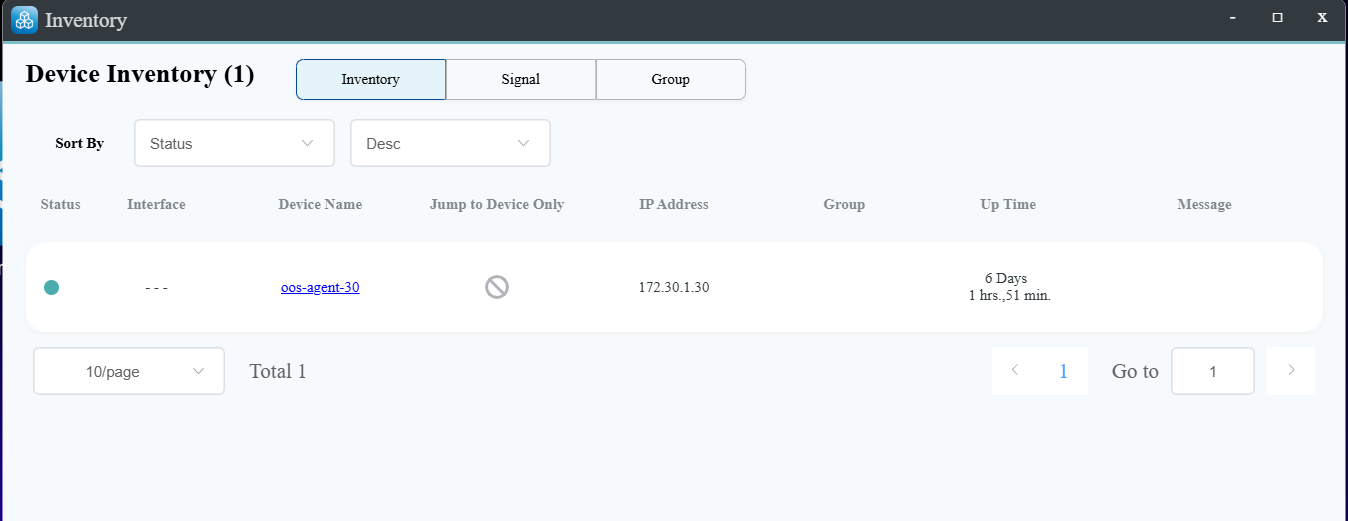
- After provisioning succeeds, verify that the device appears on the OrpheLink Inventory page.
Known Limitations and Notes
- Supported on Linux systems only (
amd64,arm64,armhf). - Automatic OTA update is not supported yet (manual upgrade required).
- Currently tested only on native Ubuntu 18.04, 20.04, 22.04, and 24.04.