orpheconsoleVersion 1.0.3
OrpheConsole Provisioning
OrpheConsole
Provision OrpheConsole to OrpheLink
1. Apply for an OrpheLink Account
If you do not have an OrpheLink account, apply through the official portal:
2. Sign In to OrpheLink
Open the OrpheLink portal and sign in with your credentials.
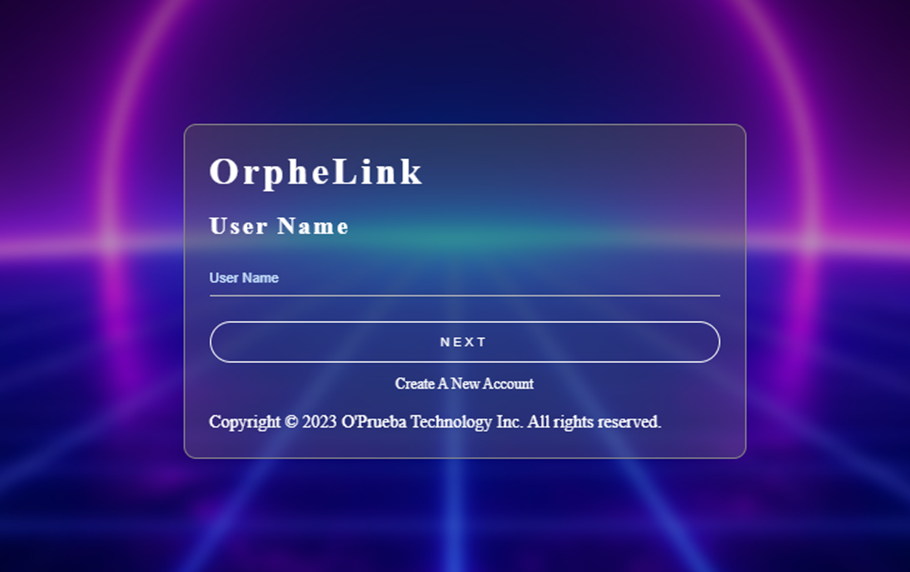
3. Open the Provision Page
In the OrpheLink interface, open the Provision section.

4. Generate a Provision Key
Generate a new Provision Key for the device and copy it.
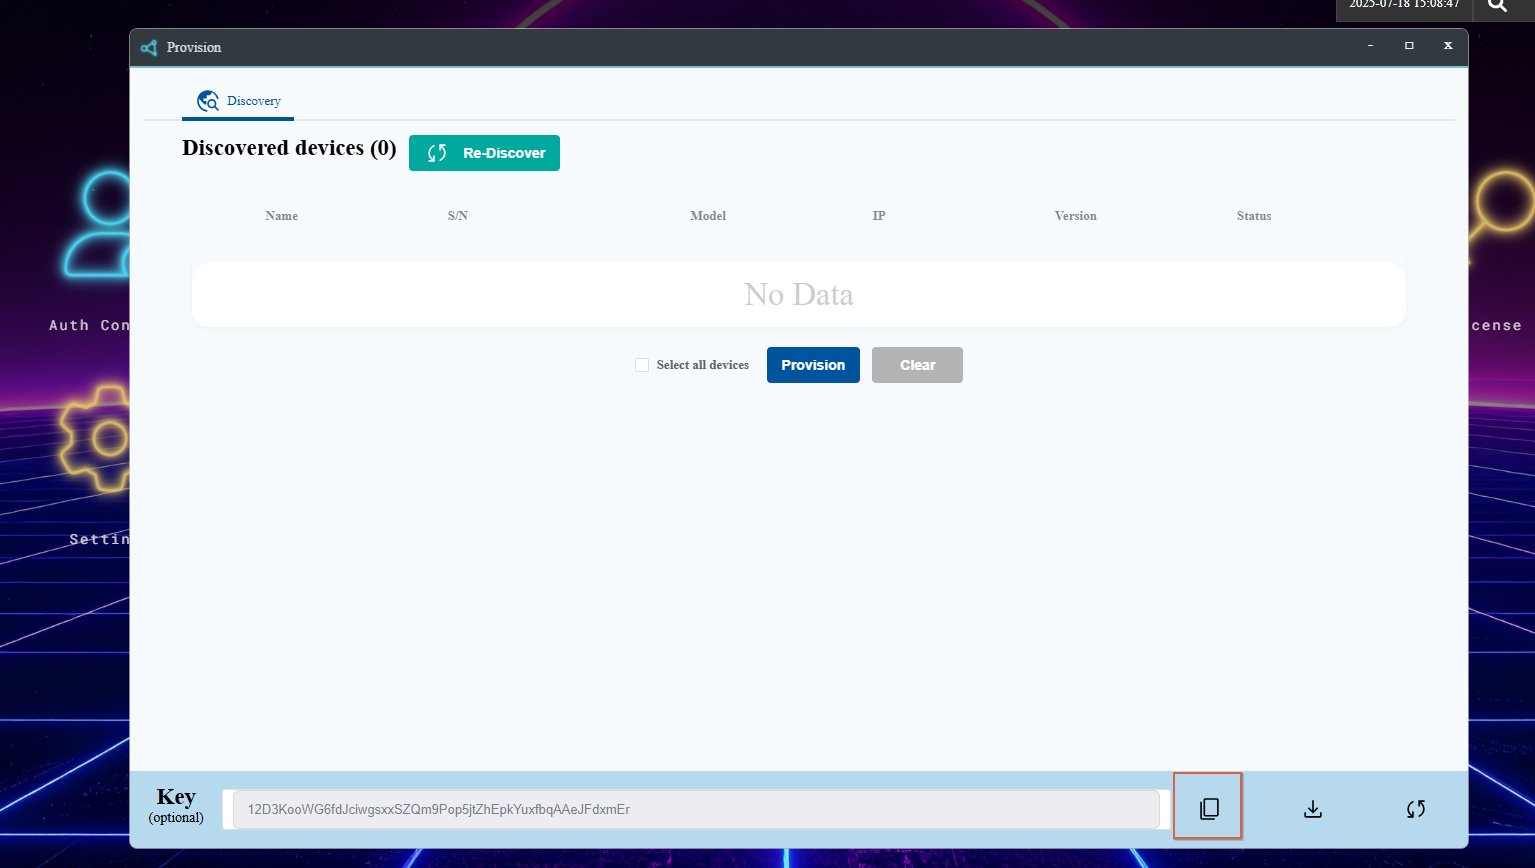
5. Provision the Device
Method A: SSH
Run the following command, replacing YOUR_KEY with the Provision Key:
orphe-agent config save --provision-key YOUR_KEY
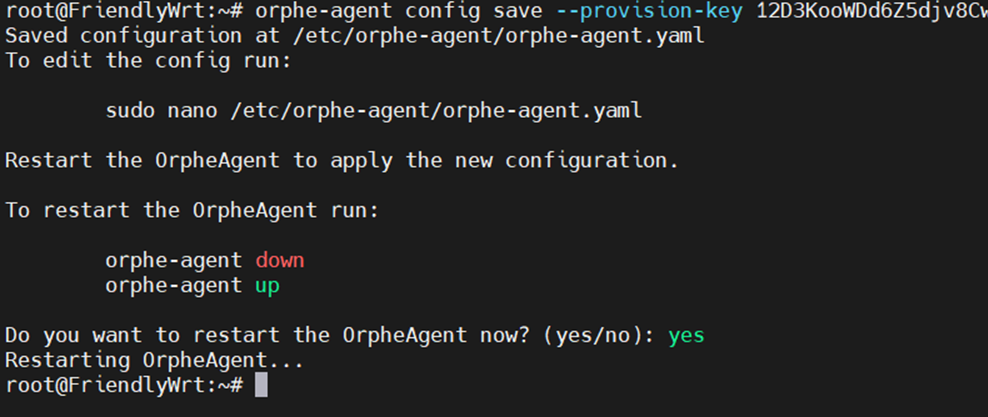
Method B: LuCI Web UI
- Connect the laptop to the LAN port on the OrpheConsole device.
- Open http://192.168.2.1 in a browser.
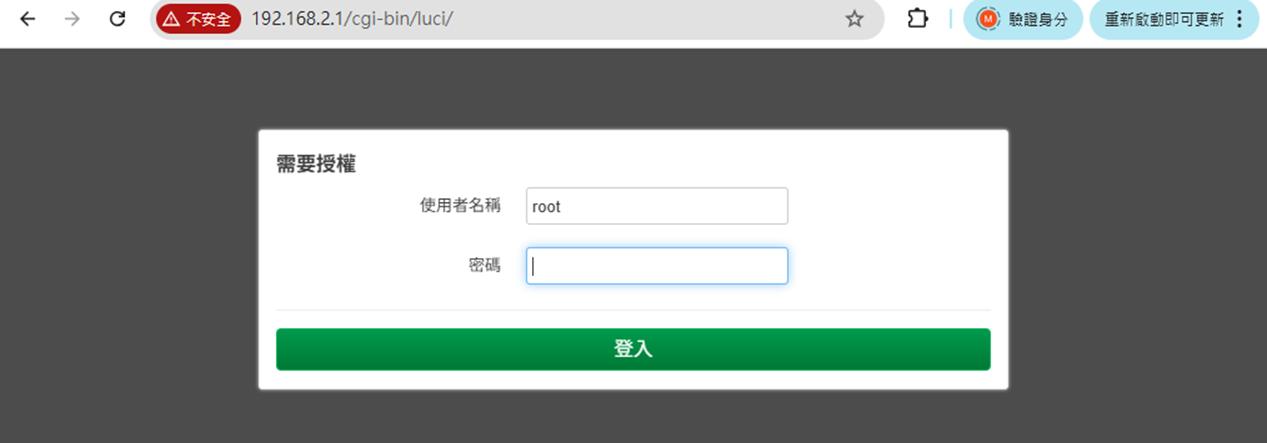
- Sign in with the default credentials:
- Username:
root - Password:
password
- Username:
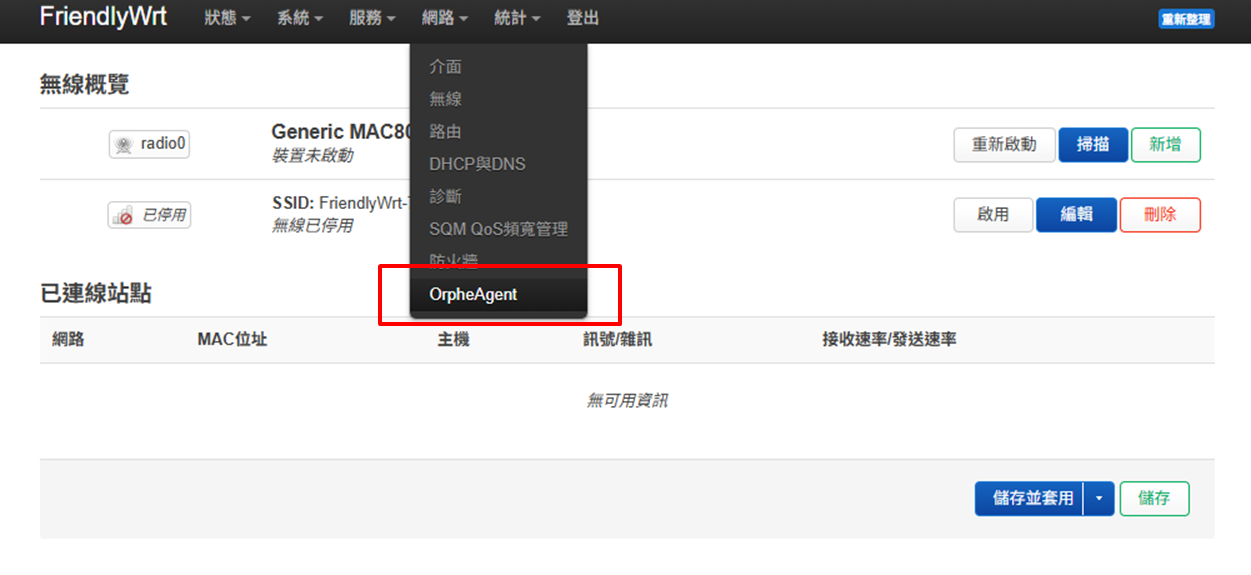
- Go to Network → OrpheAgent.
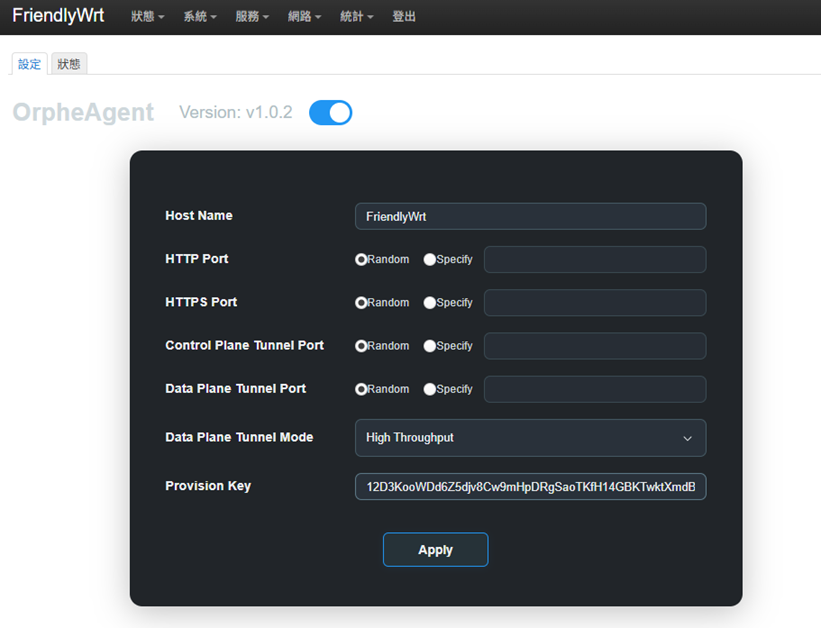
- Paste the Provision Key into the field.
- Click Apply to complete provisioning.
6. Confirm Device Provisioning
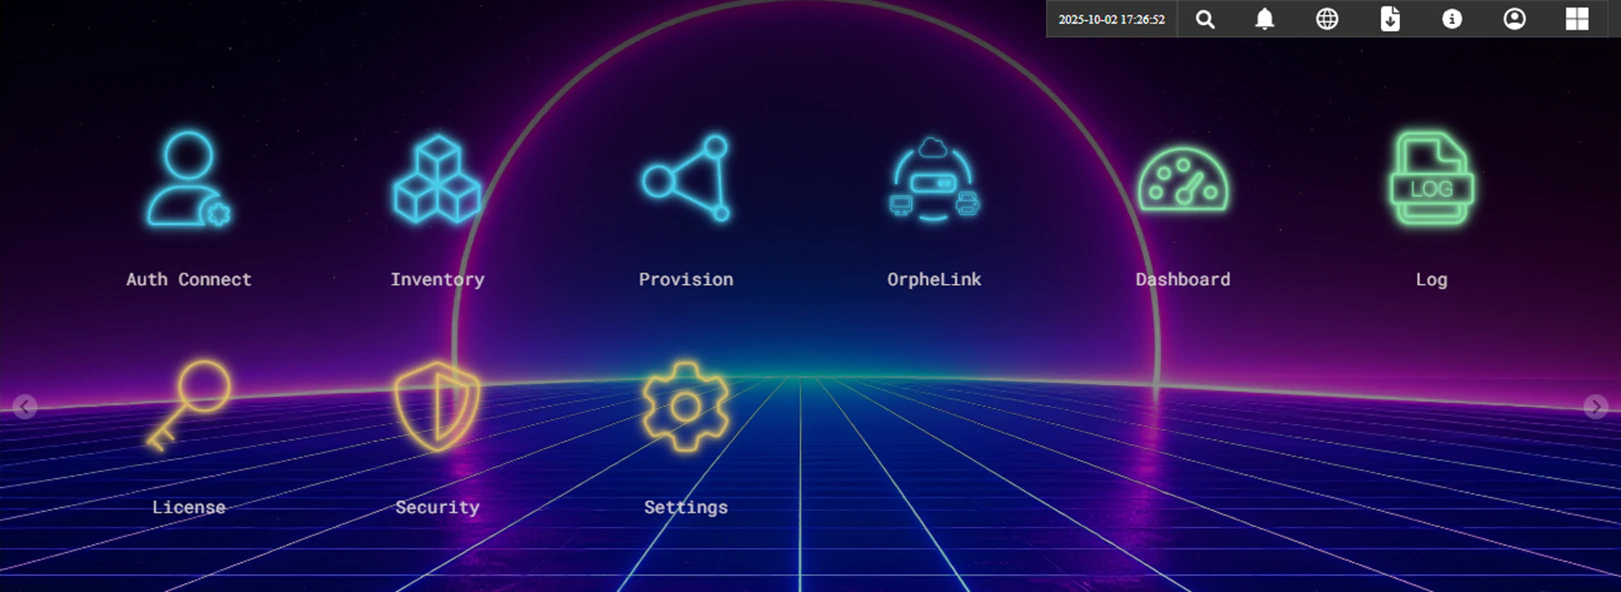
- Open Provision.
- Wait for the device to appear.
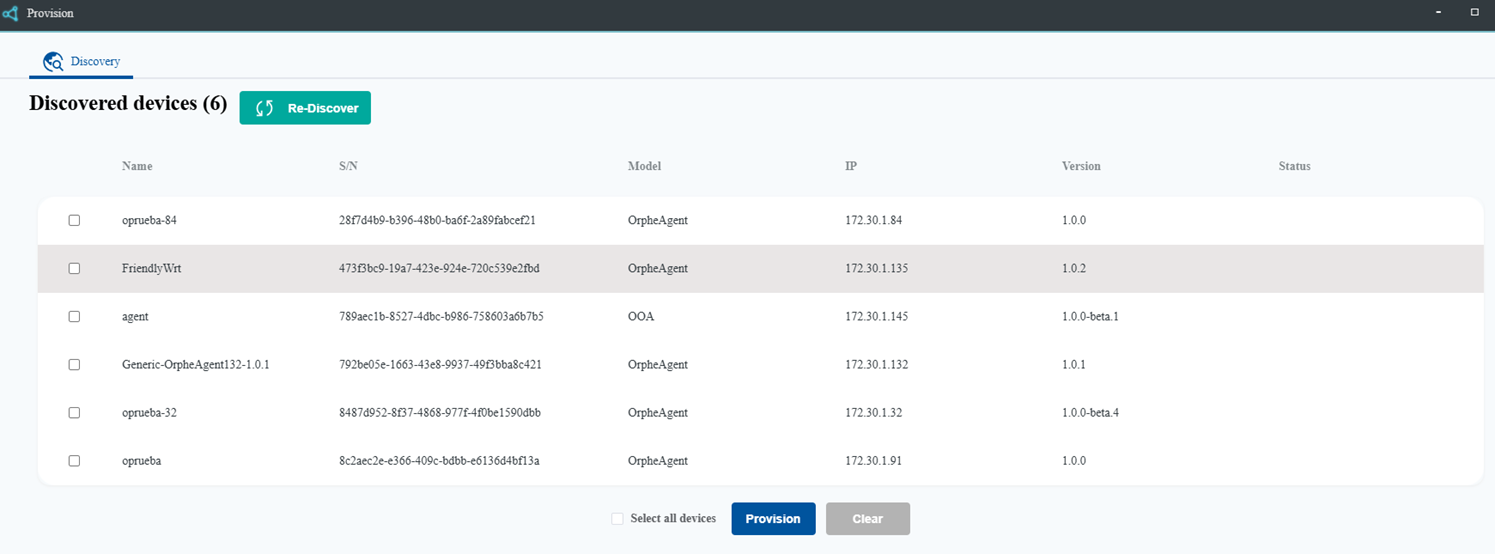
- Select the device and click Provision.
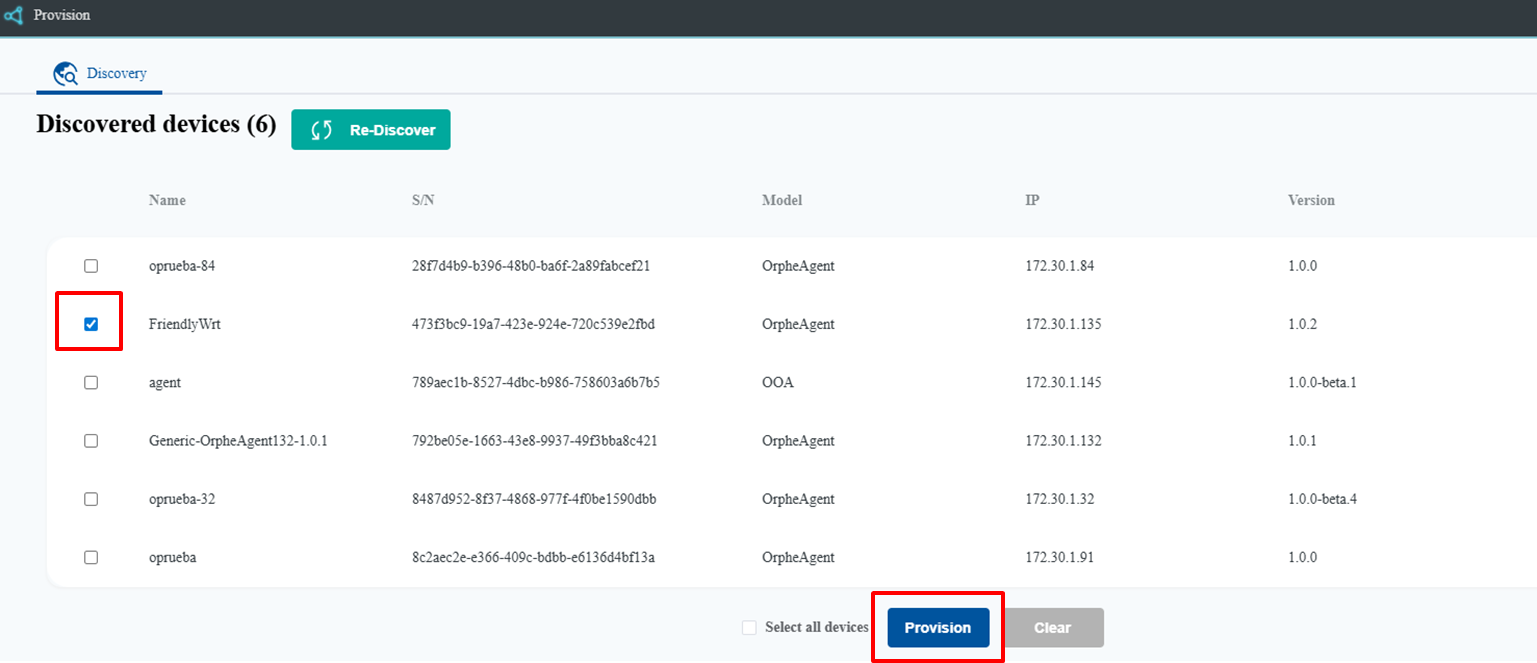
- Click Apply. After provisioning succeeds, the device appears in Inventory.
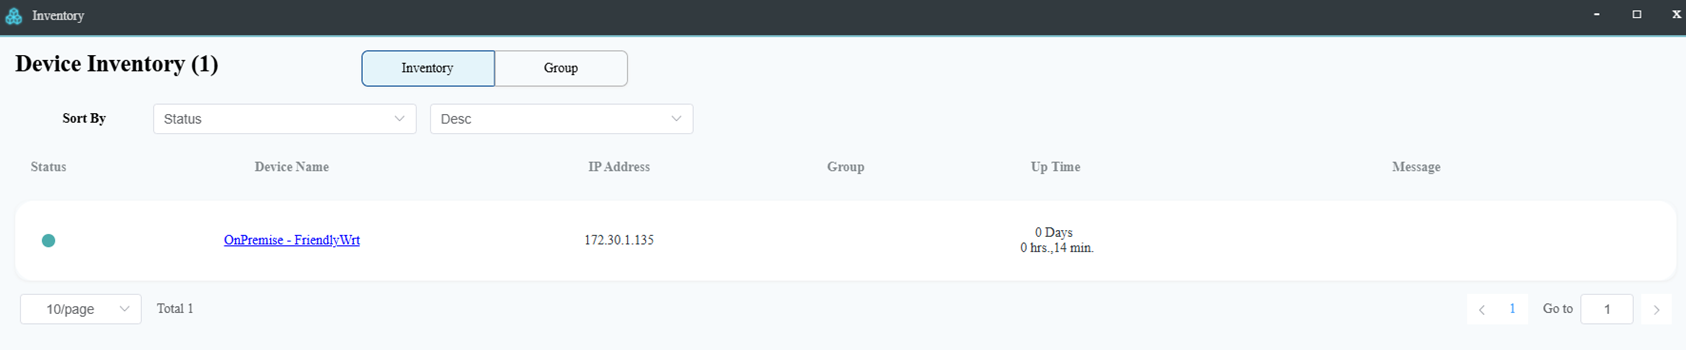
The OrpheConsole device is now registered with OrpheLink and ready for secure remote orchestration.