Setting
Version 1.2
OOS Controller provides two versions: Cloud and On-premise
-
Cloud version with Management user: Account, Company, OOS Logo, Permission, Report mode pages.
-
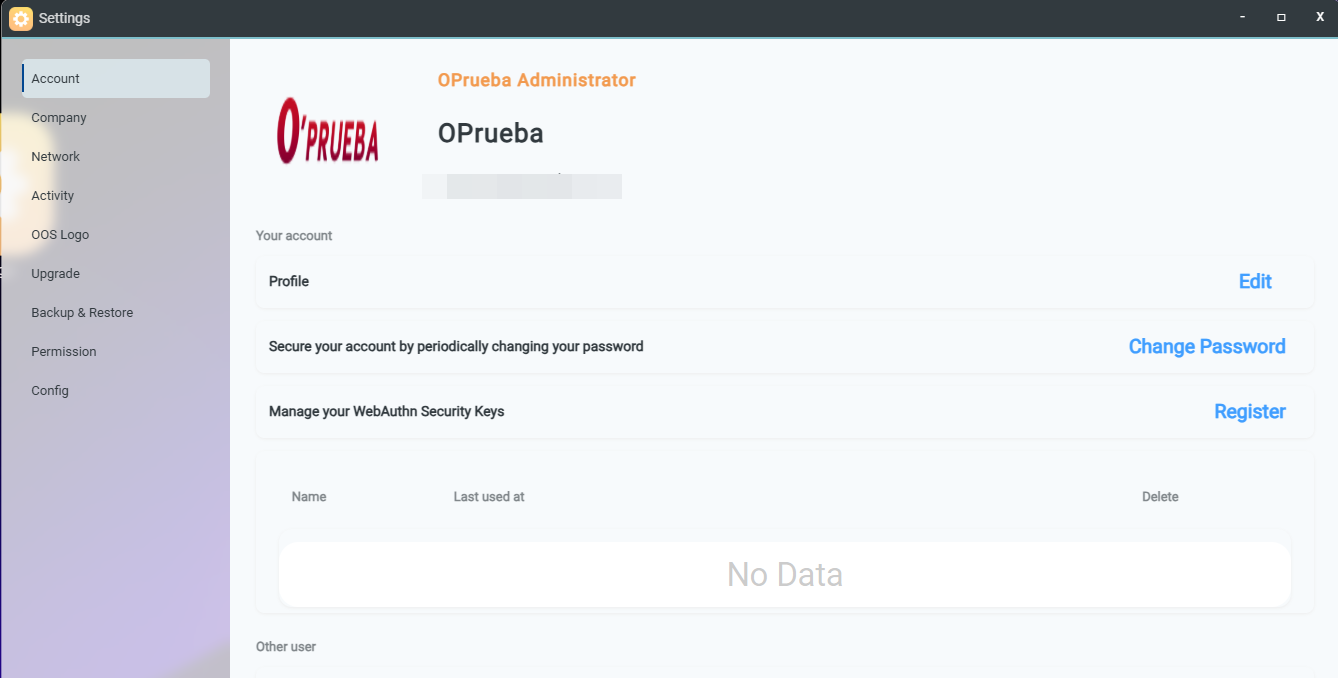
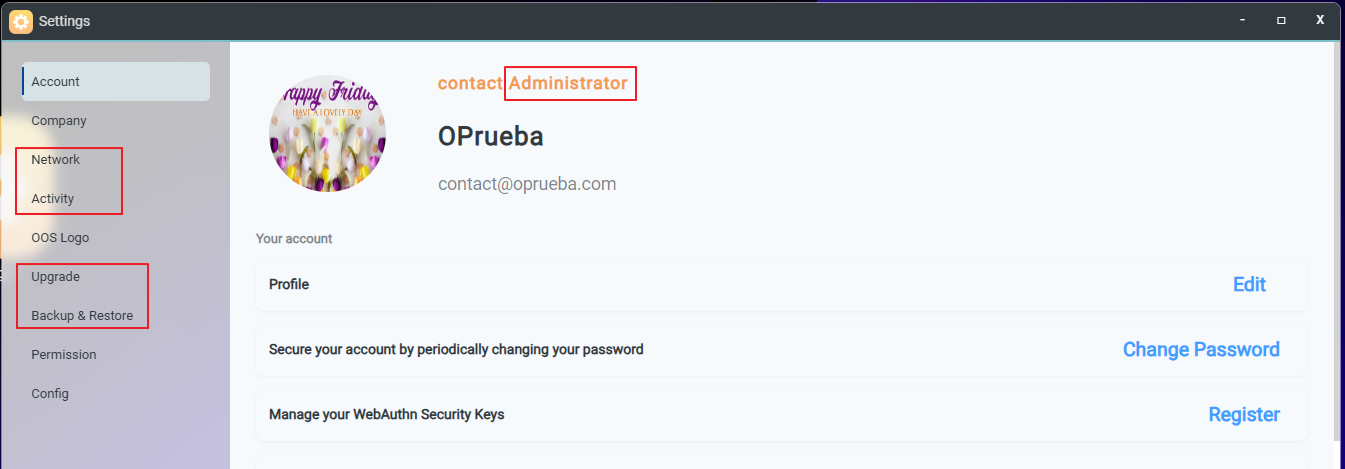
On-premise version with Administrator: Account, Company, Network, Activity, OOS Logo,Upgrade, Backup & Restore, Permission and Report mode pages
Account table of user account type
|
Account APP |
Cloud |
On-premise |
|||
|
Management |
Standard |
Administrator |
Management |
Standard |
|
|
Applications |
P |
self-defined on Permission page. |
P |
P |
self-defined on Permission page. |
|
Auth Connect |
P |
P |
P |
||
|
Backup |
P |
P |
P |
||
|
Clients |
P |
P |
P |
||
|
Diagnose |
P |
P |
P |
||
|
Inventory |
P |
P |
P |
||
|
Mission |
P |
P |
P |
||
|
Notification |
P |
P |
P |
||
|
Provision |
P |
P |
P |
||
|
SD-WAN |
P |
P |
P |
||
|
Dashboard |
P |
P |
P |
||
|
Log |
P |
P |
P |
||
|
Message |
P |
P |
P |
||
|
Statistics |
P |
P |
P |
||
|
schedule |
P |
P |
P |
||
|
ToDo |
P |
P |
P |
||
|
Security |
O |
O |
P |
O |
O |
|
License |
P |
self-defined on Permission page. |
P |
P |
self-defined on Permission page. |
|
Setting |
P |
P |
P |
||
|
Account |
P |
P |
P |
||
|
Company |
P |
P |
P |
||
|
Network |
O |
O |
P |
O |
O |
|
Activity |
O |
O |
P |
O |
O |
|
OOS Logo |
P |
P |
P |
P |
P |
|
Upgrade |
O |
O |
P |
O |
O |
|
Backup & Restore |
O |
O |
P |
P | P |
|
O |
|||||
|
Config-Report mode |
P |
P |
P |
P |
P |
|
Config-SMTP |
P |
O |
P |
O |
O |
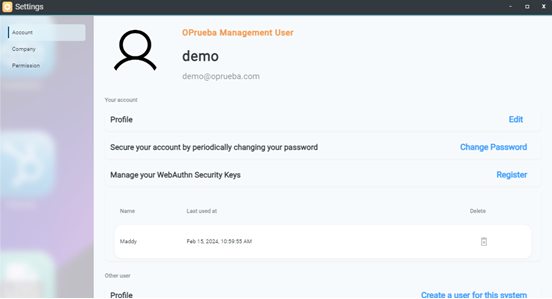
Create a new user (Management user)
-
Step1. Go to Setting> Account page
-
Step2. Click “ Create a user for this system”
-
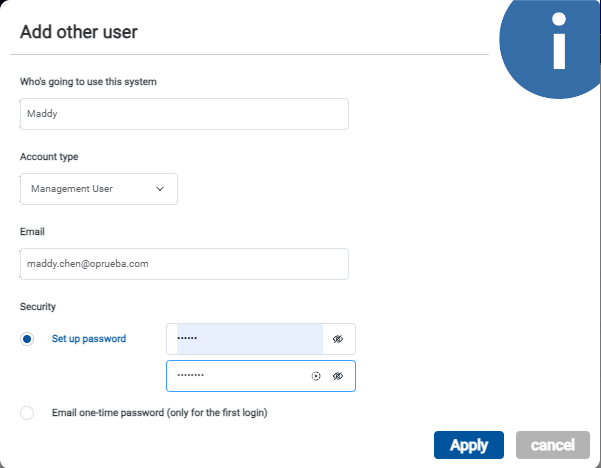
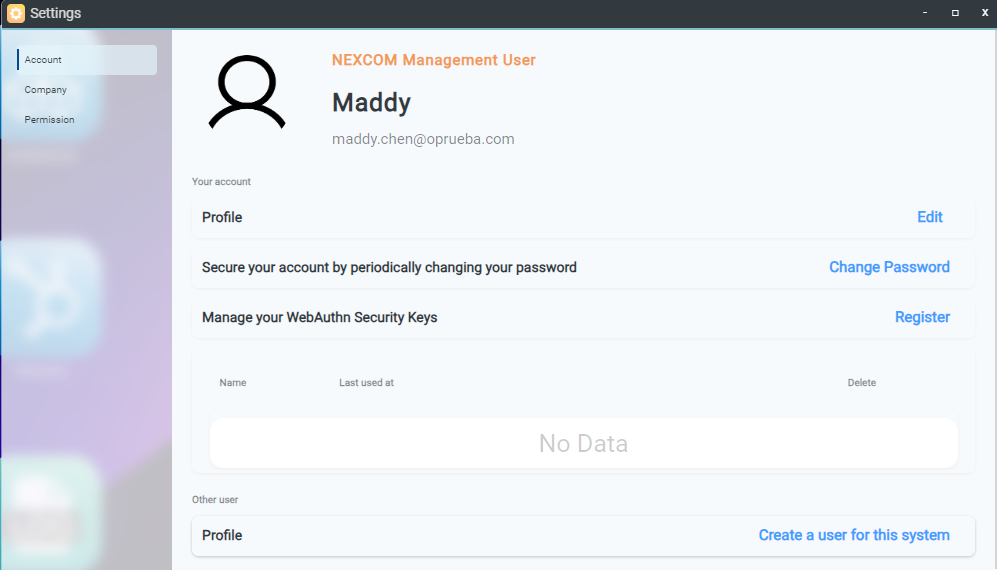
Step3. Type the User name
-
Stpe4. Select the Account Type for Management user
-
Step5. Type the E-mail address
-
Step6. Type the password ot select Email one-time password.
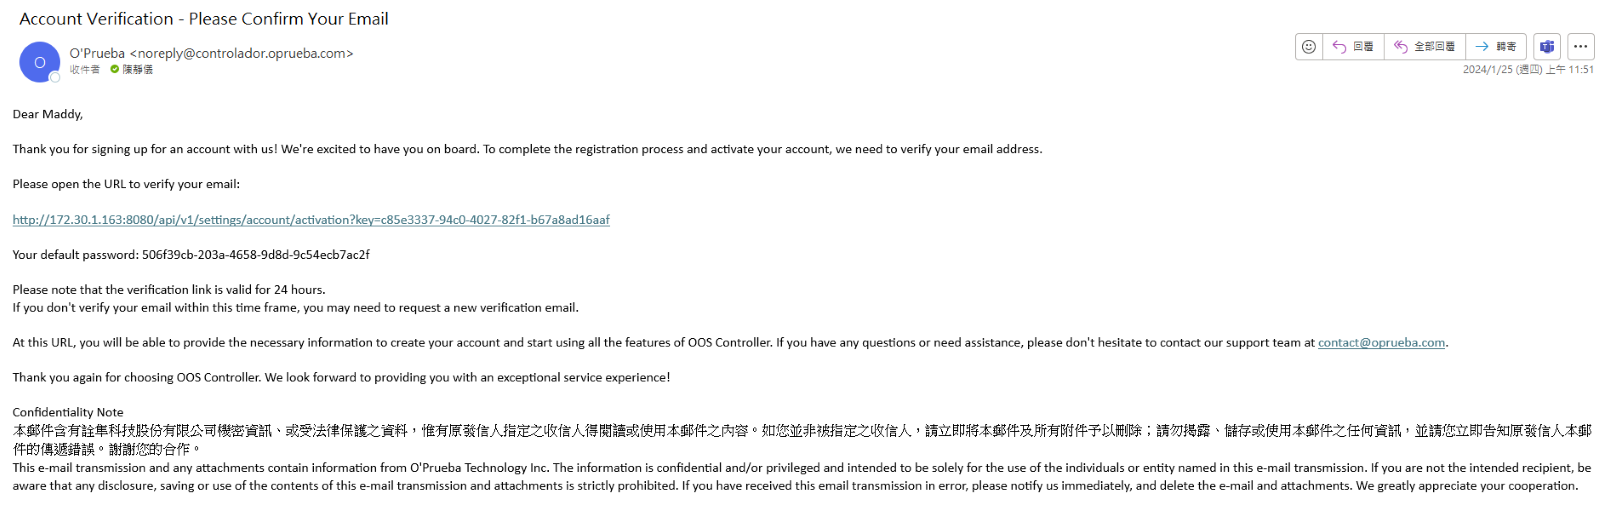
After setting up the account, please log in with your email and password. 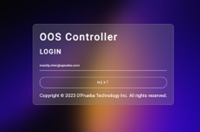
Create a new user (Standard user)
-
Step 1. Go to Setting> Permission page
-
Step 2. Click Add button
-
Step 3. Type name and Select App
-
Step 4. Click”Apply”button

-
Step 5. Go to Setting> Account page
-
Step 6. Click “ Create a user for this system”
-
Step 7. Type the User name
-
Step 8. Select the Account Type for Standard user
-
Step 9. Select Permission file
-
Step 10.Type the E-mail address
-
Step 11.Type the password or select Email one-time password.
-
Step 12. Click”Apply” button
-
Step 13. Login with a new account and view the App through permission settings.
For cloud users, only the Management user account is Provided.
Networking
The OOS controller networking settings allow configuration for both IPv4 , IPv6 and DNS.

Activity
Activities display the internal activities of the OOS controller, including security events, Application operation, setting changes, account operations, backup & Restore, Upgrades, and more.

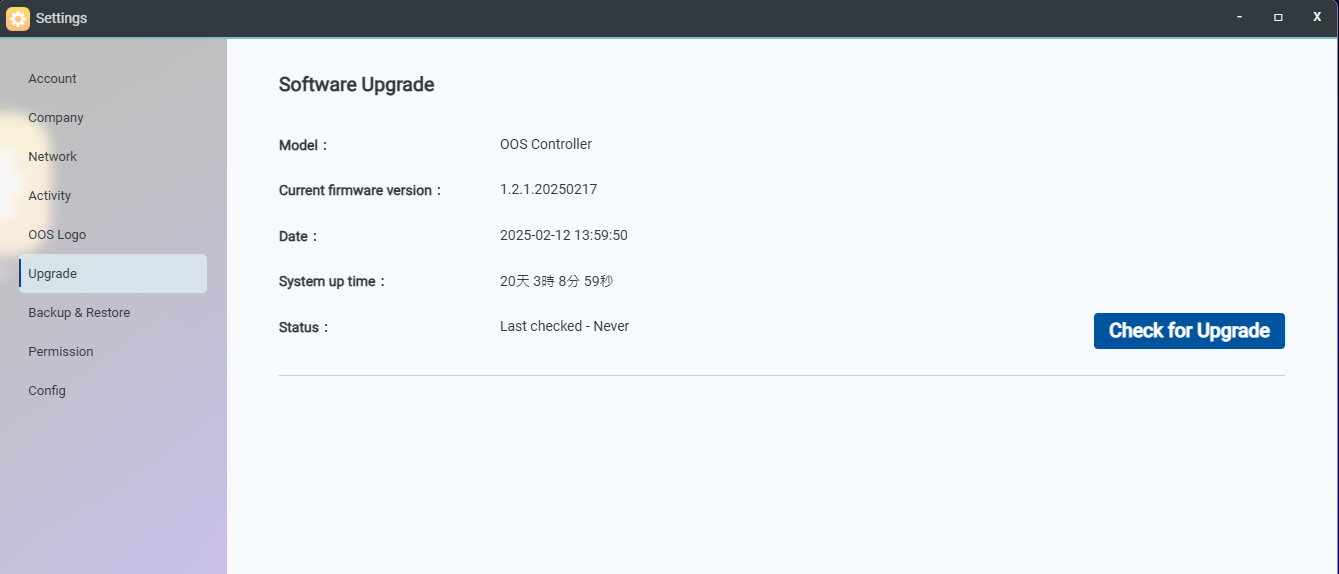
Upgrade
The Upgrade page shows the current firmware version, update timestamp, and system uptime of the OOS Controller. Users can check for updates by using the 'Check for Upgrade' button. If a new version is available, it can be updated directly.
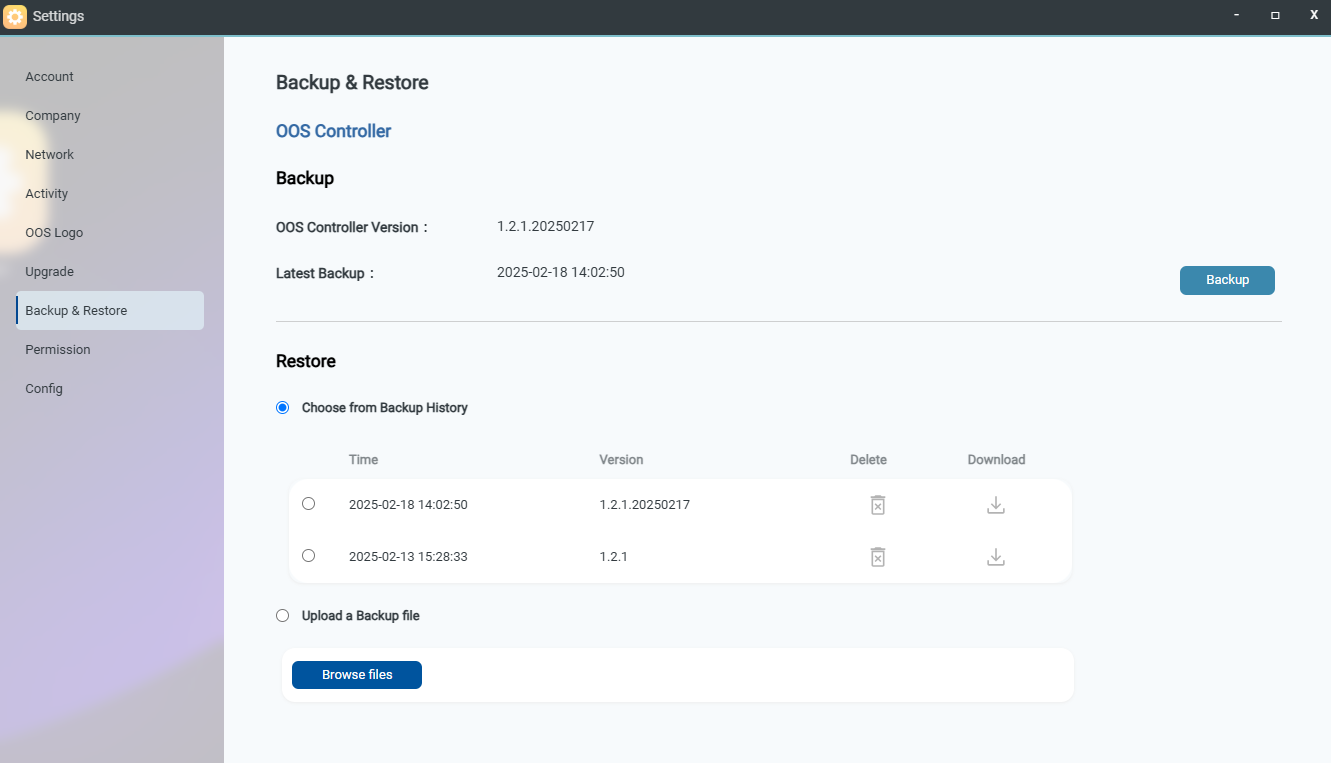
Backup and Restore page allow the user to back up the OOS controller data. Users can click the "Backup Now" button to save backup file, and up to four backup files can be stored. Restore option allows the user to select from existing backup files or upload a backup file for restoration.
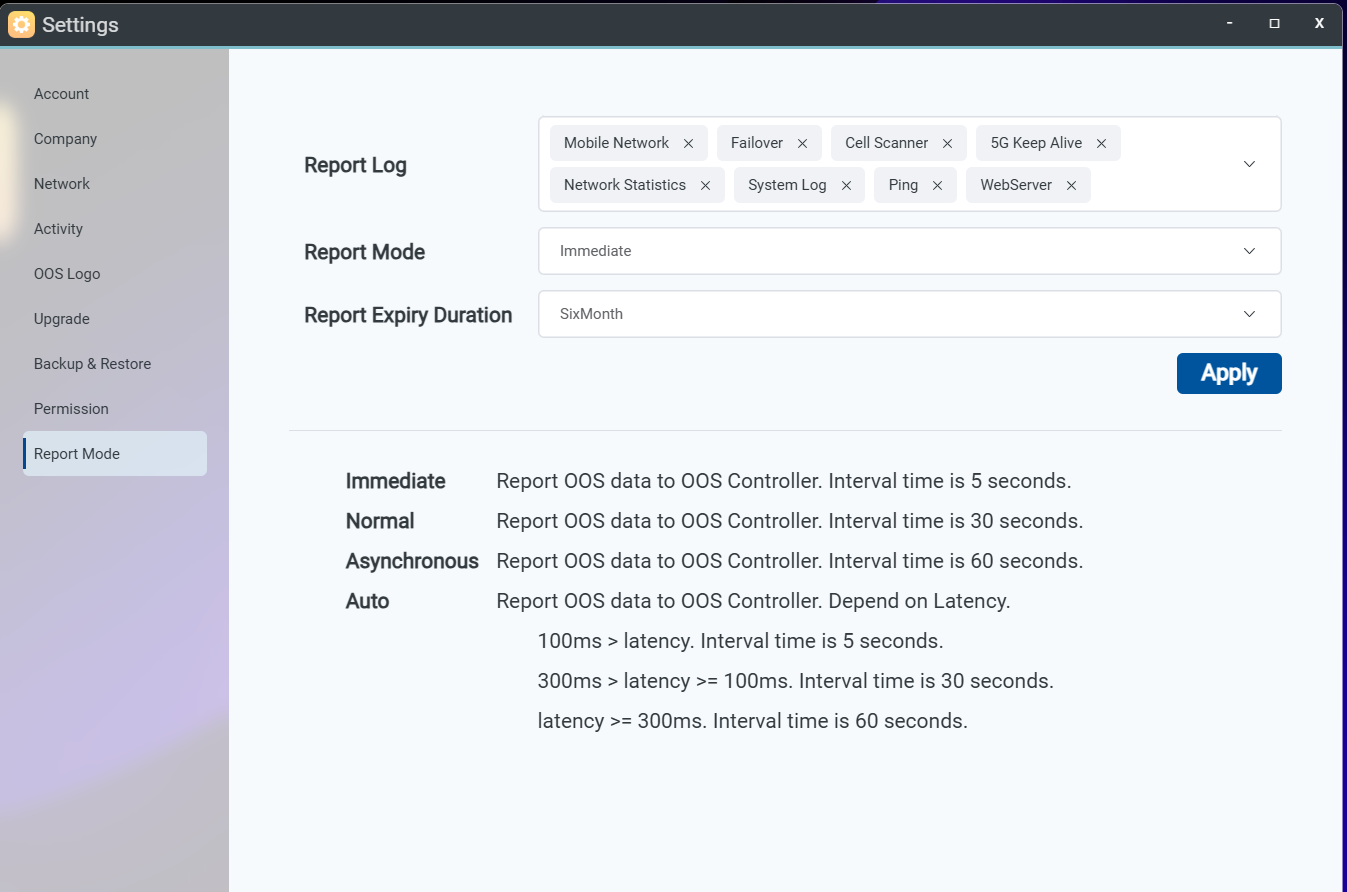
Config
Report Mode
-
Report Log: Allows selecting the type of OOS logs and customizing which logs to transmit to the controller.
-
Log Retention Period: Defines the schedule for log compression. Compressed logs will remain in the system and be retained for up to one year. Logs retained more than one year will be purged automatically.
-
Report Mode: Configures the interval for sending OOS information to the OOS controller:
-
Immediate: Sends data every 5 seconds.
-
Normal: Sends data every 30 seconds.
-
Asynchronous: Sends data every 1 minute
- Auto: Adjusts the transmission interval based on latency.