Mission
Version 1.2
Mission provides “Profile Wizard” to guide users to deploy scale number of OOS devices that have provisioned to the OOS controller and are present in the inventory.

“Profile Wizard” consolidates related pages for settings, encompassing Port Type, VLAN, DHCP Server, APN, Wi-Fi, Multiple WAN, and WAN Binding.
Setup Profile Wizard
In the Profile Wizard settings, click “NEXT” confirms the configuration will change, while selecting “Skip” means that the original settings are not changed.
-
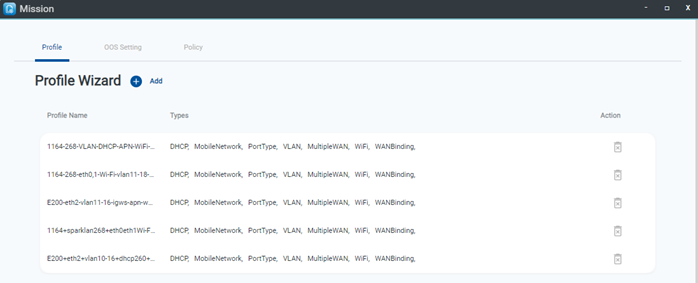
Step1. Go to Mission > Profile page.
-
Step2. Click “Add “ button on Profile Wizard.
-
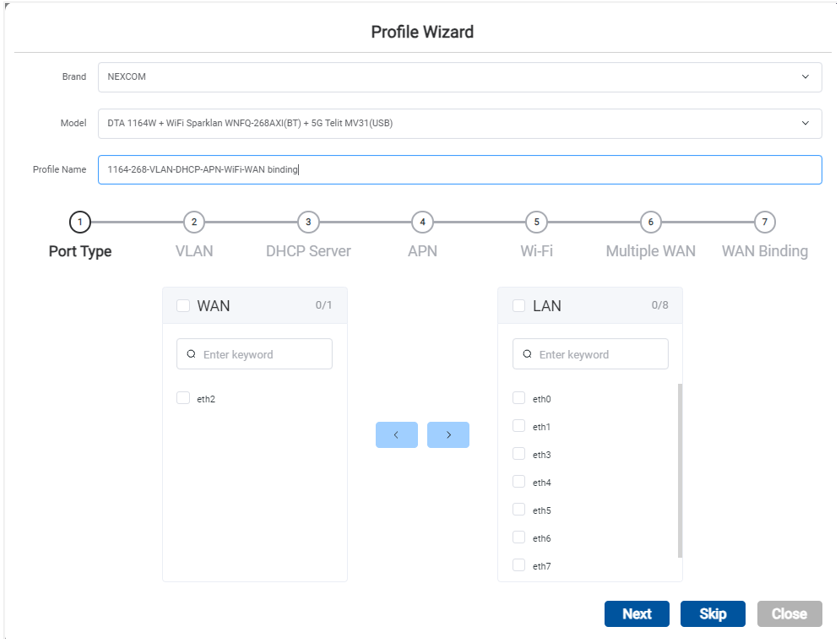
Step3. Select Brand.
-
Step4. Select Model.
-
Step5. Type Profile Name.
-
Step6. Modify Port Type and click “Next” button.
-
Step 7. Type VLAN ID 20 and click “Add” button.
-
Step 8. Select the Interface and click “Edit” button.
- Step 9. Select VLAN ID 20 and click “Apply” button.
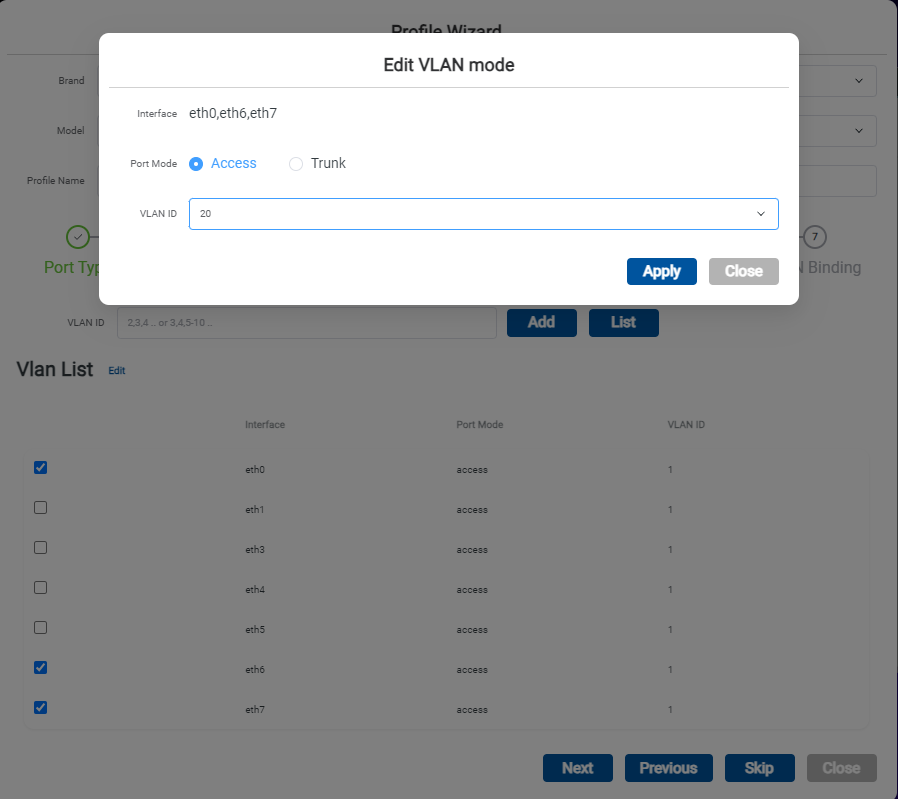

Step 10. Click “Next” button.
-
Step 11. Click Add button to Add DHCP server.
-
Step 12. Type DHCP server setting and click “Apply” button.

-
Step 13. Click” Next” button.
-
Step 14. Type Profile and field name and click “Add APN” icon.
-
Step 15. Type APN name and click “Next” button.

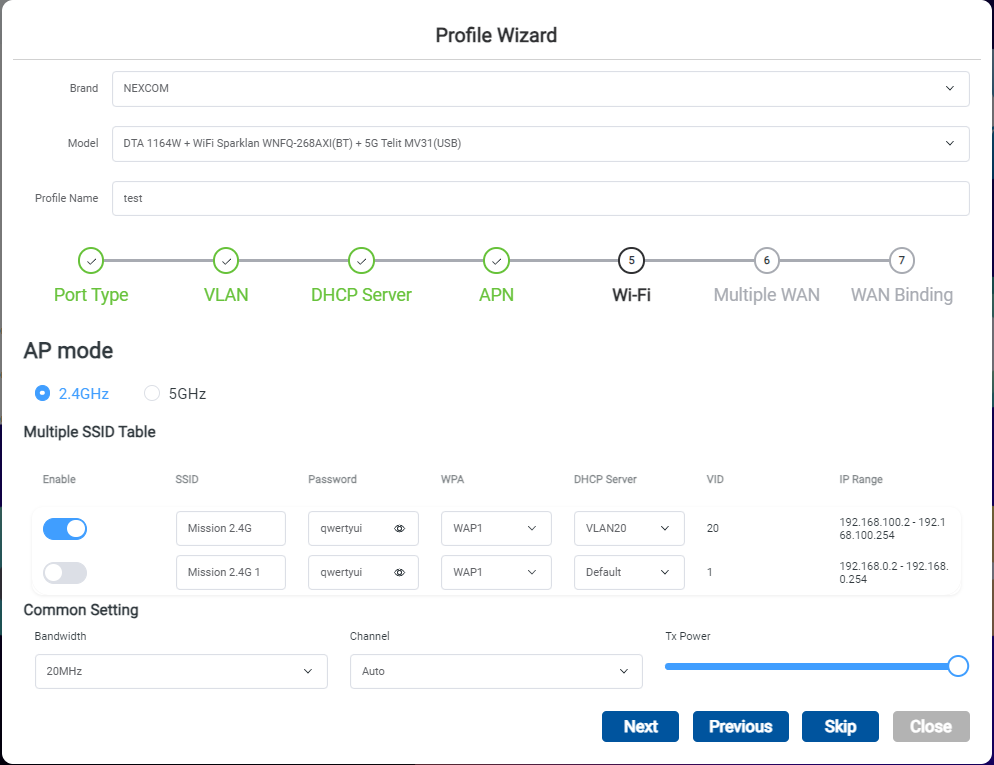
- Step 16. Modify Wi-Fi Setting and click Next button.
-
Step 17. Click “Skip” button.
-
Step 18. Binding “eth2” in WAN binding and click ”Apply” button.
-
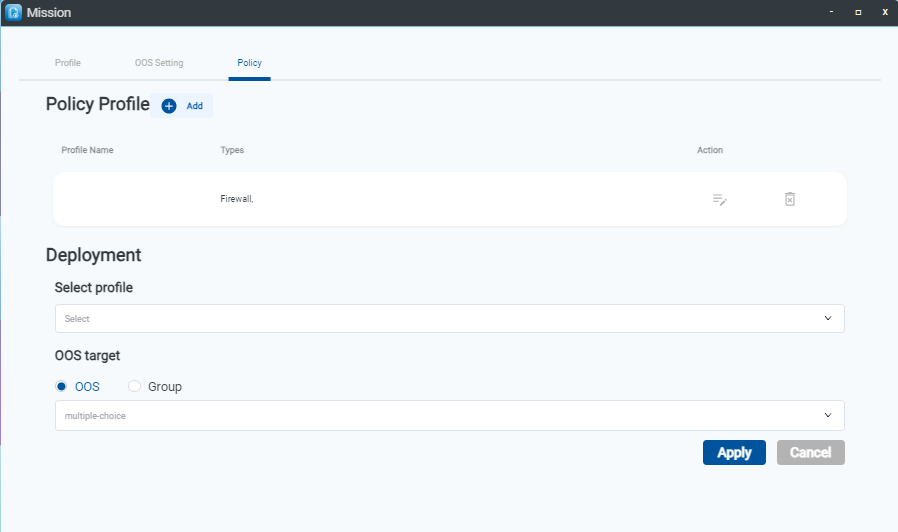
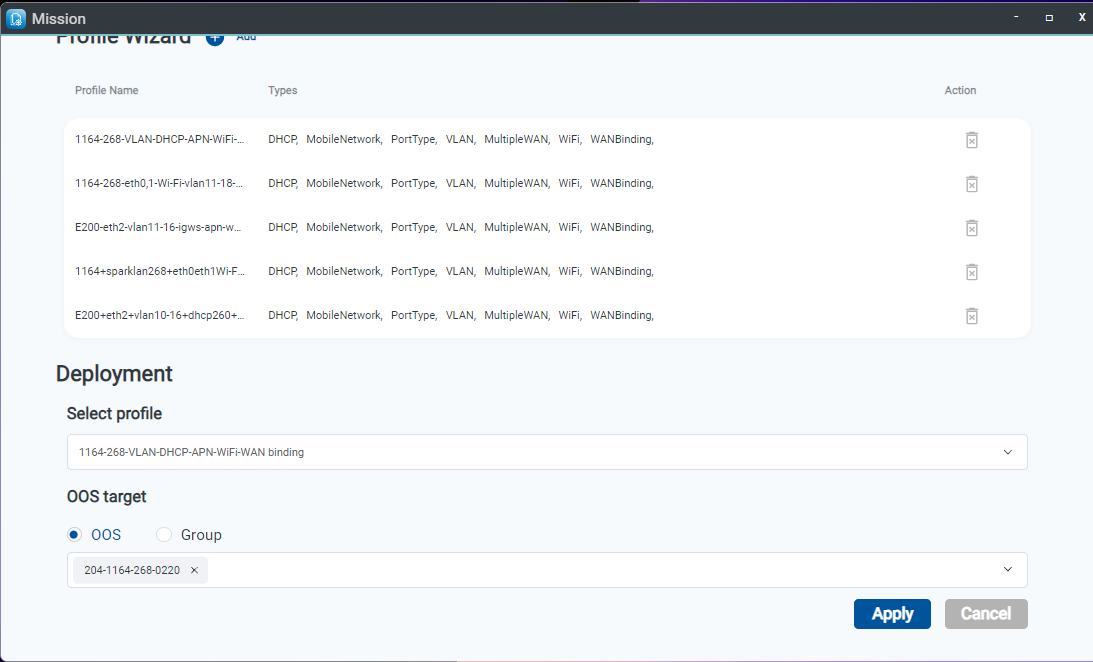
Step 19. Select the Profile in Depolyment field.
-
-
Step 20. Select the OOS target device and click “Apply” button.
Simultaneously modify " OOS Setting" on multiple devices, covering "General settings", "Mobile Network" and "Account" to change the password of the initial provisioning by the OOS controller.
“Policy” to add the Firewall or Black List rules for OOS devices.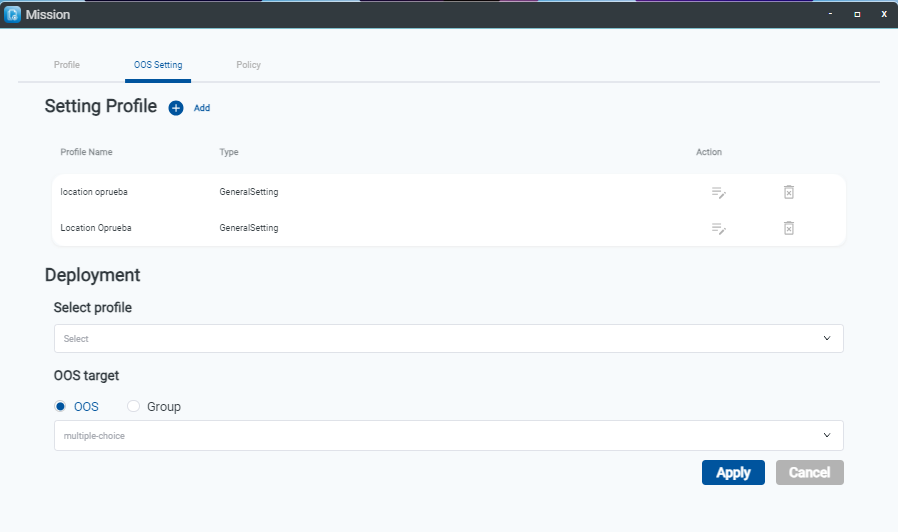
-